How to Create Spice Jar and Pantry Labels in Google Docs
Design and print professional spice jar and pantry labels using Google Docs. Get tips on choosing sizes, designing styles, printing perfectly, and building a complete kitchen labeling system.
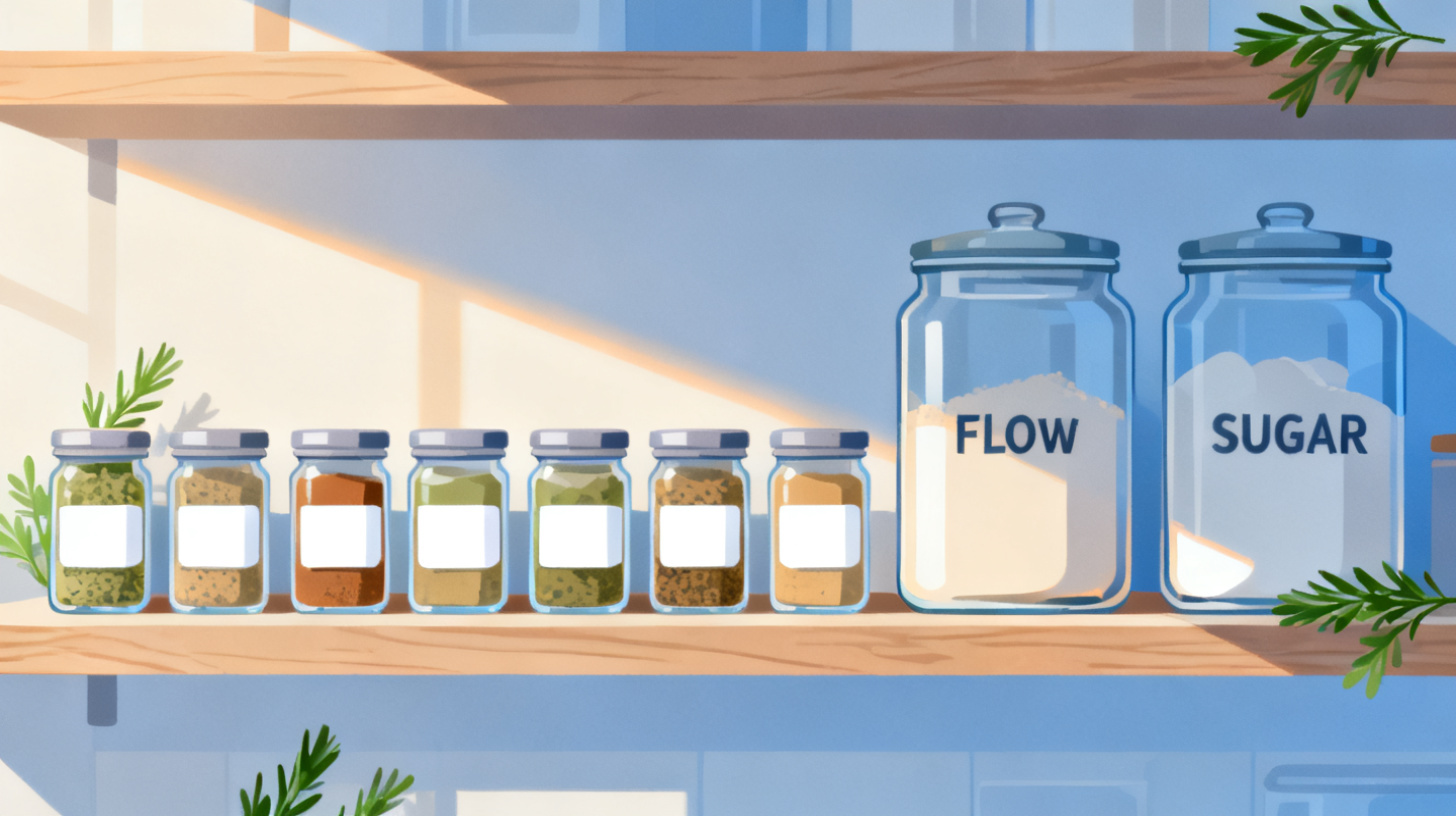
You just reorganized your entire pantry, transferred spices into matching glass jars, and everything looks beautiful. There's just one problem: you can't tell the cumin from the coriander. Without proper labels, that Pinterest-worthy kitchen quickly becomes a guessing game that slows down every meal you cook.
The good news? You don't need a fancy design tool or a $200 label maker to fix this. Google Docs, a free tool you probably already use, is more than capable of producing clean, professional-looking labels for your spice jars, pantry bins, and storage containers. And when you pair it with the right label template, the process goes from frustrating to genuinely fun.
In this guide, you'll learn how to design, customize, and print spice jar labels and pantry organization labels using Google Docs. Whether you want minimalist black-and-white text or colorful illustrated designs, you'll walk away with a clear process you can repeat anytime you add new items to your kitchen. If you want to skip straight to finding a label template that fits your jars, browse the FoxyLabels Template Catalog for sizes compatible with popular label sheets and containers.
Choosing the Right Label Size and Template for Your Containers
Before you open Google Docs and start typing "Oregano" in a fancy font, you need to answer one practical question: what size label actually fits your jars and containers? This step might seem obvious, but it's where most DIY labeling projects go sideways. People design gorgeous labels, print them out, and then realize they're too big for their spice jars or too small to read on a pantry bin.
Measuring Your Containers
Grab a ruler or measuring tape and check the flat surface area on the front of your container. For standard spice jars (the kind you find at most kitchen stores), the label area is usually somewhere between 1.5 inches wide and 2 inches tall. Round spice jar lids typically measure around 1.5 to 2 inches in diameter. Larger pantry containers for flour, sugar, rice, and pasta can accommodate labels ranging from 2x3 inches up to 4x6 inches, depending on the container.
Write down the measurements for each type of container you plan to label. Most people find they need two or three different label sizes: one small size for spice jars, one medium size for canisters, and possibly a larger size for bins or baskets on shelves.
Matching Measurements to Label Sheets
Once you know your dimensions, you need label sheets (the adhesive-backed paper you'll run through your printer) that match. Common label sheet sizes for kitchen organization include:
Label Use | Common Sizes | Labels Per Sheet |
Spice jar wraps | 1.5" x 1.5" or 2" x 2" | 20-30 |
Spice jar lids (round) | 1.5" or 2" diameter circles | 20-24 |
Pantry canisters | 2" x 3" or 2.5" x 3" | 10-14 |
Pantry bins/baskets | 3" x 5" or 4" x 6" | 4-6 |
Popular label sheet brands like Avery, Online Labels, and SheetLabels all offer these sizes. The key is finding a Google Docs template that matches your specific sheet layout so every label prints in exactly the right spot.
This is where most people hit a wall. Setting up a document manually with the correct margins, cell sizes, and spacing is tedious and error-prone. Instead, use a pre-built template that already matches your label sheet's specifications. The FoxyLabels Template Catalog has templates organized by size and brand compatibility, so you can search for your exact label sheet number and get a template that's ready for customization.
Why Templates Save Hours of Frustration
A properly formatted template handles all the fiddly layout work for you: page margins, cell dimensions, gutters between labels, and print alignment. Without one, you'd need to manually create a table in Google Docs, adjust every column width and row height to the millimeter, remove cell padding, and then run multiple test prints on plain paper to verify alignment. People who go the manual route often waste five or six sheets of expensive label paper before getting it right.
With a template, you open it, type your text, and print. That's the entire workflow. If you're working with round labels for spice jar lids, check out this guide on how to print round circle labels in Google Docs easily for tips specific to circular formats.
Designing Your Spice and Pantry Labels in Google Docs
Now that you have a template matched to your label sheets, it's time for the creative part. Google Docs gives you more design flexibility than you might expect, and you can create labels that range from simple and elegant to bold and colorful.
Step 1: Open Your Template and Set Up the Document
Open your label template in Google Docs. You'll see a table structure where each cell represents one label. Before you start designing, go to File > Page Setup and confirm the page size matches your label sheet (usually US Letter, 8.5" x 11"). Check that the margins match what the template specifies. Most label templates require specific margin settings, sometimes as narrow as 0.1 inches.
If you're using a FoxyLabels template, these settings are already configured. Just make sure you don't accidentally change them while editing.
Step 2: Choose Your Design Style
Before typing anything, decide on a consistent style. Here are three popular approaches that work well for kitchen labels:
Minimalist text-only labels. Use a clean sans-serif font like Montserrat or Raleway in all caps. Set the font size between 8pt and 12pt depending on label dimensions. Center the text both horizontally and vertically within each cell. This style works beautifully on white or kraft-colored label paper and gives your pantry a modern, uniform look.
Script and serif combination labels. Pair a decorative script font (like Pacifico or Great Vibes) for the spice name with a smaller serif font underneath for additional details like "Ground" or "Whole." This creates a farmhouse or artisanal feel. Keep the script font readable by not going below 10pt.
Color-coded category labels. Use cell background colors or colored text to distinguish categories. For example, baking spices in warm orange, herbs in green, chili and heat-related spices in red, and pantry staples in neutral gray. You can set background colors by right-clicking a cell, selecting "Table properties," and changing the cell background color.
Step 3: Add and Format Your Text
Click into the first label cell and type your spice or pantry item name. Format it according to your chosen style. Here's a practical formatting checklist:
Font selected and consistent across all labels
Font size readable but fits within the label boundaries
Text aligned (center alignment works best for most label sizes)
Vertical alignment set to middle (Table properties > Cell > Vertical alignment)
Consistent capitalization (all caps, title case, or lowercase)
Any secondary text (like "organic" or "ground") is smaller and distinguishable
Once your first label looks right, copy the formatting to all other cells. You can use Format > Paint format (the paint roller icon) to quickly apply the same styling across labels.
Step 4: Add Optional Visual Elements
Google Docs lets you insert images into table cells, which means you can add small icons or illustrations to your labels. Search for free-use spice illustrations or simple botanical line drawings. Insert them using Insert > Image > Search the web and resize them to fit within your label cell alongside the text.
Keep images small, roughly 0.5 inches square for spice jar labels, so they don't crowd out the text. Position them to the left of the spice name or centered above it for a polished look.
Pro tip: If you plan to label dozens of spice jars, design one "master" label first. Get every detail perfect in that single cell, then copy and paste it into all other cells before changing the text. This ensures visual consistency across your entire set.
If you want more guidance on the full printing workflow, including troubleshooting alignment issues, the FoxyLabels Tutorials page walks you through each step with screenshots.
Printing Your Labels Perfectly Every Time
Designing labels is satisfying, but the real test comes when you hit "Print." Nothing deflates your motivation faster than labels that print misaligned, blurry, or with cut-off text. Here's how to get crisp, perfectly aligned prints on your first try.
Step 1: Run a Test Print on Plain Paper
Always, always do a test print on regular copy paper before using your label sheets. Print your document, then hold the printed page up against a blank label sheet with a light behind them. Check whether the text and designs fall within the label boundaries. If anything is off, you'll adjust margins in your template rather than wasting label paper.
Common issues at this stage include:
Text too close to the edge of a label. Add a small amount of cell padding (2-3pt) in the table properties.
Labels shifted slightly left or right. Adjust the left margin by 0.05 to 0.1 inches.
Labels shifted up or down. Adjust the top margin similarly.
Step 2: Configure Print Settings
When you're ready to print on actual label sheets, go to File > Print in Google Docs. In the print dialog, configure these settings:
Set paper size to Letter (8.5 x 11)
Set margins to None or Custom (matching your template's specifications)
Set scaling to 100% or Actual Size (never "Fit to Page," which will distort your layout)
Select the highest quality print option your printer offers
That third point is critical. "Fit to Page" scaling is the number one reason labels print incorrectly. It shrinks or stretches your document to fit the printable area, which throws off every measurement in your template. Always print at actual size.
Step 3: Load and Print Your Label Sheets
Load your label sheets into your printer tray with the adhesive side facing the correct direction (check your printer's manual, but for most inkjet printers, labels go face-down in the tray). Print one sheet first and verify alignment before printing a full batch.
For the best print quality on glossy or waterproof label sheets, switch your printer to "photo paper" or "high quality" mode. This uses more ink but produces sharper text and more vibrant colors, which matters when your labels will be handled frequently in the kitchen.
Choosing the Right Label Paper
Not all label paper is created equal, and this matters a lot in a kitchen environment where labels encounter moisture, oil, and heat.
Paper Type | Best For | Durability | Cost |
Matte white | General pantry bins | Medium | Low |
Glossy white | Spice jars, display containers | High | Medium |
Kraft brown | Farmhouse/rustic aesthetic | Medium | Medium |
Waterproof vinyl | Near-sink items, freezer labels | Very High | High |
Clear/transparent | Glass jars (seamless look) | High | High |
For spice jars that sit near the stove, waterproof or glossy labels resist smudging from oily hands. For dry pantry shelves, standard matte labels work perfectly well and cost less.
If you're also labeling homemade food products for sale or gifting, keep in mind that the FDA's food labeling guidelines outline specific requirements for ingredient lists and allergen information on packaged foods.
Organizing Your Kitchen with a Complete Labeling System
Printing a batch of spice labels is a great start, but the real transformation happens when you think about labeling as a system for your entire kitchen. A consistent labeling approach makes cooking faster, grocery shopping easier, and keeps everyone in the household on the same page about where things go.
Build Your Master Spice and Pantry List
Before printing labels, create a master list of everything you want to label. Open a Google Sheet and make columns for the item name, category, container size, and label size needed. This serves two purposes: it ensures you don't forget anything, and it gives you a document you can reference later when you add new items.
A typical kitchen labeling project might include:
Spice rack: 25-40 individual spice jars (salt, pepper, cumin, paprika, oregano, thyme, cinnamon, nutmeg, turmeric, and so on)
Baking supplies: 8-12 canisters (flour, sugar, brown sugar, baking soda, baking powder, cornstarch, powdered sugar, cocoa powder)
Dry goods: 6-10 containers (rice, pasta, oats, quinoa, lentils, beans, cereal)
Snack bins: 4-6 baskets (crackers, chips, granola bars, dried fruit, nuts, trail mix)
Fridge and freezer: 5-10 containers (leftovers rotation labels, freezer meal labels with date fields)
Once your list is complete, group items by label size. You can print all 2-inch spice jar labels in one batch, all 3x5 pantry labels in another, and so on. This minimizes label sheet waste and speeds up the printing process.
Maintaining Your Labels Over Time
Kitchens change. You discover a new spice you love, you switch from one type of rice to another, or you reorganize a shelf. The beauty of using Google Docs for your labels is that your template file lives in Google Drive forever. When you need new labels, open the same document, change the text in a few cells, and print just the sheet you need.
Save your template files with clear names like "Spice Jar Labels - 2 inch round" and "Pantry Bin Labels - 3x5" so you can find them quickly months later. If you have a lot of labels to manage, consider using Google Sheets with the FoxyLabels add-on to pull item names from a spreadsheet directly into your label template, which is especially handy when you're printing 40+ spice labels at once.
You can explore the full range of features and find step-by-step help on the FoxyLabels Tutorials page to streamline large labeling projects.
Making It a Household Habit
The most organized kitchens aren't the ones that had one big labeling weekend. They're the ones where labeling is a quick, easy habit. Keep a few blank label sheets in a drawer near your printer. When you buy a new spice or reorganize a shelf, printing a fresh label takes less than two minutes when your template is already set up.
Teach other household members how to find and edit the template files so the system doesn't depend on one person. The whole point of labels is making your kitchen intuitive for everyone, not just the person who set it up.
A well-labeled kitchen is one of those small upgrades that makes daily life noticeably smoother. You grab what you need without second-guessing, you put things back where they belong, and you always know when you're running low on something. Google Docs makes the design process accessible to anyone, and the right template makes it fast.
Ready to get started? Head over to the FoxyLabels Template Catalog to find a label template that matches your jars and containers, and check out FoxyLabels Pricing Plans if you want access to the full library of premium designs and features. Your spice rack is about to look incredible.
Install Foxy Labels
Get started with Foxy Labels and create perfectly aligned labels in minutes.
Get Started