This guide describes how to print a mailing list from Google Sheets using Foxy Labels.
Eager to learn more? When you’re done, check out our other guides for more on making professional-looking, creative labels:
1. Prepare a Google Sheet
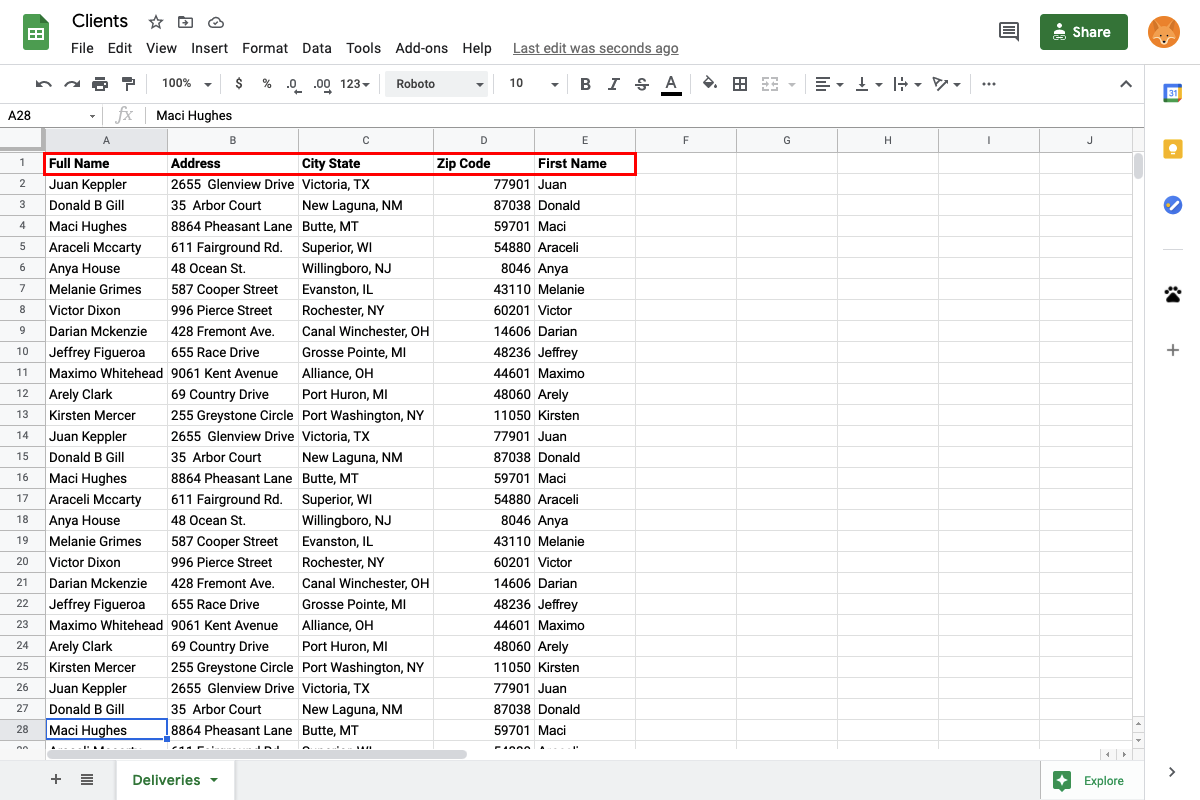
Open a sheet with mailing data or create a new one. Make sure that the first row contains headers like “Full Name,” “Address,” “City State,” “Zip Code,” etc.
2. Open the Foxy Labels Add-on
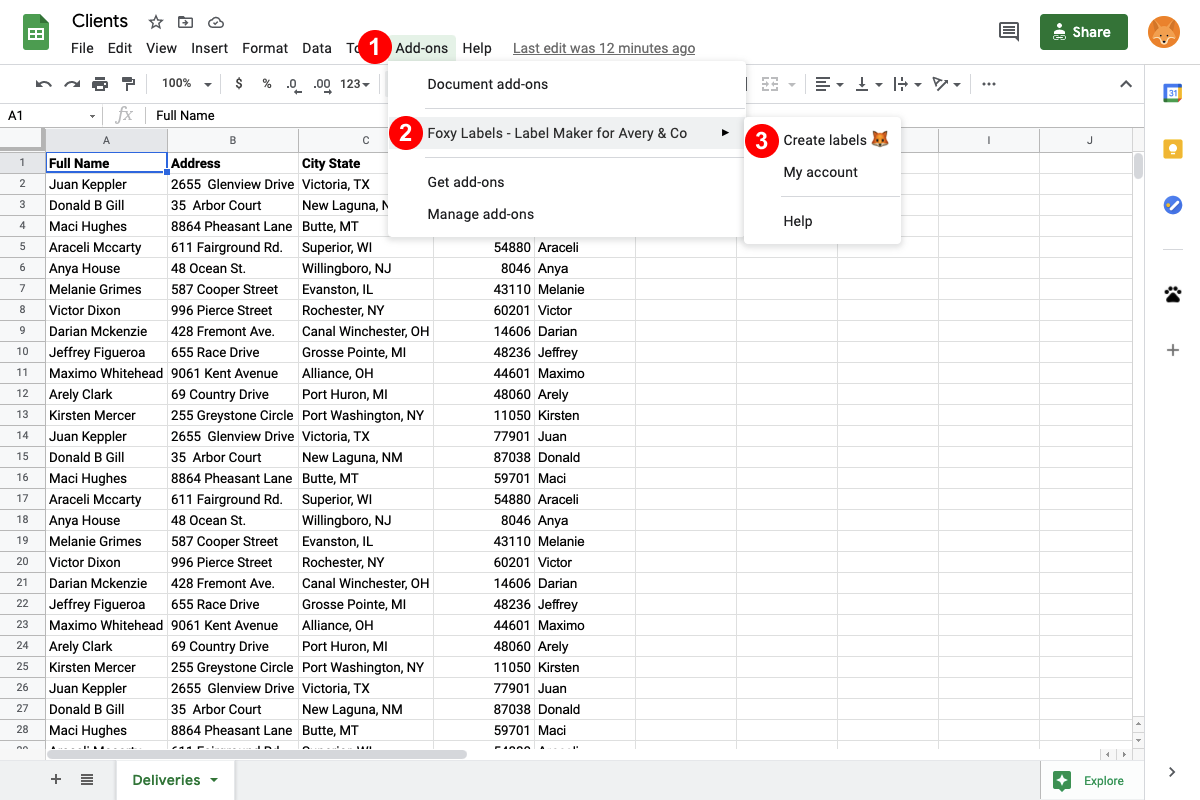
Click “Extensions” (previously named “Add-ons”) (1), then “Foxy Labels” (2), and then “Create labels” (3) to open the Foxy Labels add-on. If you don’t see the add-on in the list, install the add-on first.
3. Select a Template
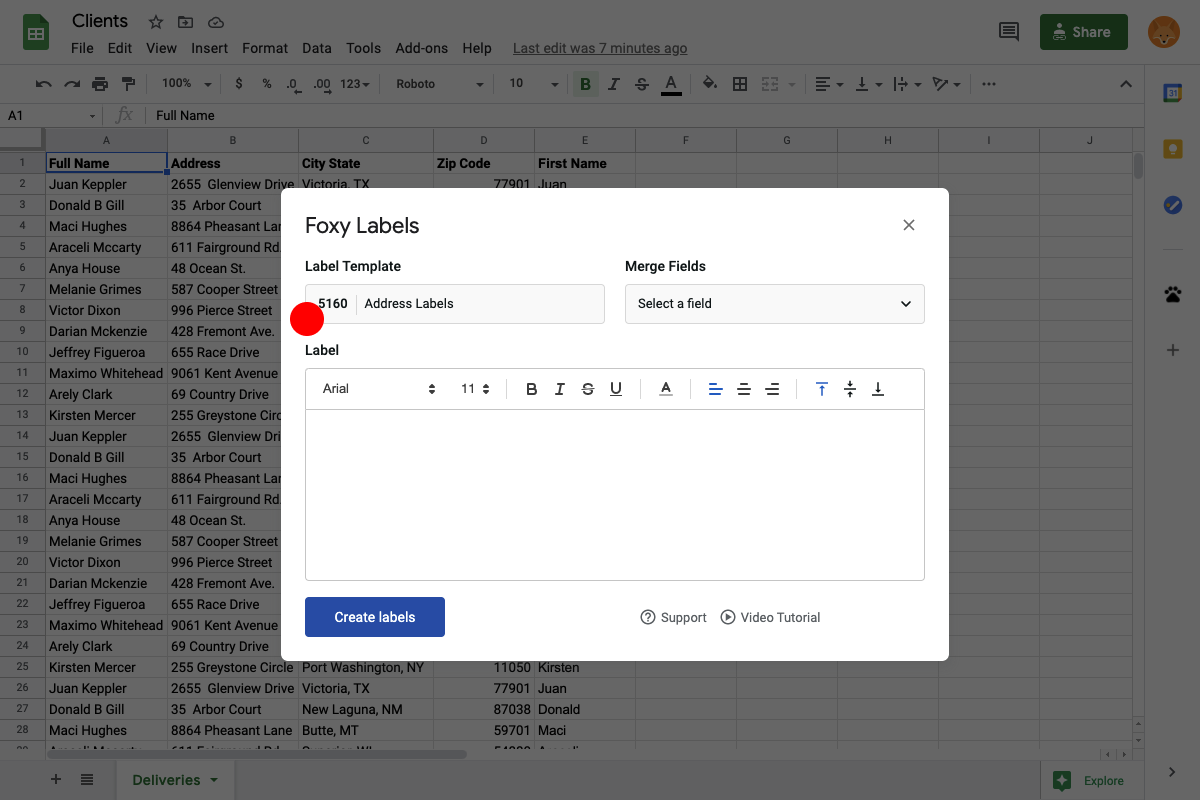
In the Foxy Labels window, click the “Label Template” button, which will open a dialog window with the templates catalog.
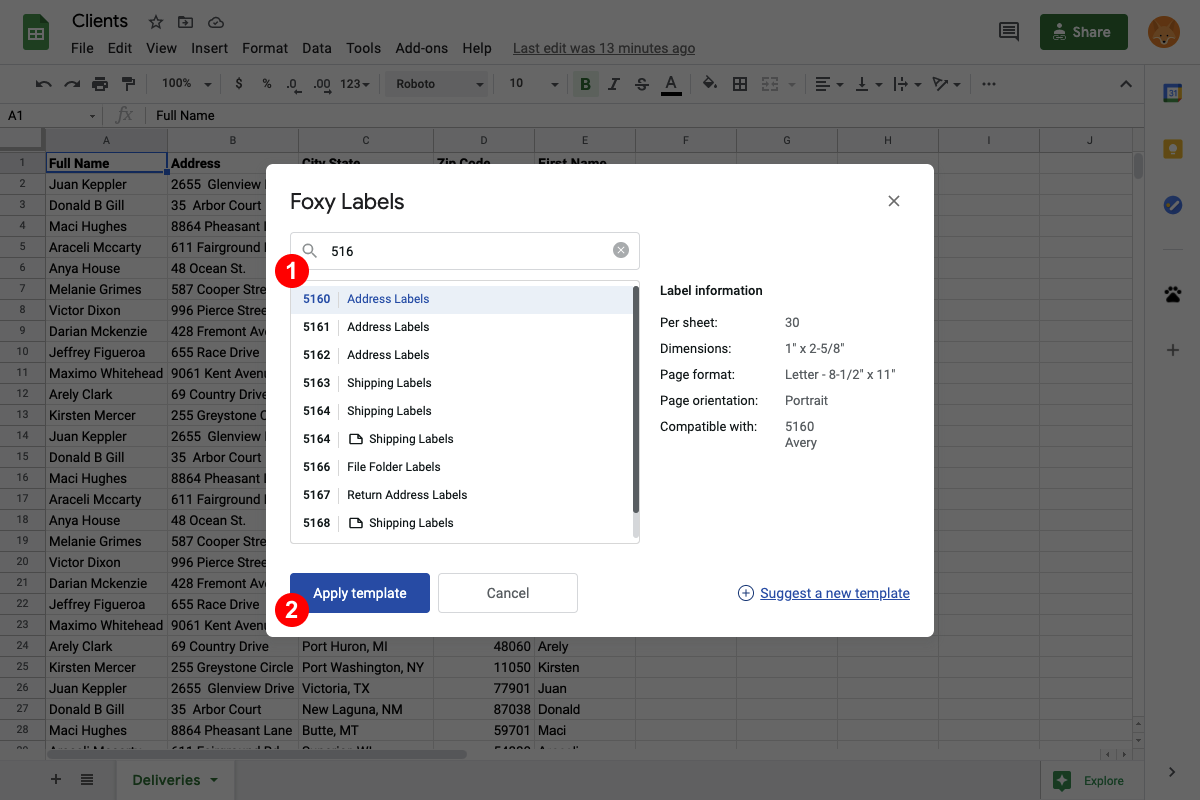
Use search (1) to locate the desired template. We support templates compatible with Avery, OnlineLabels, and other providers. After you select the template, the label information is displayed on the right. Click “Apply template” (2).
4. Add Merge Fields and Format the Label
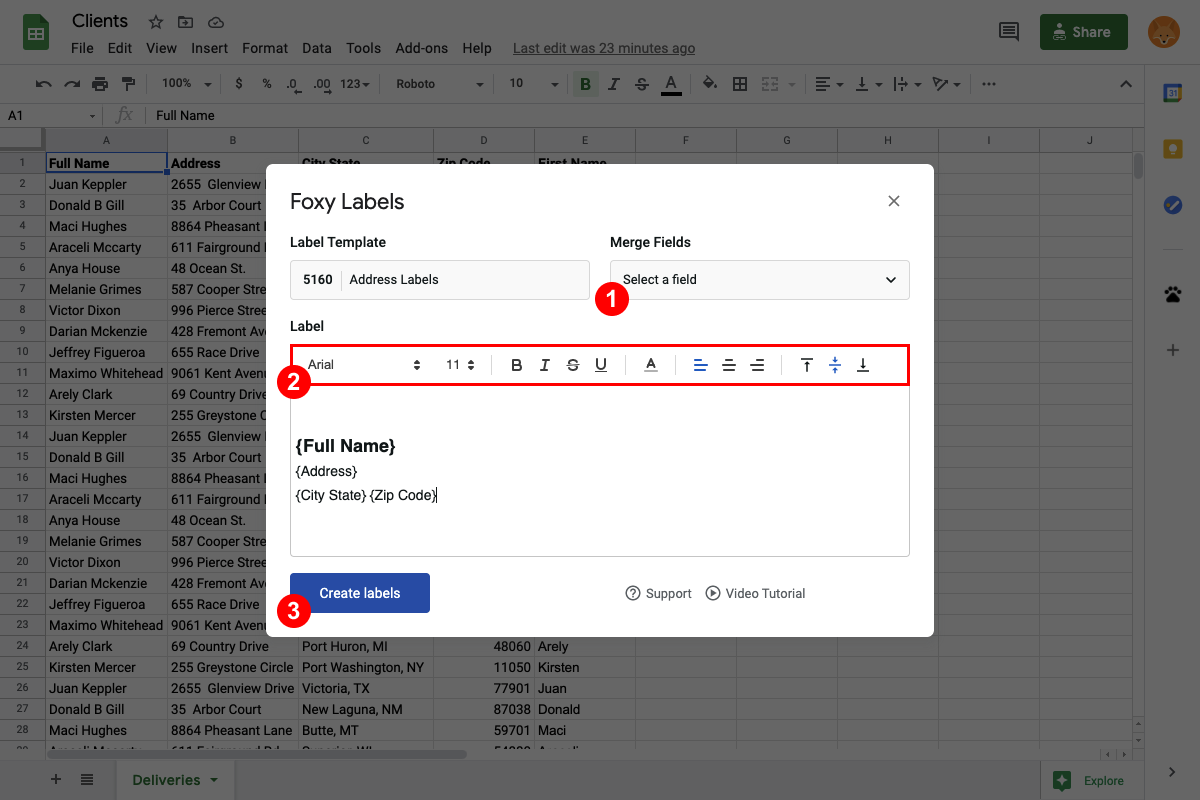
Using the “Merge Fields” button (1), add the desired merge fields to the label content. You can also adjust the label design and format using the controls on the top of the label area (2). After you are done, click “Create labels” (3).
5. Open the Generated Document
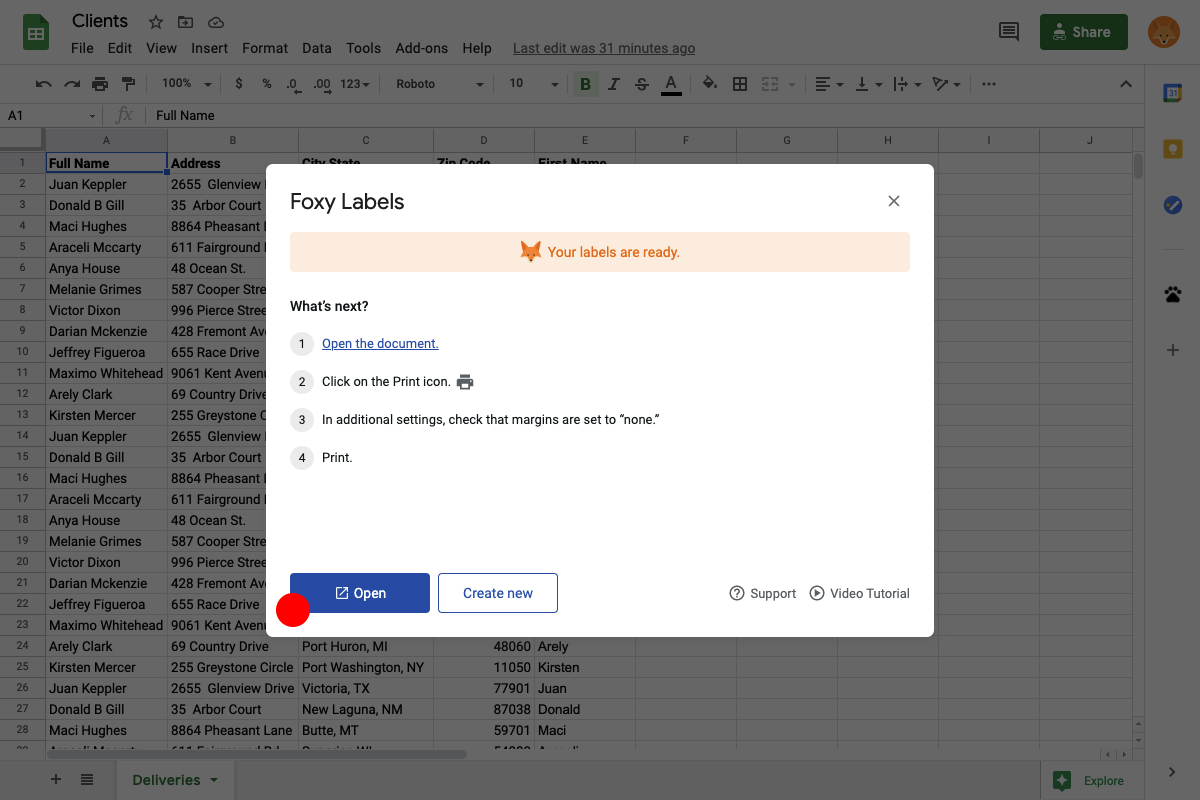
Wait until the generation is complete, and then click “Open” to open the final document.
6. Print Labels
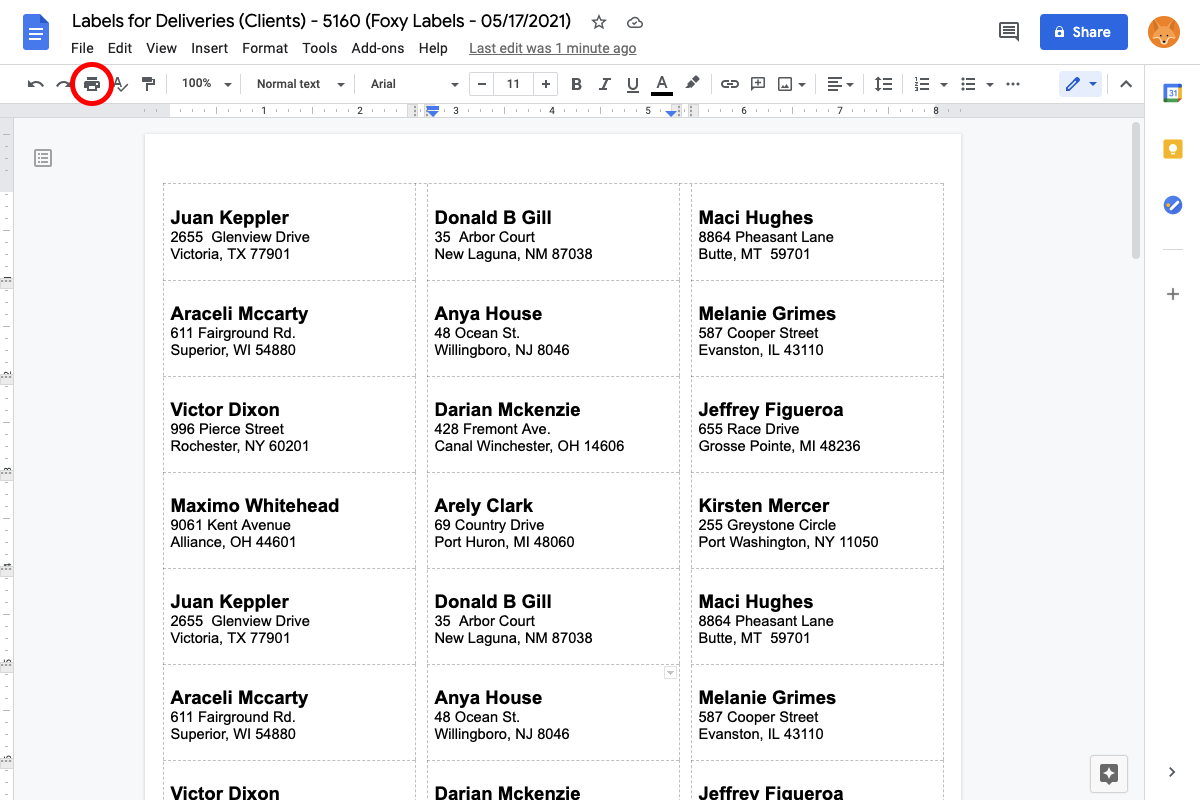
Before printing the document, put the appropriate label paper in the printer. To print the document, click “Print.” In the new dialog window, make sure that the margins are set to “none.”
How to print Avery labels in Google Sheets: Final thoughts
This post explains in detail how to print labels from a Google Sheet. Printing normally takes approximately 5 minutes.