How to Print DIY Wedding Favor Labels from Google Sheets
Turn your Google Sheets guest list into beautiful, personalized wedding favor labels. Step-by-step guide to choosing templates, formatting data, and printing professional DIY labels.
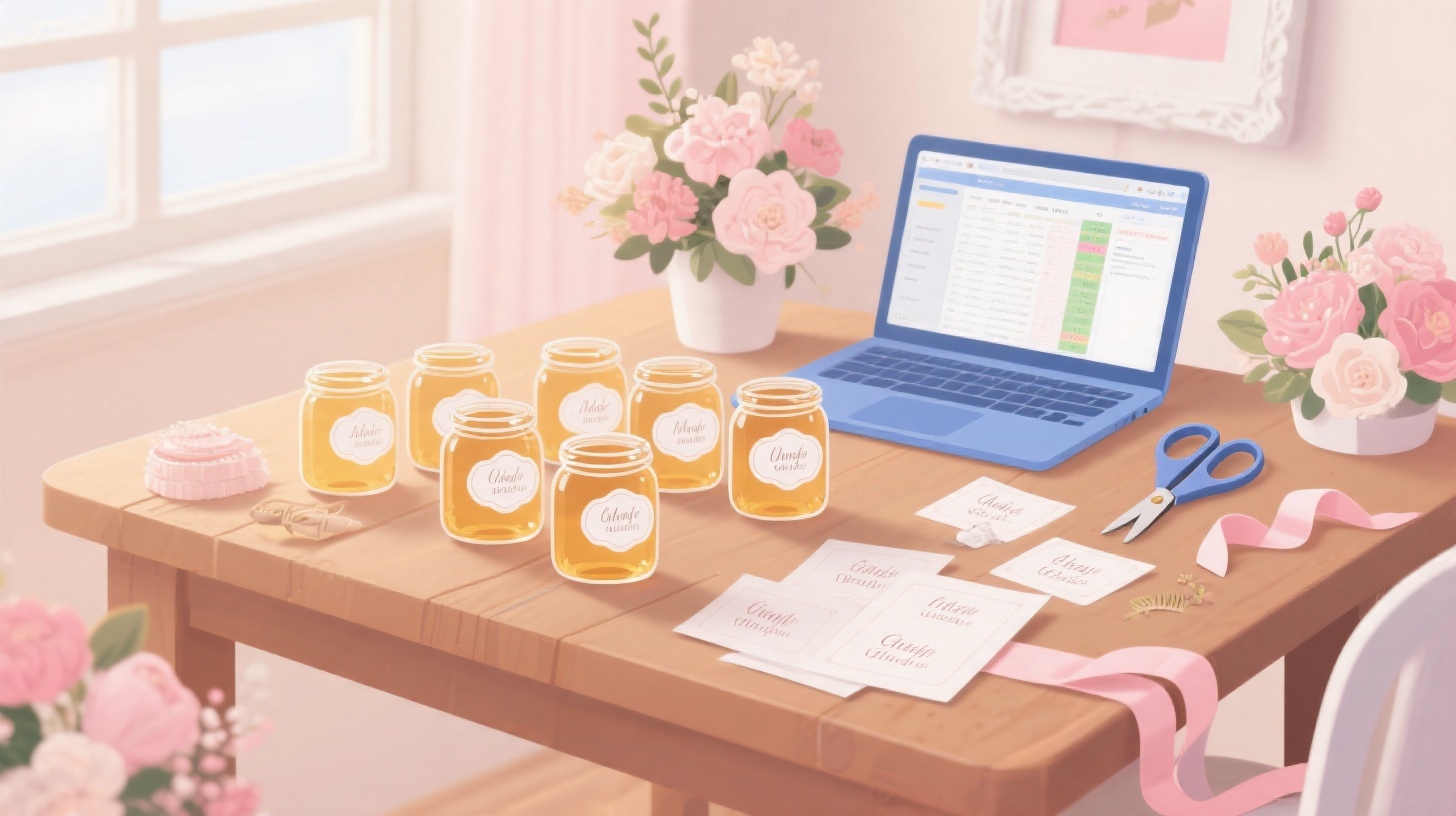
Your wedding guest list is finalized, your favors are ready to assemble, and now you need one finishing touch: personalized labels that make each gift feel special. The good news? You don't need expensive custom printing or hours of manual formatting. With Google Sheets and the right label template, you can turn your guest spreadsheet into beautifully printed favor labels in minutes.
Whether you're creating elegant name tags for jarred honey, custom stickers for candle favors, or "thank you" labels with each guest's name, this guide walks you through the entire process. You'll go from a simple spreadsheet to print-ready labels without fighting with margins, alignment, or formatting headaches. And if you already have your guest list in Google Sheets (which most couples do), you're halfway there.
The key is pairing your spreadsheet data with a properly sized label template. The Avery 5160 label template is one of the most popular choices for wedding favor labels because it fits 30 labels per sheet and works perfectly for names, short messages, and small decorative text. Let's break down exactly how to make this happen.
Setting Up Your Google Sheets Guest List for Label Printing
Before you touch a single label, your spreadsheet needs to be organized in a way that translates cleanly to printed labels. This is where most DIY couples make mistakes, so getting the foundation right saves you from reprinting an entire batch later.
Start by opening Google Sheets and creating a clean, single-purpose spreadsheet for your label data. Even if you already have a master wedding planning spreadsheet with RSVPs, dietary restrictions, and table assignments, create a separate sheet (or tab) dedicated exclusively to your label content. This keeps things simple and prevents accidental data from sneaking onto your labels.
Structuring Your Columns
Think about exactly what text you want on each label. For wedding favor labels, common formats include:
Guest name only: "Sarah & Michael"
Name plus message: "Thank you, Sarah & Michael!"
Custom message with date: "With love from Emma & James"
Table assignment labels: "Table 7 - The Hendersons"
Set up your columns to match your desired output. For personalized guest labels, a typical structure looks like this:
Column A | Column B | Column C |
First Name | Last Name | Full Label Text |
Sarah | Henderson | Thank you, Sarah! |
Michael | Torres | Thank you, Michael! |
David | Chen | Thank you, David! |
The "Full Label Text" column is where the magic happens. Use a simple Google Sheets formula to combine your data into the exact text you want printed. For example:
Or for couples attending together:
Cleaning Your Data
Spelling errors on wedding favor labels are memorable for all the wrong reasons. Before printing, run through this quick checklist:
Verify spelling of every guest name
Check for extra spaces before or after names
Confirm consistent capitalization ("McDonald" not "Mcdonald")
Remove any blank rows that could create empty labels
Double-check that your total label count matches your guest count plus extras
A practical tip: always print 10-15% more labels than you think you need. Between last-minute RSVPs, printing errors, and labels that don't stick properly, extras are a lifesaver.
Once your data is clean and your formulas are producing the exact text you want on each label, you're ready to connect your spreadsheet to a label template. This is the step that transforms rows of data into a print-ready layout.
Choosing the Right Label Template for Your Wedding Favors
Label size matters more than most people realize. A label that's too large looks awkward on a small jar of jam. A label that's too small makes text unreadable on a wine bottle. Matching your label dimensions to your actual wedding favors is the difference between "homemade" and "professionally done."
The most versatile option for wedding favor labels is the standard address label size (1" x 2-5/8"), which fits on virtually any small to medium favor. These labels work beautifully on:
Small glass jars (honey, jam, spices)
Favor boxes and bags
Candle tins
Seed packets
Cookie bags or cellophane wraps
The Avery 5160 template gives you exactly this size with 30 labels per sheet, meaning you can print labels for your entire guest list in just a few pages. The template is pre-formatted with the correct margins and spacing, so your labels align perfectly with the adhesive label sheets you buy at any office supply store.
Beyond Standard Rectangles
Not every wedding favor calls for a rectangular label. If you're working with round favors, bottle necks, or want a more decorative look, you might need a different template shape. Browse the full template library to find options ranging from small round labels (perfect for jar lids) to scalloped edges and larger shipping-size labels for gift boxes.
When selecting your template, consider these factors:
Font readability at your label size. A 1" x 2-5/8" label comfortably fits one to two lines of text at 10-12pt font. If you want a longer message ("Thank you for celebrating with us! Love, Emma & James"), you'll need a larger label or a smaller font size.
Your favor's surface area. Measure the flat surface of your favor where the label will sit. Leave at least 1/8" of margin around the label edge so it doesn't wrap or peel.
Paper finish matters. Matte labels look elegant and accept ink beautifully, but glossy labels resist moisture better (important for favors that might sweat, like cold drinks or chilled items). Clear labels create a "printed directly on the item" look that's very polished.
Matching Template to Label Sheets
Here's a critical detail that trips people up: your digital template must match the physical label sheets you purchased. The Avery 5160 template works with Avery 5160 label sheets, but it's also compatible with most generic brand equivalents that share the same dimensions (30 labels per sheet, 1" x 2-5/8" each).
Before buying label sheets in bulk, print a test page on plain paper. Hold it up against your label sheet to verify alignment. This 30-second test can save you from wasting an entire pack of premium label paper.
Printing Your Wedding Labels Step by Step
With your spreadsheet organized and your template selected, it's time to connect everything and produce actual labels. This is where Foxy Labels streamlines what would otherwise be a tedious manual process.
The traditional method of creating labels from a spreadsheet involves copying each name individually into a word processing document, carefully positioning each one within template boundaries, and praying that nothing shifts when you hit print. With a Google Workspace add-on approach, your spreadsheet data flows directly into the template, automatically populating each label position.
Step 1: Prepare Your Template Document
Open Google Docs and load your chosen label template. The template establishes your page layout with invisible table cells that match your physical label sheet dimensions. Each cell represents one label position, and your guest data will fill these cells automatically.
Make sure your template matches your purchased label sheets exactly. If you're using Avery 5160 compatible sheets, the Avery 5160 template for Google Docs gives you the precise measurements needed.
Step 2: Connect Your Spreadsheet Data
This is where personalization happens at scale. Instead of typing 100+ names manually, your Google Sheets data populates each label position. Select the column containing your final label text (that "Full Label Text" column you created earlier), and let the merge process assign one entry per label.
The process works like mail merge: one row of data equals one label. If you have 87 guests, you'll get 87 unique labels spread across three sheets (since each page holds 30 labels).
Step 3: Format Your Label Design
Before generating the final output, set your formatting preferences:
Font choice: Script fonts like Great Vibes or Pacifico add elegance but check readability at small sizes. Safe elegant options include Playfair Display, Cormorant, or Lora.
Text alignment: Center-aligned text works best for short names. Left-aligned is better for longer messages.
Font size: 10-12pt for standard rectangular labels. Test print to verify readability.
Color: Black prints most reliably. If you want colored text, ensure your printer handles it well on label paper (inkjet printers generally produce richer colors than lasers on adhesive sheets).
Step 4: Print a Test Page
Never skip this step. Print your first page on regular paper, then hold it up to a window with your label sheet behind it. Check that:
Text is centered within each label boundary
No text is cut off at edges
Font size is readable
Spacing between lines looks balanced
If anything is off, adjust before committing label sheets to your printer. Label paper isn't cheap, and wedding budgets are already stretched thin enough.
Step 5: Print on Label Sheets
Load your label sheets into your printer's manual feed tray (if available) to reduce jamming risk. Print one sheet first to confirm everything looks perfect, then batch print the rest. Let each sheet dry for 30 seconds before stacking to prevent smearing, especially with inkjet printers.
For those who also need to create address labels for wedding invitations or thank-you cards, the same process applies with your full mailing list. The guide on printing Avery 5160 address labels from Google Sheets walks through that specific workflow in detail.
Creative Ideas and Troubleshooting for Wedding Label Projects
Once you've mastered the basic process, you can get creative with your wedding label projects. The same spreadsheet-to-label workflow works for dozens of wedding-related printing needs beyond just favor labels.
Expand Your Label Projects
Escort cards and place cards: Use larger labels on folded card stock to create table assignments. Your spreadsheet can include columns for guest name and table number, merged into text like "Table 7 - The Henderson Family."
Return address labels: Print your new shared address on labels for thank-you card envelopes. One template run gives you hundreds of identical return address labels.
Bottle labels for signature drinks: Create fun labels for wine bottles, water bottles, or custom cocktail mixers at the reception.
Welcome bag labels: Personalize out-of-town guest welcome bags with their names and a short greeting.
Candy bar or dessert table labels: Identify treats for guests with allergies by creating labels that note ingredients.
Common Problems and Quick Fixes
Labels are misaligned after the first row. Your template margins don't match your label sheet. Verify you're using the correct template for your exact label product number. Even a 1mm difference compounds across the page.
Text is too small to read. Shorten your message or move to a larger label size. "Thank you!" with the guest name is more readable than a three-line heartfelt message crammed into a tiny space.
Ink smears on glossy labels. Switch your printer to "photo paper" or "glossy" media settings. This adjusts ink application and drying time. Alternatively, let labels dry for two full minutes before handling.
Some labels are blank. Check your spreadsheet for empty rows. Remove any gaps in your data, as each row (including blanks) corresponds to a label position.
Labels peel off favors. Surface preparation matters. Wipe your favor surface with rubbing alcohol before applying labels. Avoid applying labels to cold items, and let items reach room temperature first. For items that will be refrigerated (like food favors), consider labels rated for cold surfaces.
Making It Look Professional
The secret to DIY wedding labels that look professionally printed comes down to three details: consistent fonts, quality label paper, and proper alignment. Skip the temptation to use multiple fonts or add clip art. A single elegant font with clean alignment looks far more polished than a busy design.
If your budget allows, consider investing in a higher-quality label paper with a linen or textured finish. The visual difference between standard matte labels and textured ones is dramatic, and it often costs just a few dollars more per pack.
Printing personalized wedding labels from your guest spreadsheet puts you in control of timing, design, and cost. You can make changes up until the last minute, reprint specific labels if needed, and create a cohesive look across all your wedding paper goods without paying per-piece prices from a print shop.
Ready to start creating your wedding favor labels? Grab the Avery 5160 template, organize your guest list in Google Sheets, and you'll have beautiful, personalized labels printed before your next planning meeting. Your guests will never guess they were DIY.
Install Foxy Labels
Get started with Foxy Labels and create perfectly aligned labels in minutes.
Get Started