How to Print Waterproof Product Labels at Home with Google Docs
Print professional waterproof product labels at home using Google Docs, an inkjet printer, and the right label paper. This guide covers material selection, design setup, and printing tips for small businesses.
You've got a product. Maybe it's a handmade candle, a hot sauce recipe perfected over years, or a line of body butters you sell at farmers markets. The product is great, but the label? It smears the second it gets wet, peels off in the shower, or fades before the jar even makes it to the customer. Sound familiar?
Printing waterproof product labels at home isn't some mythical craft reserved for big brands with industrial equipment. With the right label paper, a standard inkjet printer, and a free tool like Google Docs, you can produce professional, durable labels from your kitchen table. And you don't need design software that costs hundreds of dollars to pull it off.
This guide walks you through the entire process, from choosing the right waterproof label stock to setting up your template in Google Docs, printing with precision, and getting results that actually hold up. If you're ready to get started, browse FoxyLabels templates to find a layout that matches your label sheet size and start designing right away.
Choosing the Right Waterproof Label Paper for Your Inkjet Printer
Before you open Google Docs or think about fonts, the single most important decision is your label paper. The paper you choose determines whether your label survives a splash, a refrigerator, or a steamy bathroom. Not all "waterproof" label papers are created equal, and picking the wrong one is the fastest way to waste time and money.
Understanding Waterproof Label Materials
There are three main types of waterproof label materials available for home inkjet printers.
Vinyl label sheets are the gold standard for waterproof durability. They're made from a synthetic plastic film rather than paper pulp, which means water doesn't penetrate the surface at all. Vinyl labels resist oil, moisture, UV light, and general wear. They work well for bath products, cleaning supplies, beverages, and anything that might sit in a cooler full of ice. Look for sheets labeled as "waterproof vinyl" that are specifically compatible with inkjet printers.
Polyester (BOPP) label sheets are another synthetic option. They're slightly thinner than vinyl and have a smooth, professional finish. Many commercial product labels you see in stores are printed on BOPP material. These sheets handle water beautifully and tend to have excellent color reproduction with inkjet ink.
Waterproof coated paper labels are a budget-friendly middle ground. They're actual paper sheets treated with a waterproof coating. They handle light moisture and condensation reasonably well, but they won't survive being submerged in water or prolonged exposure. These work best for food jars, gift items, and products that face occasional splashes rather than constant wetness.
What to Look for When Buying Label Stock
When shopping for waterproof label paper, check these specifics on the product listing:
Printer compatibility: Make sure the label sheet is designed for inkjet printers, not laser printers. Laser-only sheets can jam in an inkjet, and inkjet ink won't adhere properly to laser-specific coatings.
Sheet size: Most home printers use US Letter (8.5" x 11") or A4 sheets. Confirm the label stock matches your printer's tray size.
Label dimensions and count per sheet: This matters enormously for template alignment. You need to know the exact label width, height, number of rows, number of columns, and margins. Write these numbers down. You'll need them when selecting a template.
Adhesive type: Permanent adhesive is standard for product labels. Removable adhesive exists but tends to peel off too easily for products that ship or sit on shelves.
Finish: Glossy finishes give colors extra pop and add a premium feel. Matte finishes reduce glare and look great for organic, earthy, or minimalist branding. Clear vinyl is perfect for the "no label" look where your product shows through.
Popular brands include Online Labels, Avery, Sticker Paper, and Milcoast. Most of these brands list their sheet layouts using standard template codes. This is where a tool like FoxyLabels becomes invaluable, because you can browse FoxyLabels templates by brand or label size and find a Google Docs template that matches your exact sheet layout, no measuring or guessing needed.
A Quick Note on Ink
Standard inkjet ink (dye-based ink) works on most waterproof label sheets because the coating or vinyl surface locks the ink in. However, if you want maximum durability and fade resistance, consider a printer that uses pigment-based ink. Pigment ink bonds more permanently to surfaces and resists UV light better than dye ink. Epson EcoTank printers and many Canon PIXMA models use pigment black ink, which is a good starting point for small business label printing.
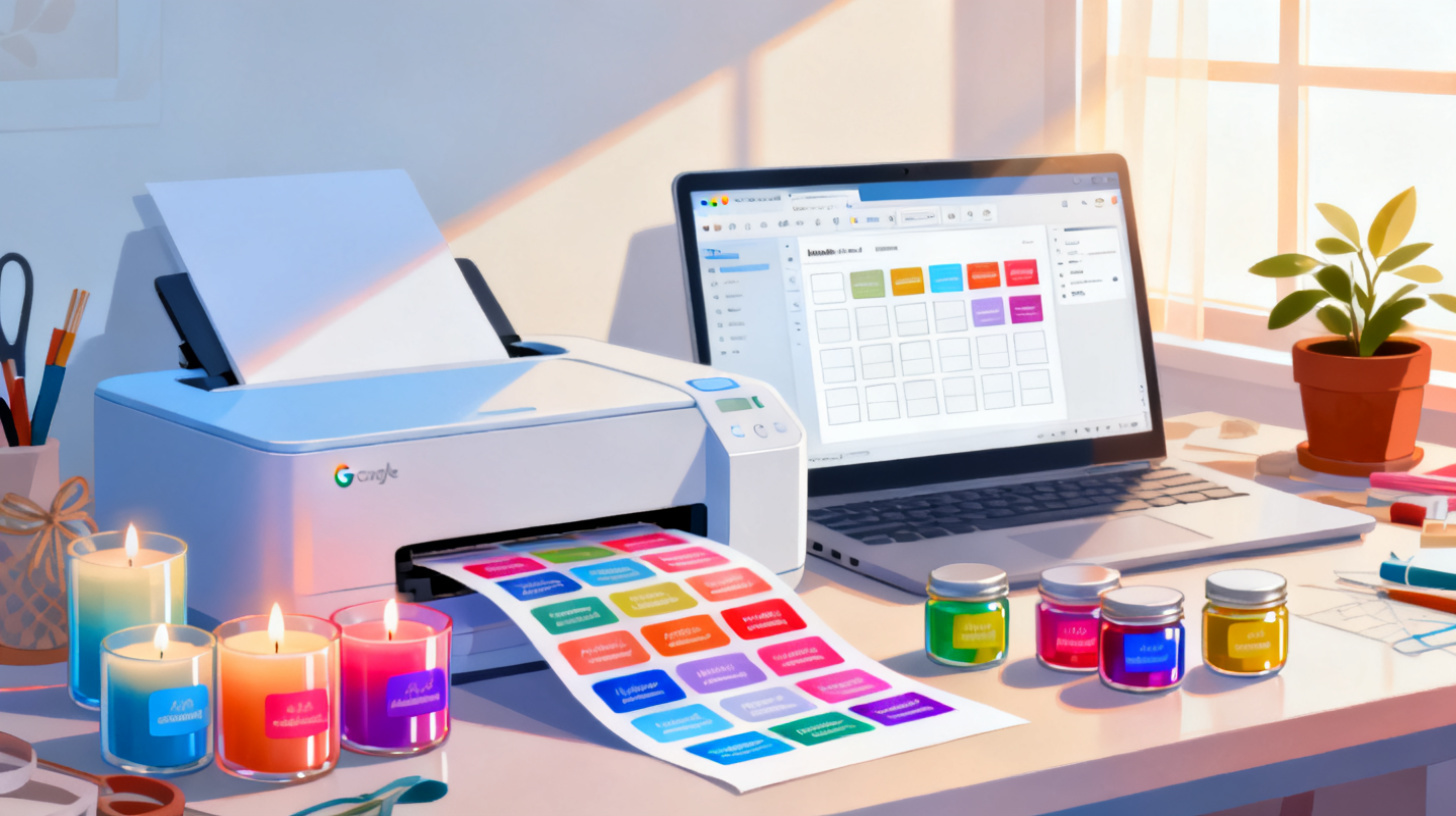
Setting Up Your Label Design in Google Docs
With your waterproof label paper in hand (and its dimensions written down), it's time to build your label design. Google Docs isn't Photoshop, but it's surprisingly capable for product label creation, especially when you start from a properly formatted template.
Step 1: Select a Template That Matches Your Label Sheet
This is the step most people get wrong, and it's the reason labels print misaligned, overlap, or waste entire sheets. Your template must match your label paper's layout exactly. That means matching the number of labels per row, labels per column, label width, label height, and page margins.
Rather than building a table from scratch and spending an hour adjusting cell dimensions, start with a pre-built template. FoxyLabels templates are designed to match hundreds of common label sheet sizes from major brands. Find your label sheet's brand and product code, select the matching template, and open it directly in Google Docs. The grid, spacing, and margins are already set.
Step 2: Design Your Label Content
Once you've got your template open, you'll see a table grid where each cell represents one label. Here's how to make it look professional:
Add your logo or product image. In Google Docs, click inside a label cell, go to Insert > Image, and upload your logo. Resize it by clicking the image and dragging the corner handles. Keep your logo crisp by using a PNG file with a transparent background whenever possible.
Type your product name and details. Use Google Docs' built-in font options to set your product name in a bold, legible typeface. For product labels, fonts like Montserrat, Raleway, Oswald, or Playfair Display (available through Google Fonts in Docs) work well. Keep your font size large enough to read at arm's length. For most labels, this means 10pt minimum for body text and 14-18pt for the product name.
Add required information. Depending on your product type, you may need to include ingredients, net weight, your business name and address, batch numbers, or barcodes. If you're selling products commercially, the SBA's guide on licenses and permits covers federal and state requirements for product labeling, which vary by industry.
Use color strategically. You can change text color and cell background color in Google Docs. For waterproof labels on white vinyl, a colored background can make your product pop on the shelf. For clear vinyl labels, keep backgrounds transparent and use bold text colors that contrast with your product's container.
Keep it simple. One of the biggest mistakes in DIY label design is overcrowding. Give your text room to breathe. White space isn't wasted space; it's what makes a label look clean and professional instead of cluttered.
Step 3: Duplicate Your Design Across the Sheet
Once you've perfected one label, copy the contents of that cell and paste it into every other cell on the sheet. Select all the content inside the cell (Ctrl+A or Cmd+A while your cursor is in the cell), copy it, then click into the next cell and paste. Repeat until the entire sheet is filled. If you're printing different products or variations, you can customize each cell individually.
For those printing large batches with variable data (like different scents, flavors, or SKU numbers), FoxyLabels also integrates with Google Sheets to let you auto-populate label templates from spreadsheet rows. Check out FoxyLabels pricing plans if batch printing from a spreadsheet would save you time.
Printing, Troubleshooting, and Getting Professional Results
Designing the label is half the battle. Printing it correctly on waterproof stock is where many DIY label makers hit a wall. Paper jams, color shifts, misalignment, and smearing are all common problems, but they're all fixable with the right printer settings and techniques.
Configuring Your Printer for Waterproof Label Stock
Before you hit "Print," adjust your printer settings. This makes a dramatic difference in quality.
Paper type: Set this to "Glossy Photo Paper" or "Premium Matte" (depending on your label finish). Never leave it on "Plain Paper." Waterproof label stock has a coated or synthetic surface, and the photo paper setting tells your printer to lay down ink more carefully with better color saturation.
Print quality: Set this to "High" or "Best." Standard or draft quality will produce faded, streaky output on label stock.
Paper size: Make sure it matches your sheet size (Letter or A4).
Margins: If your template is properly configured (which it will be if you used a FoxyLabels template), set margins to match or choose "None" if your printer supports borderless printing.
Scaling: Set to "Actual size" or "100%." Never use "Fit to page" or "Shrink to fit," because this will resize your labels and throw off alignment.
Always print a test page on regular paper first. Hold it up against your label sheet (with a light behind it) to check alignment before committing a sheet of expensive waterproof stock.
Dealing with Common Printing Problems
Smearing or wet-looking prints: Synthetic label stock doesn't absorb ink the way paper does. The ink sits on the surface and needs a moment to dry. After printing, don't stack sheets or touch the printed surface for at least 5 to 10 minutes. If smearing persists, try reducing ink density in your printer's advanced settings or switch to pigment-based ink cartridges.
Colors look different on screen vs. print: Every monitor displays color differently than a printer reproduces it. To get closer to what you expect, print a small test batch first and adjust your design's colors accordingly. Bump saturation slightly in your design if prints look washed out.
Labels are misaligned: This almost always comes from either incorrect margins in your template or printer scaling settings. Double-check that your template matches your label sheet exactly, and verify your printer is set to 100% scale with no auto-fitting. If you're still having trouble, the FoxyLabels support page can help you troubleshoot alignment issues specific to your label sheet and printer.
Paper jams with thick stock: Some waterproof vinyl sheets are thicker than standard paper. Use your printer's rear feed tray (if it has one) instead of the main paper cassette. The rear tray provides a straighter paper path with less bending, which reduces jams significantly. Feed one sheet at a time for thick stock.
Finishing Touches for Maximum Durability
Even on waterproof label stock, you can add extra protection:
Clear laminate overlay: Some label sheets come with a clear laminate sheet you apply over the printed label. This adds a physical barrier against scratching, UV damage, and chemical exposure. It's especially useful for cleaning products, cosmetics, and outdoor items.
Spray sealant: A light coat of clear acrylic spray sealant (available at any craft store) can further protect printed labels from moisture and handling.
Proper storage: Store your printed label sheets flat in a cool, dry place. Don't leave them in direct sunlight before application, as UV can start fading colors even before the label goes on your product.
Turning Your Home Label Setup into a Small Business Advantage
Printing waterproof labels at home isn't just a fun weekend project. For small businesses, makers, and side hustlers, it's a genuine competitive advantage. You control your branding, your timeline, and your costs, all without minimum order quantities from professional print shops.
Cost Comparison: DIY vs. Professional Printing
Let's look at real numbers. A professional label printer typically charges $0.15 to $0.75 per label depending on size, material, and quantity, with minimum orders of 100 to 500 labels. For a small business testing a new product or selling 50 units at a market, that minimum order is a problem.
Printing at home, a pack of 25 waterproof vinyl label sheets with 10 labels per sheet gives you 250 labels for roughly $20 to $35, depending on the brand. That's $0.08 to $0.14 per label, and you can print as few or as many as you need. Ink cost adds roughly $0.02 to $0.05 per label on a standard inkjet. Your total per-label cost comes in under $0.20, often under $0.15, with zero minimum order and instant turnaround.
The savings compound quickly. If you sell 1,000 units per year and save even $0.10 per label compared to a print shop, that's $100 back in your pocket. For a small operation, that's meaningful.
Scaling Up with Google Sheets Integration
As your product line grows, manually copying label content across a sheet becomes tedious. Imagine you sell 12 candle scents, each with different names, descriptions, and ingredient lists. Copying and pasting each variation one cell at a time is error-prone and slow.
This is where printing labels from a spreadsheet transforms your workflow. You keep a Google Sheet with all your product data (name, scent, ingredients, weight, SKU), and FoxyLabels pulls that data directly into your label template. Change a detail in your spreadsheet, and every label updates automatically. If you're approaching this stage, FoxyLabels pricing plans break down what's included at each level so you can find the right fit for your volume.
Beyond Rectangles: Other Label Shapes
Product labels aren't always rectangular. Round labels are wildly popular for jar lids, bottle caps, and seal stickers. If your product uses circular containers, check out our guide on how to print round circle labels in Google Docs easily for a walkthrough on setting up circular label templates.
Building a Brand That Lasts (Literally)
Waterproof labels aren't just functional. They signal quality. When a customer picks up your candle at a market and the label feels substantial, when your hot sauce bottle sits in a cooler all afternoon and the label still looks perfect, when your body scrub survives six months of steamy showers without peeling, that durability builds trust. It tells your customer you care about details, and it makes your product feel worth every penny.
Professional-grade labels used to require professional-grade budgets. That's no longer the case. With waterproof label stock, a decent inkjet printer, and a properly formatted Google Docs template, you can produce labels at home that rival anything on a retail shelf.
Ready to get started? Browse FoxyLabels templates to find the exact layout for your label sheets, and for deeper guidance on every step of the process, visit the FoxyLabels tutorials page. Your products deserve a label that lasts as long as the impression they make.
Install Foxy Labels
Get started with Foxy Labels and create perfectly aligned labels in minutes.
Get Started