Once the wedding celebration is over, the gifts unwrapped, and the guests bid farewell, the elated newlyweds must embark on a new chapter in their life together. They have relocated to a new home, and one of the primary items on their to-do list is revamping their home office and managing their mailing affairs. Although it could be a daunting task, they have an ace up their sleeve: Foxy Labels, a Google Workspace extension that they have installed and mastered to help them streamline the process. With just a few clicks, they can create and print custom family-style address labels, and this guide will show how you can do exactly the same.
1. Open a blank document
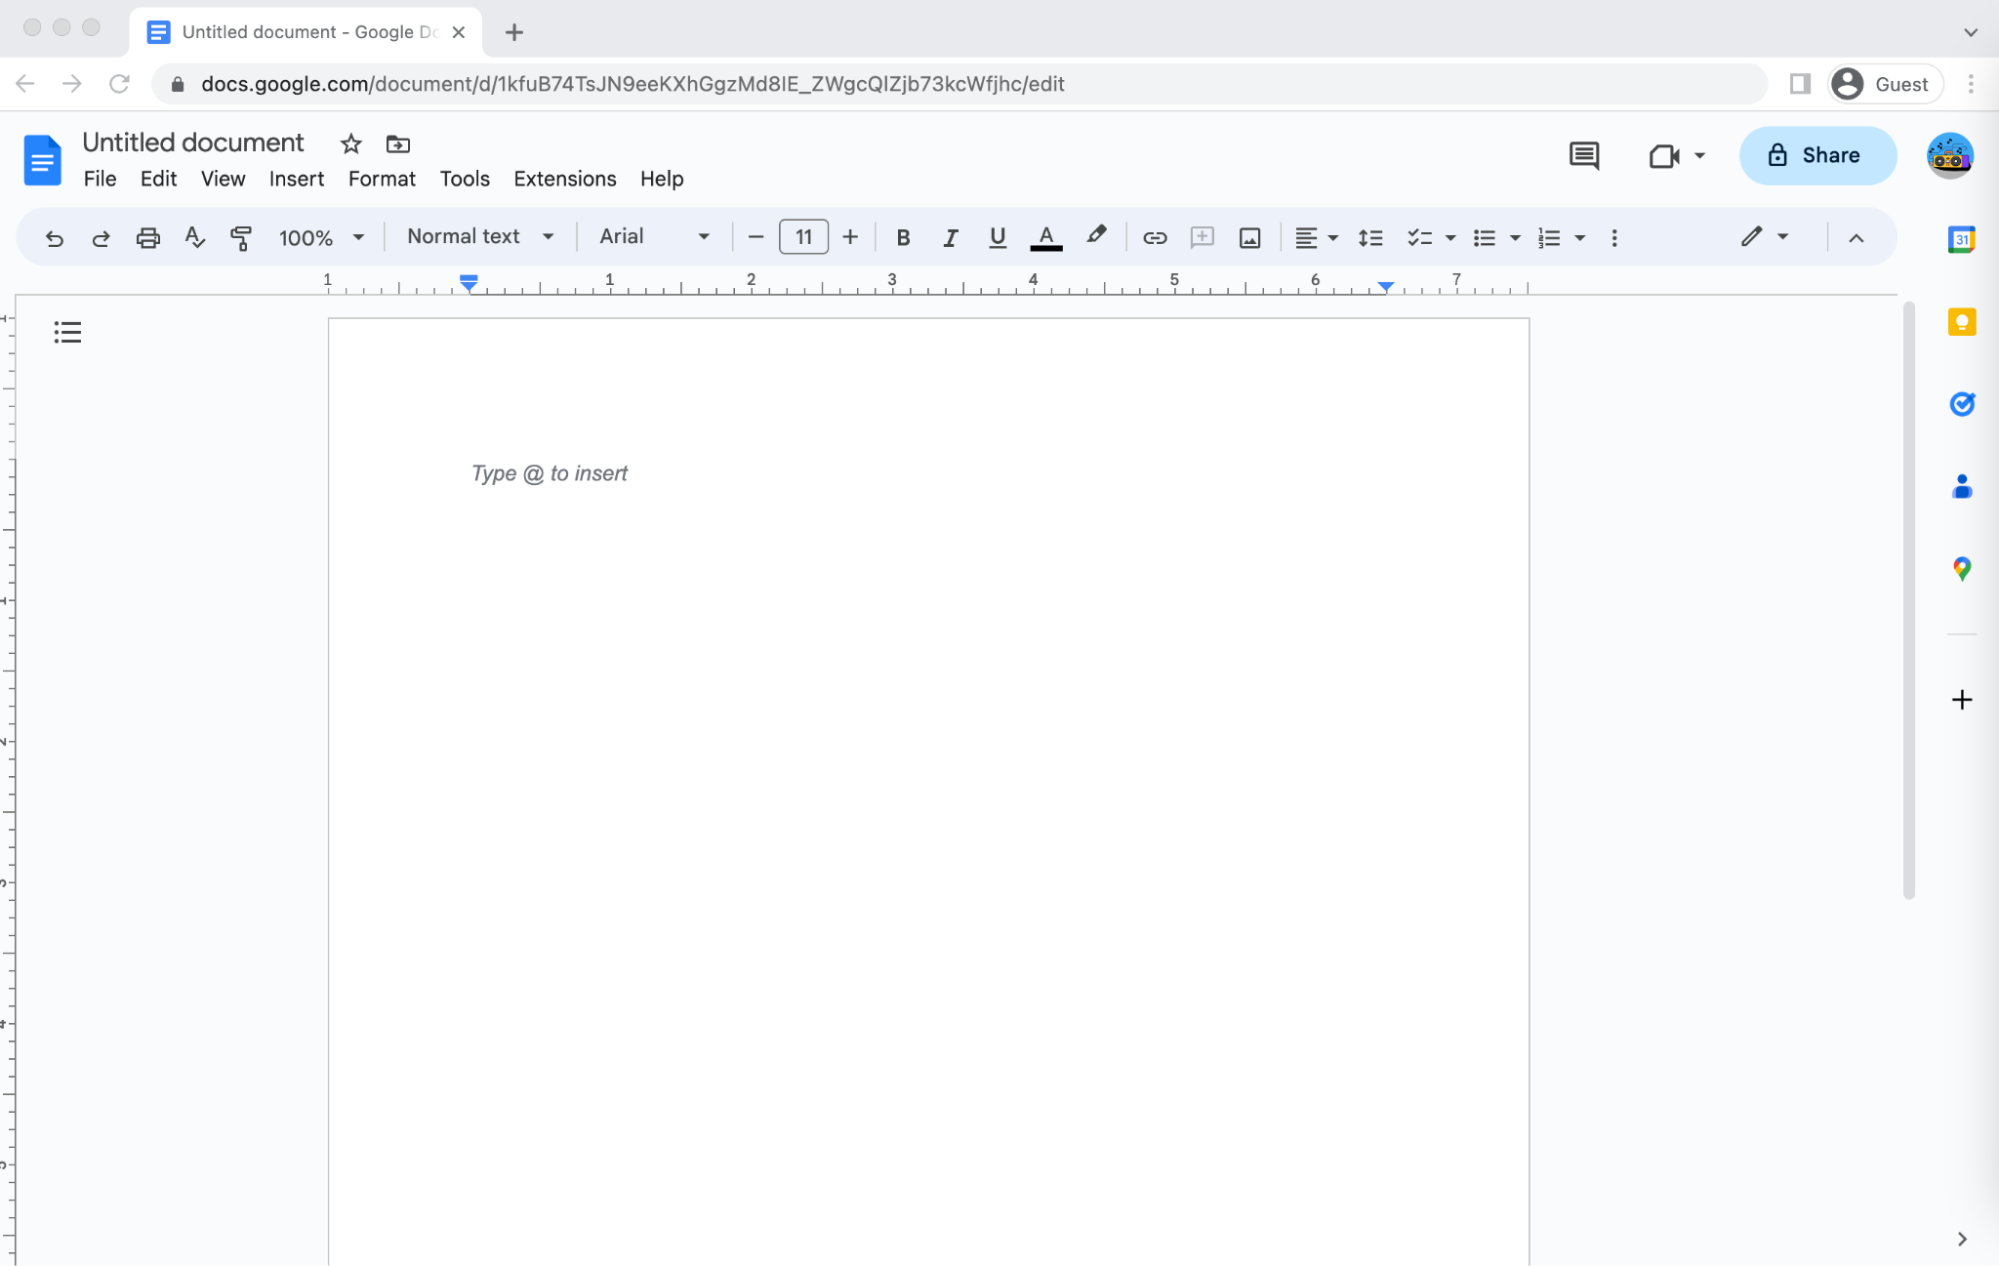
To start, open a new Google Document by using one of several methods available. The most convenient way is to follow the link https://docs.new, which will create and open a new file.
2. Launch Foxy Labels
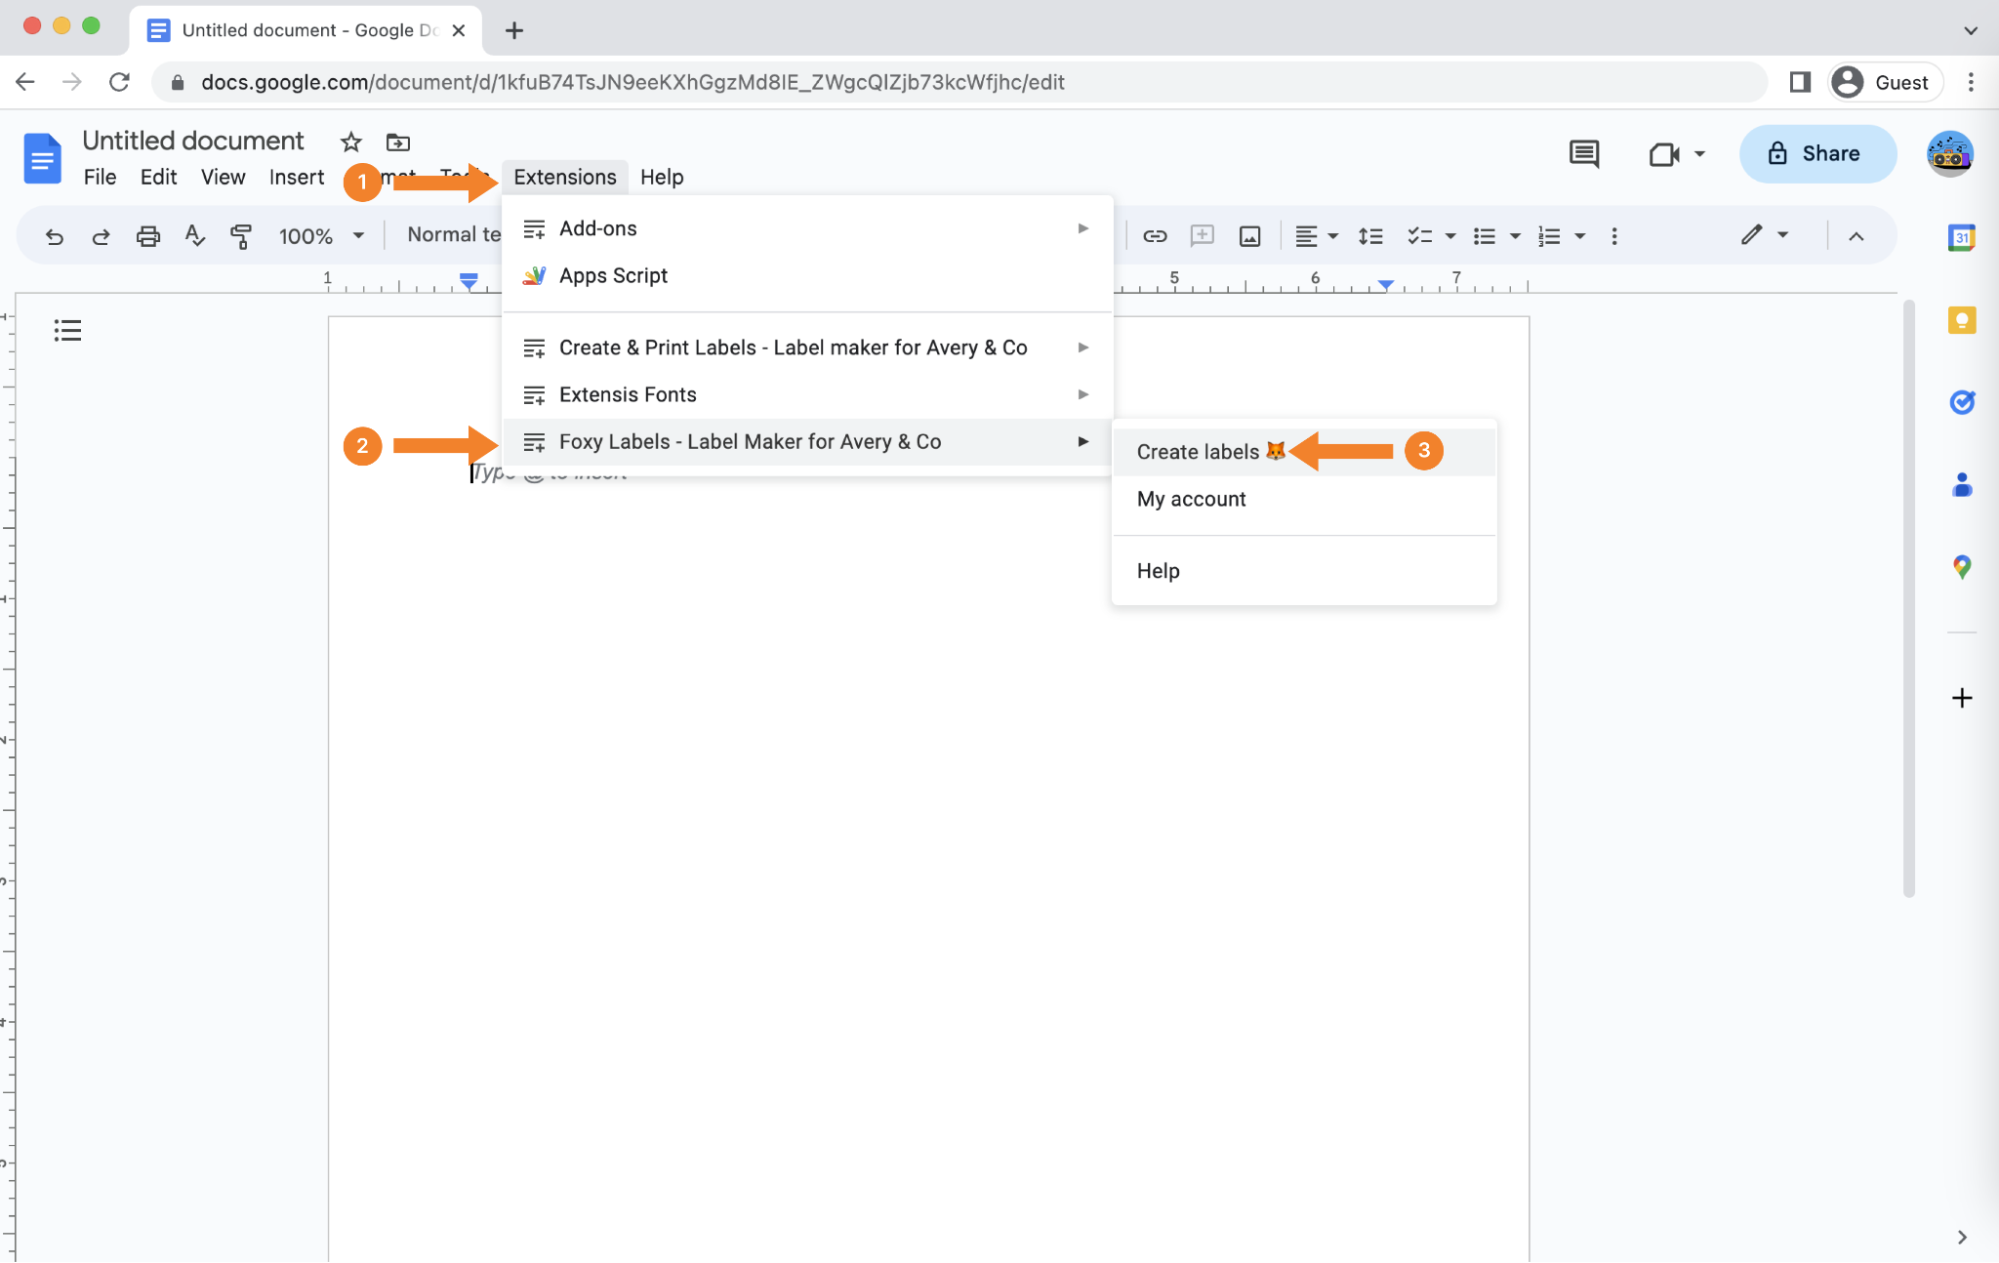
First, you should install the extension if you haven’t done it already. Once the plugin is installed, select "Extensions" (1), open the "Foxy Labels - Label Maker for Avery & Co" menu (2), and choose "Create labels" (3).
3. Select a template
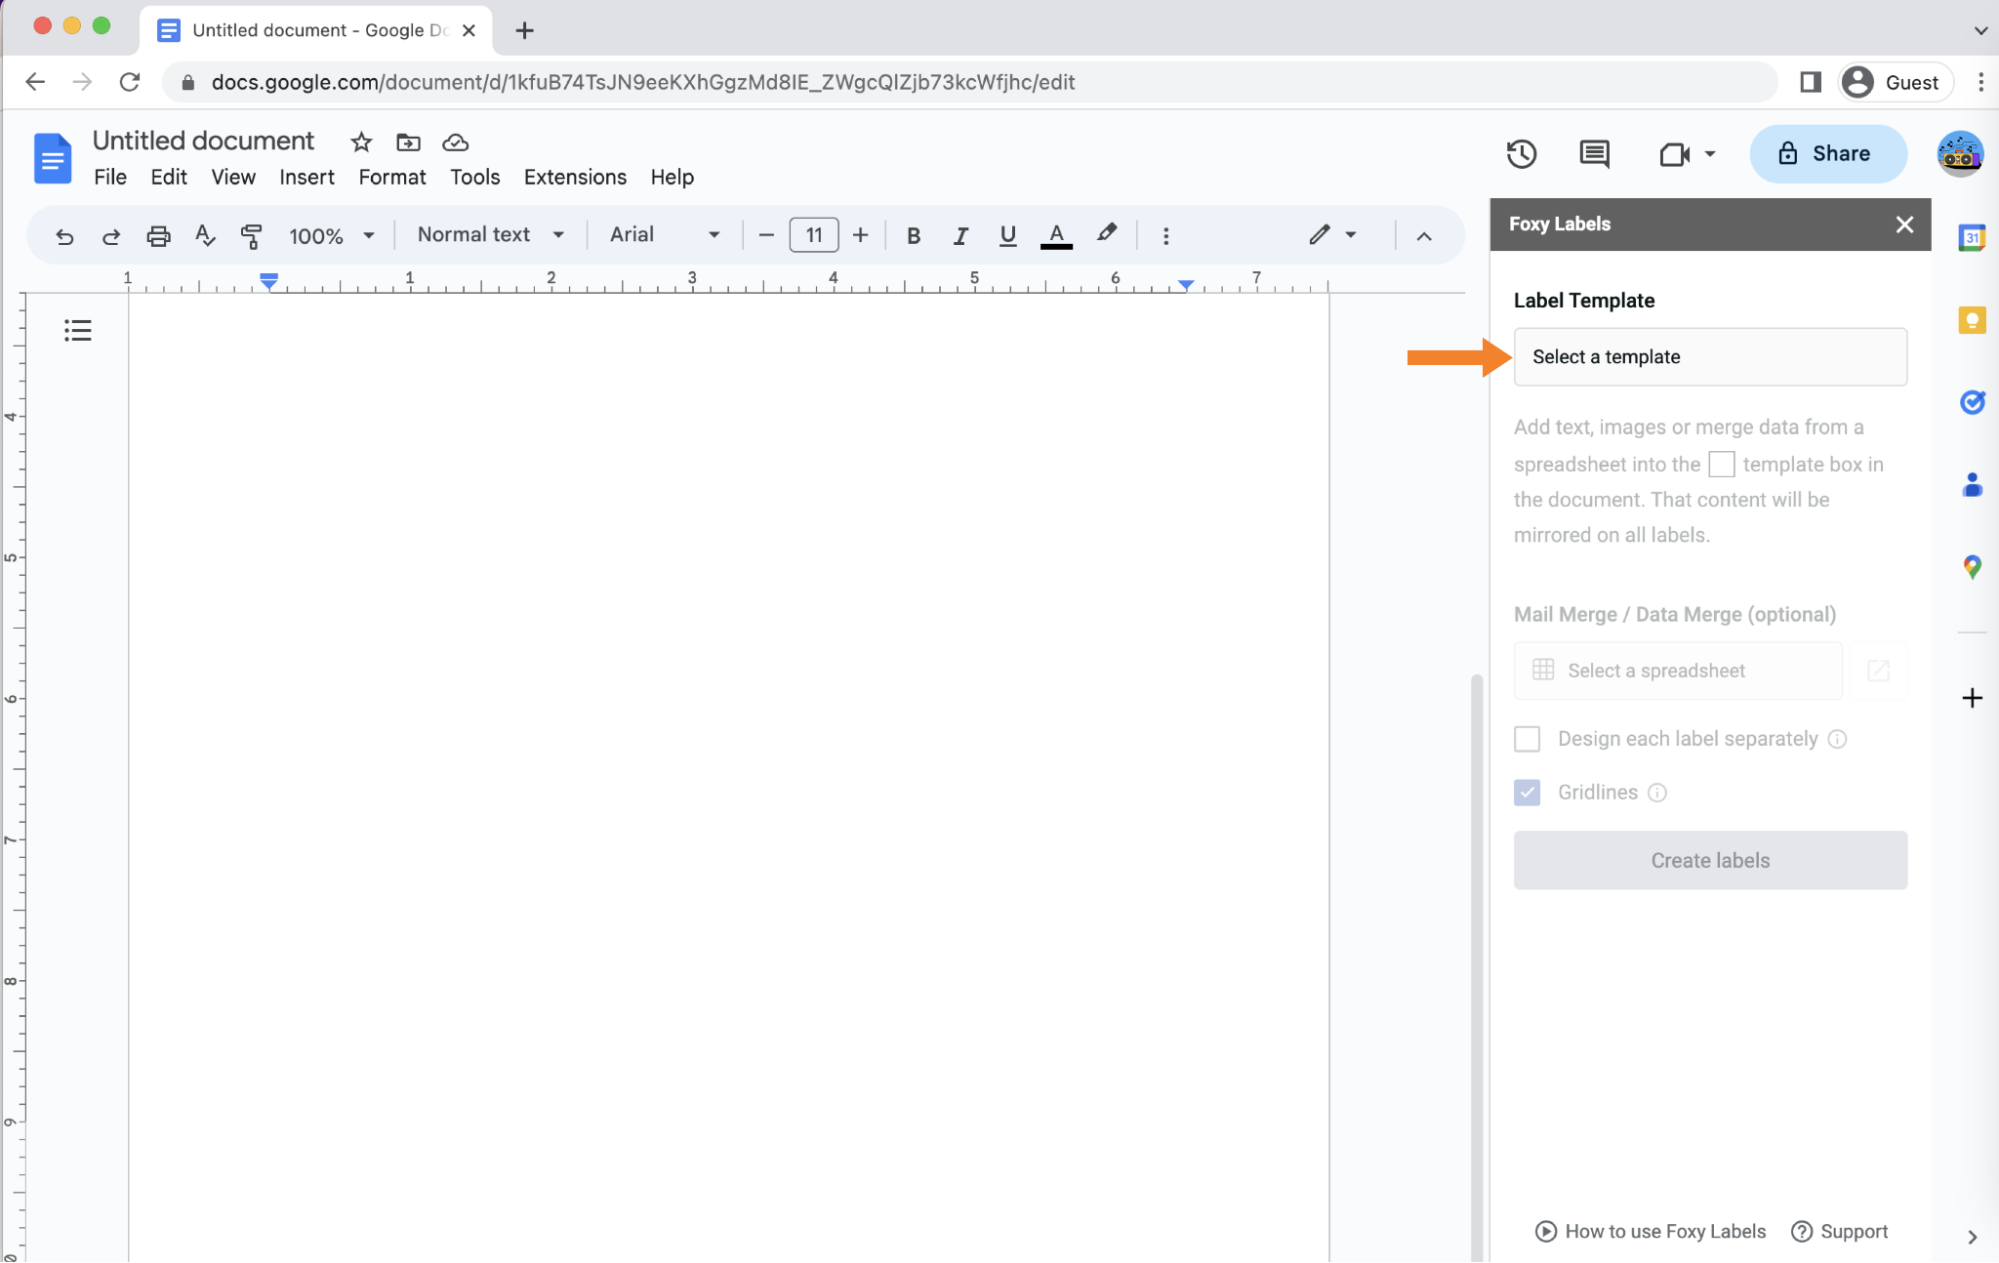
Now is the time to select a template that fits your requirements. The Foxy Labels sidebar presents all the accessible alternatives. To see every available template, click on "Select a template."
In this tutorial, we will generate address labels by applying the J8177 Avery Zweckform template. If you know the type of your preferred template, type it in the search field in the Foxy Labels sidebar (step 1), or find it by browsing through the list of All templates. Once you've found the template, click on its name and then hit the "Apply template" button (step 2). It will appear on your screen momentarily.

4. Insert a table
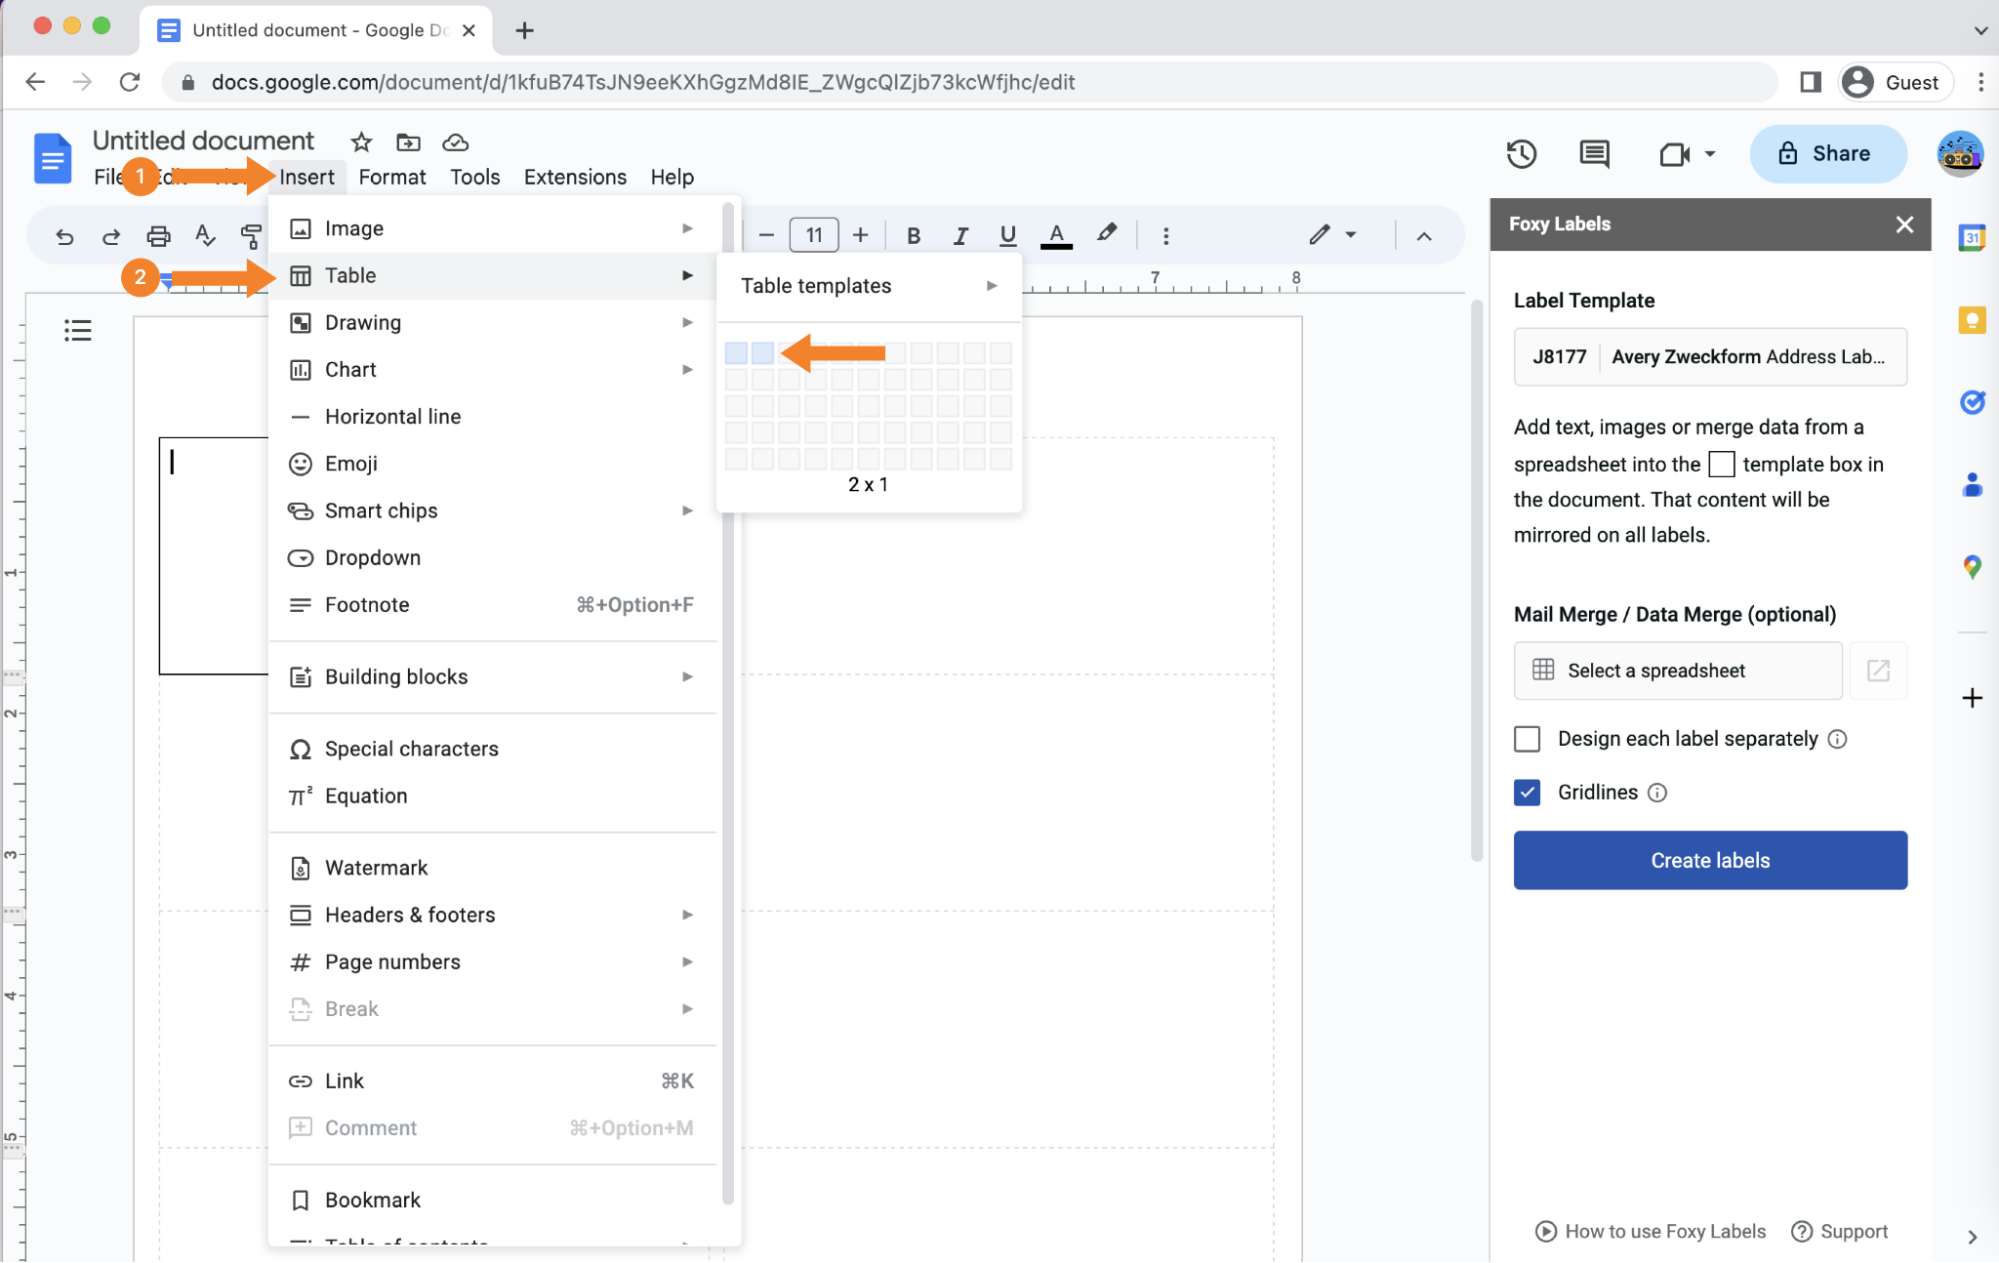
Now, you're ready to start designing. As you're creating customized family address labels, you'd probably want them to be special and one of a kind. Decorating them with your selected image is a great way to make your labels stand out. To add an image to your template, you need to insert a table inside it first. Click inside the newly appeared table.
- Navigate to the "Insert" menu
- Click on "Table"
- Select 2x1 squares
These steps will result in a small double-cell table inside your template’s first blank label frame.
5. Add and edit an image
To add an image correctly, follow the steps below:
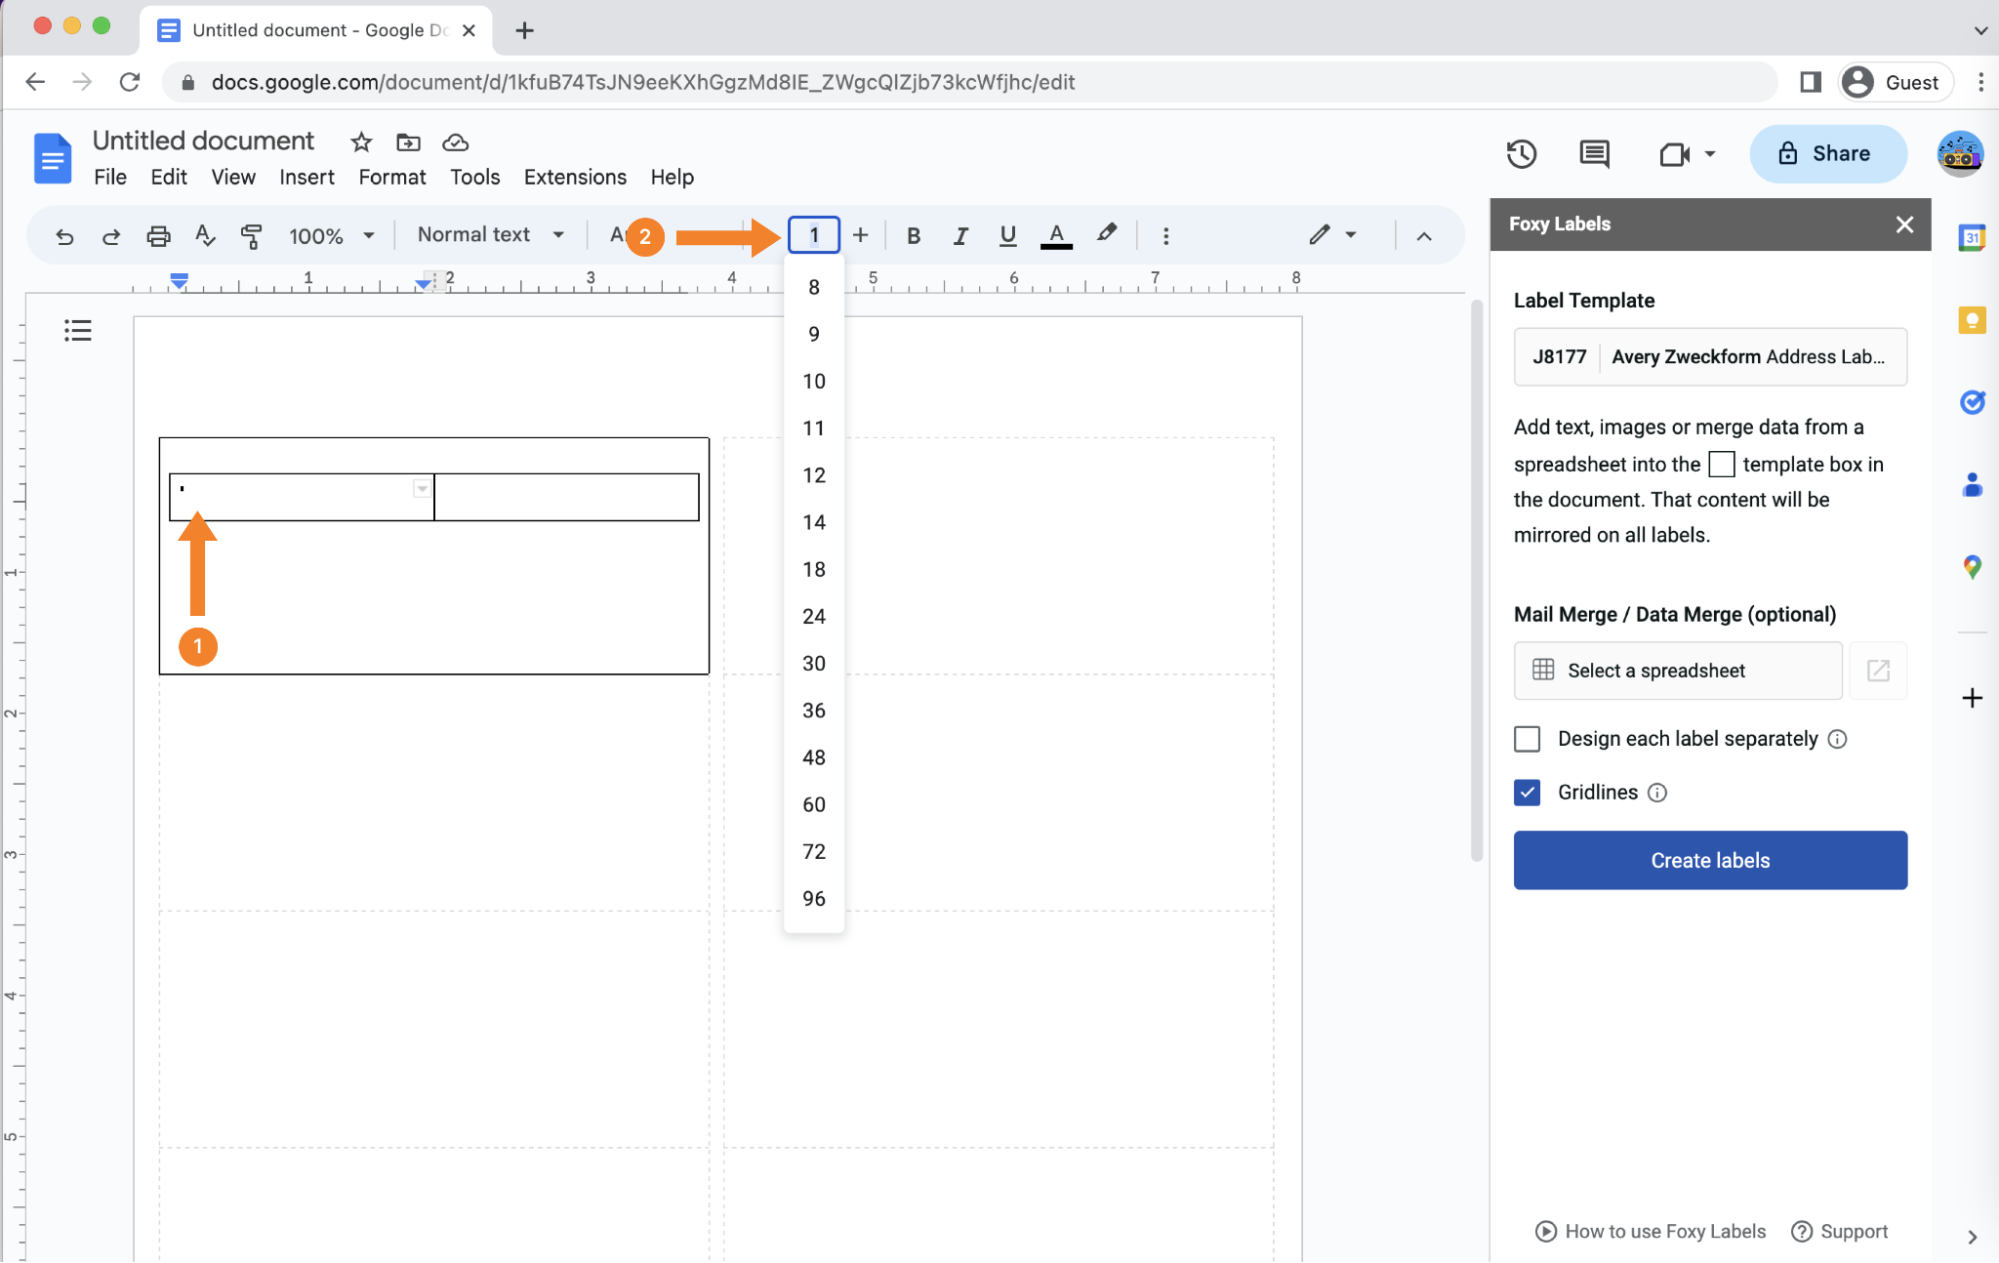
- First, click on the inside of the first cell of the grid (1) and decrease the font size to "1" (2).
- Go to the "Insert" menu/li>
- Select "Image" (step 1). You will find several different sources depending on where you prefer to store your images. We will upload a picture from the computer for this particular guide (step 2).

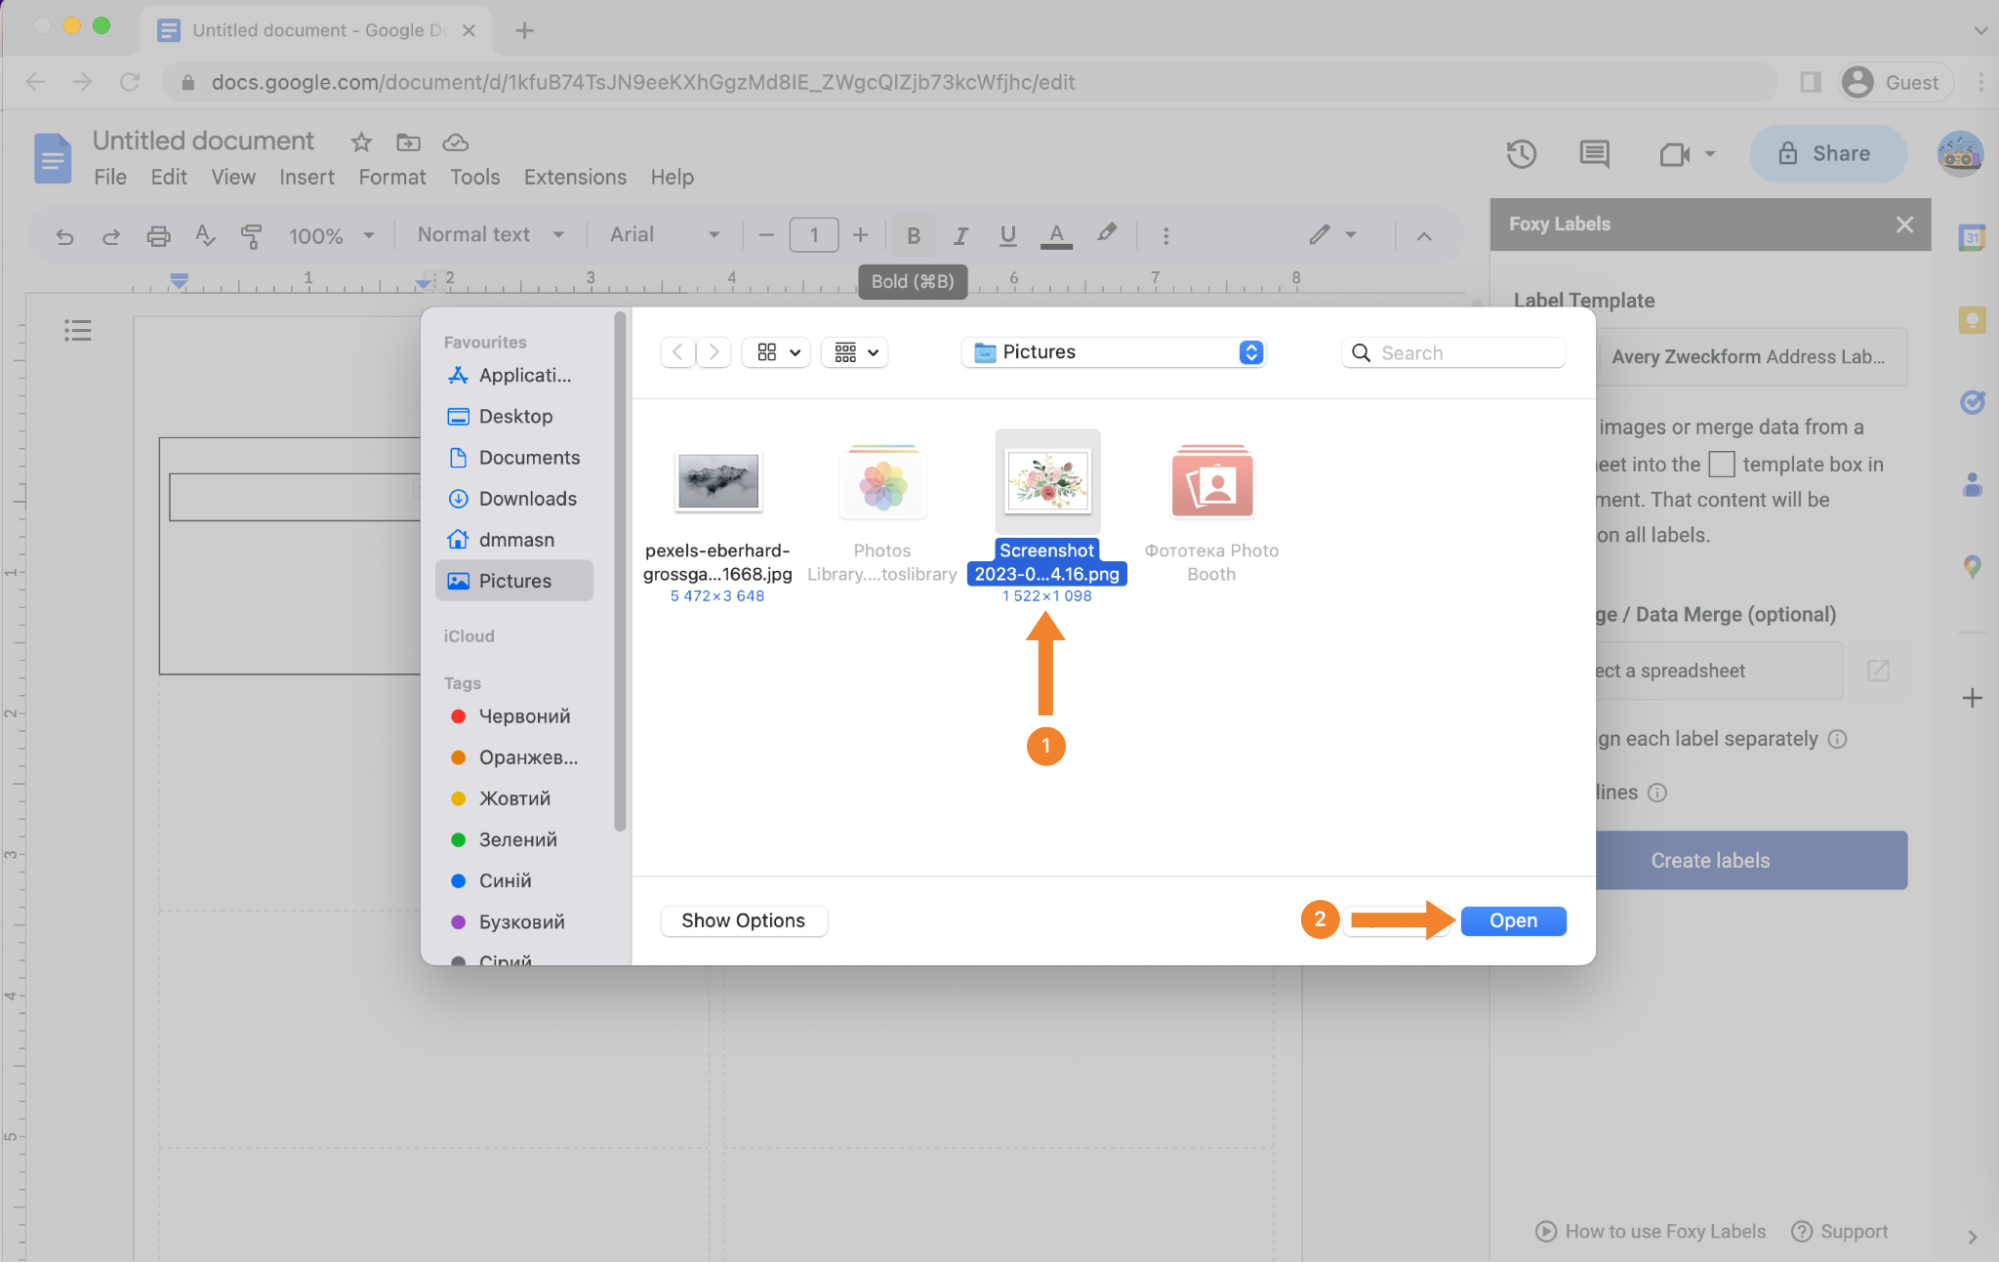
- Browse your file system until you find the image, select it (step 1), and then click “Open” (step 2).
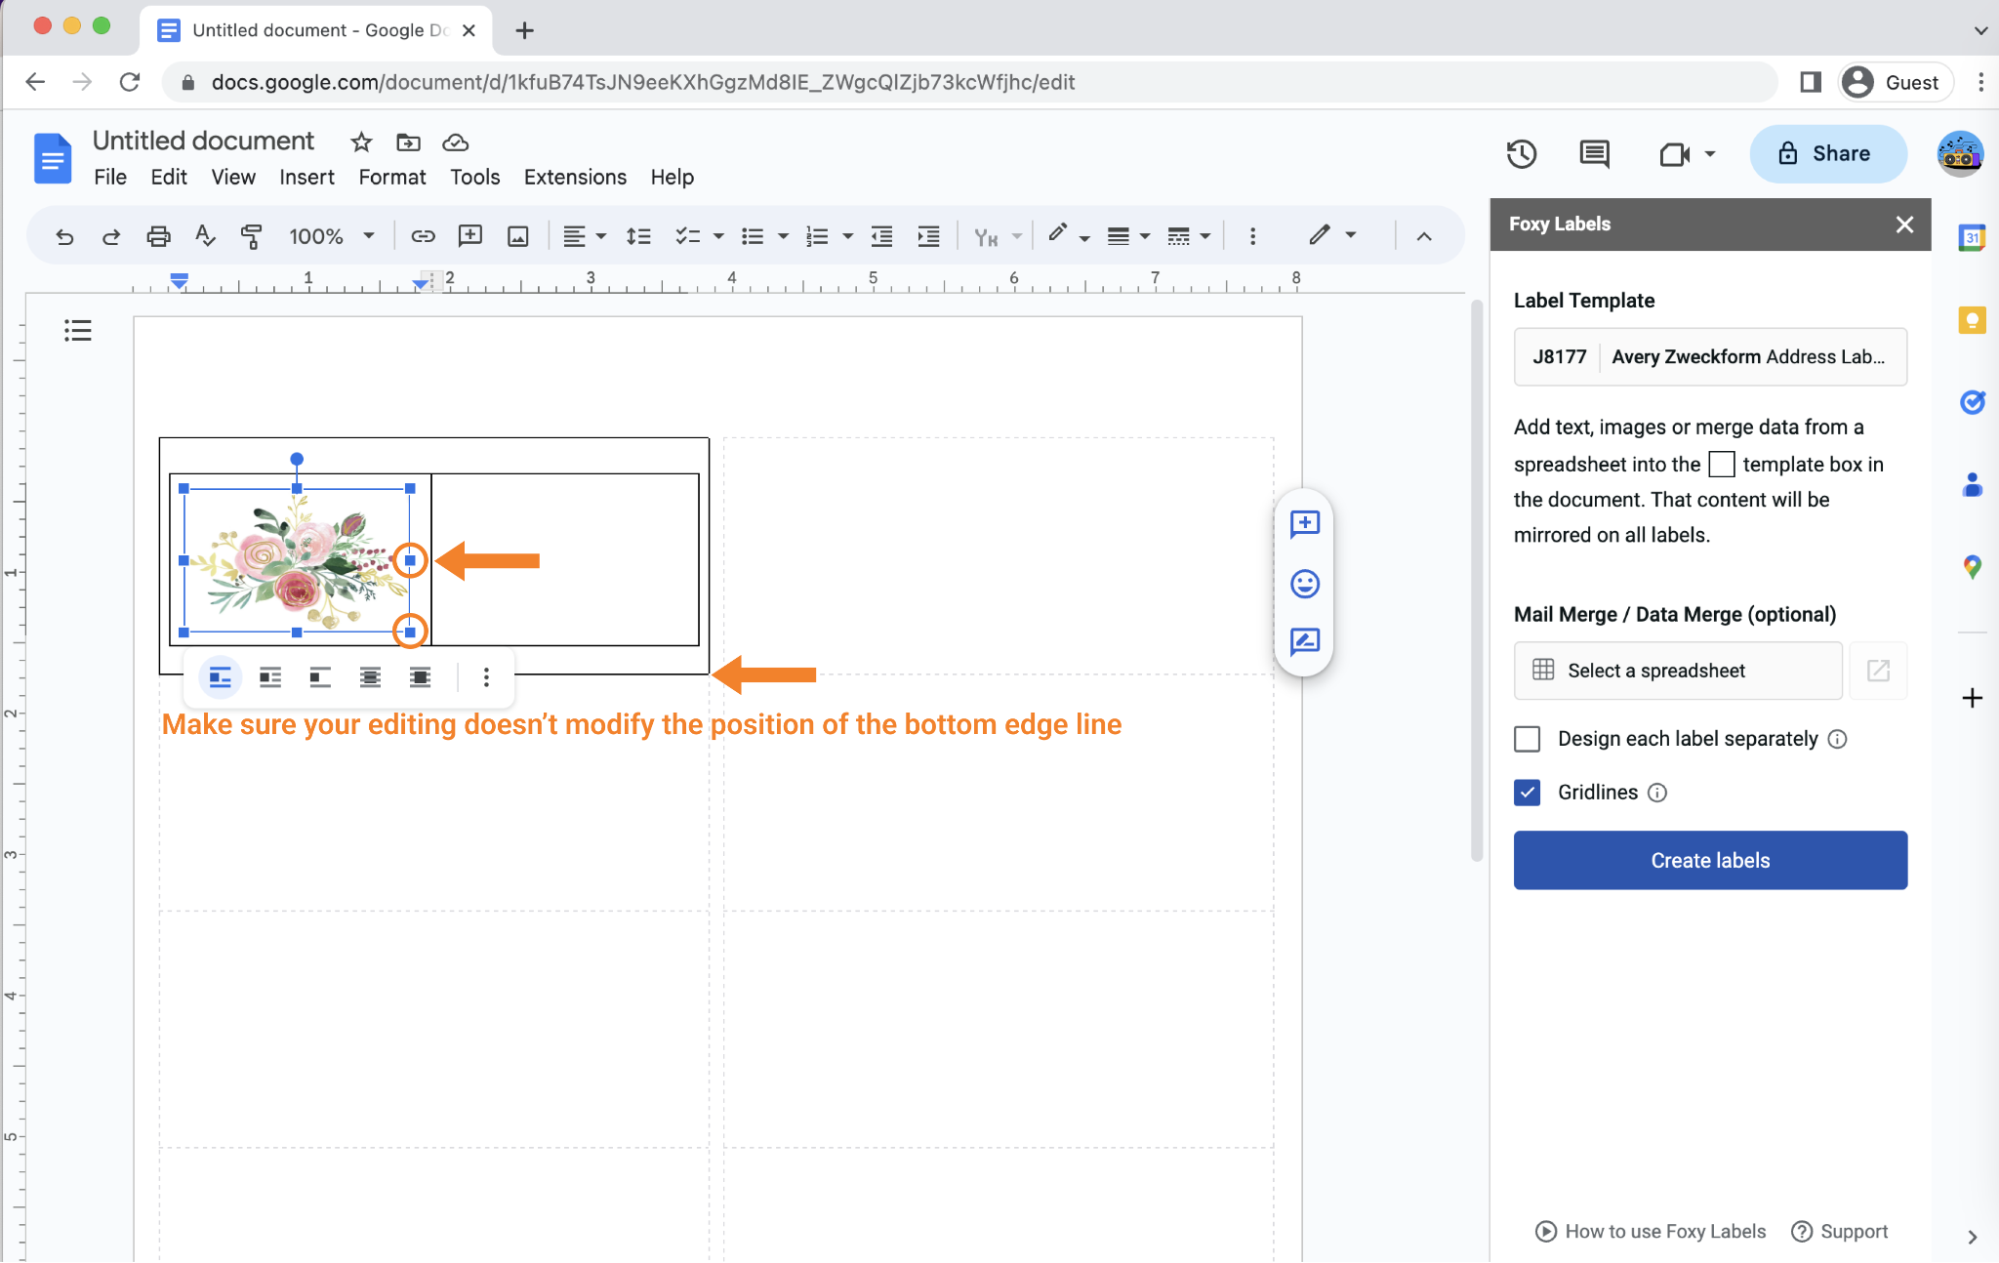
Your picture will appear in the left-hand section of the inner table. Its size may not match the template's requirements, but you can adjust it using the image editing tools available to ensure it fits neatly within the table section.
Select one of the highlighted points on the image's outline, and move it up or down or left or right based on its original size. Be careful not to alter the position of the bottom edge of the template's frame while adjusting the image's size and making other editings.
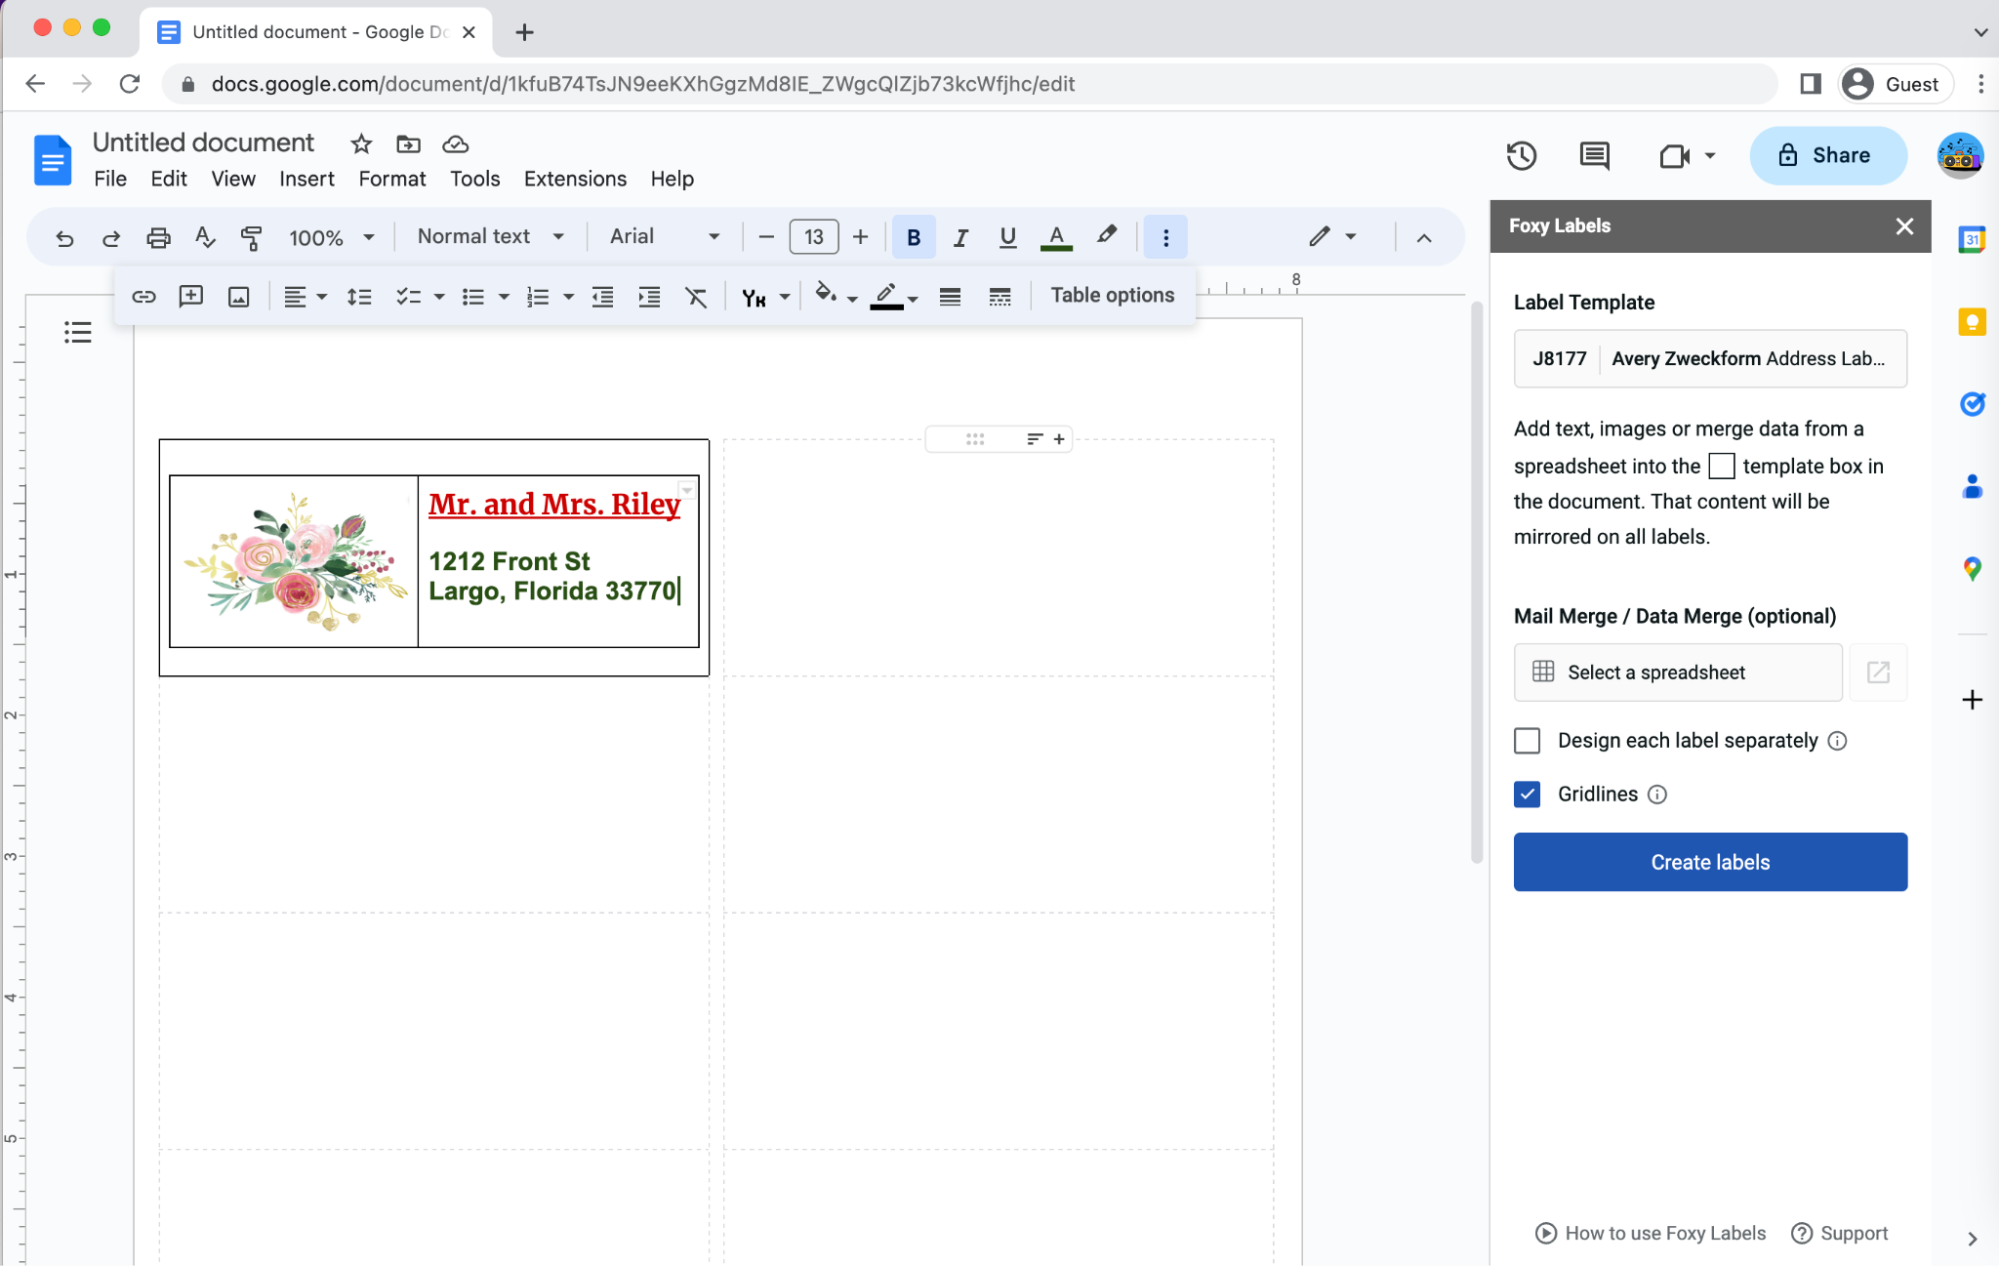
6. Add text and apply formatting
Now, you should proceed to the essential part of the document and include address information about your new family next to the picture on the other side of the table. You can apply all word-editing tools like color, size, alignment, etc. However, remember that the cell's external frame should maintain the same height as mentioned in the previous step. The only restriction to your editing is the cell's dimensions.
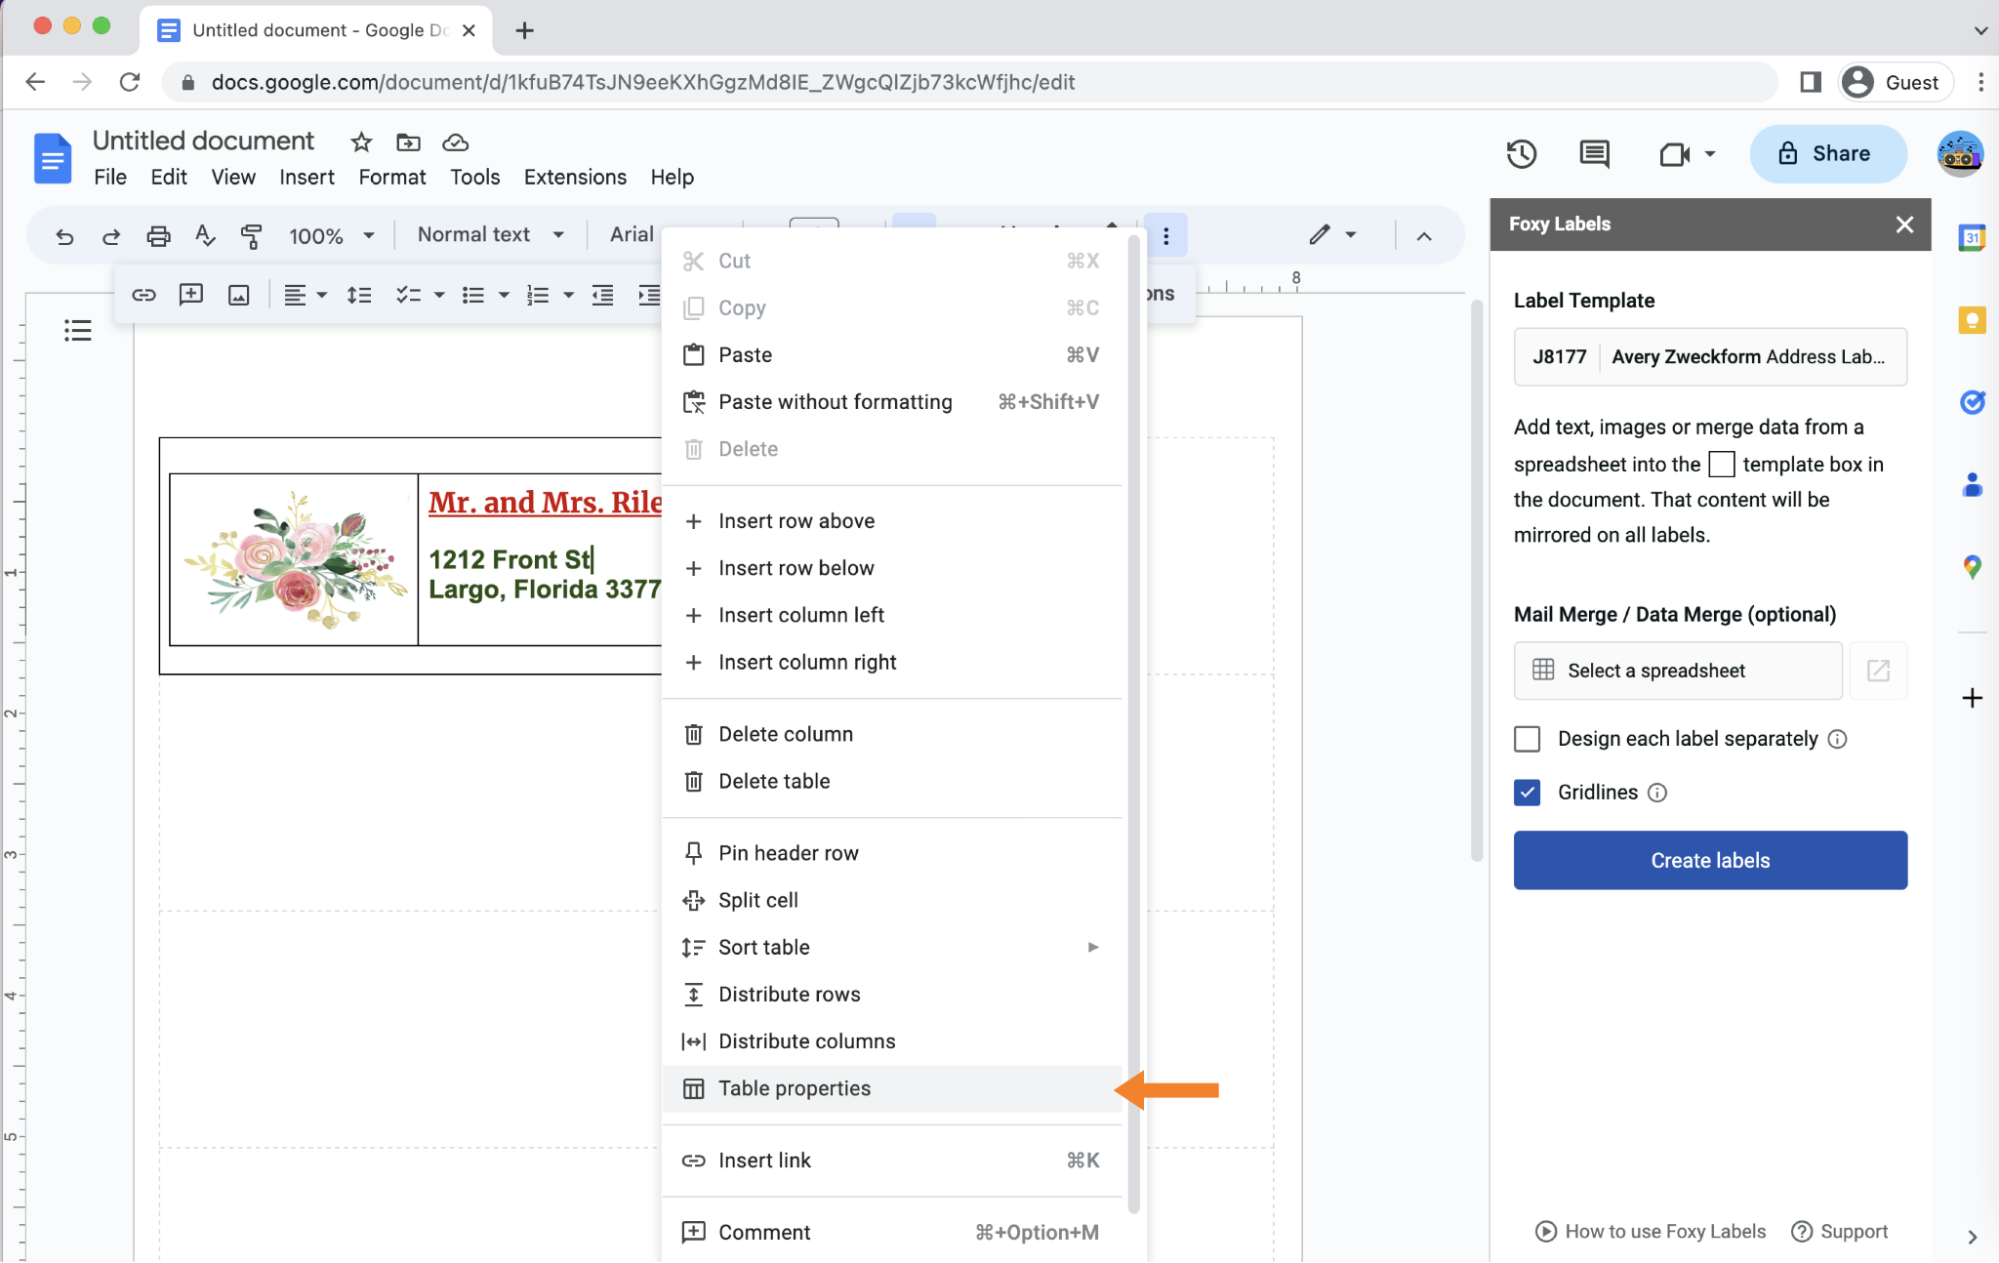
7. Remove the borders
Your finished labels will look complete if you remove the black borders from the outside of your design so they won't appear on your printed document. Right-click on the inner table and select "Table properties."
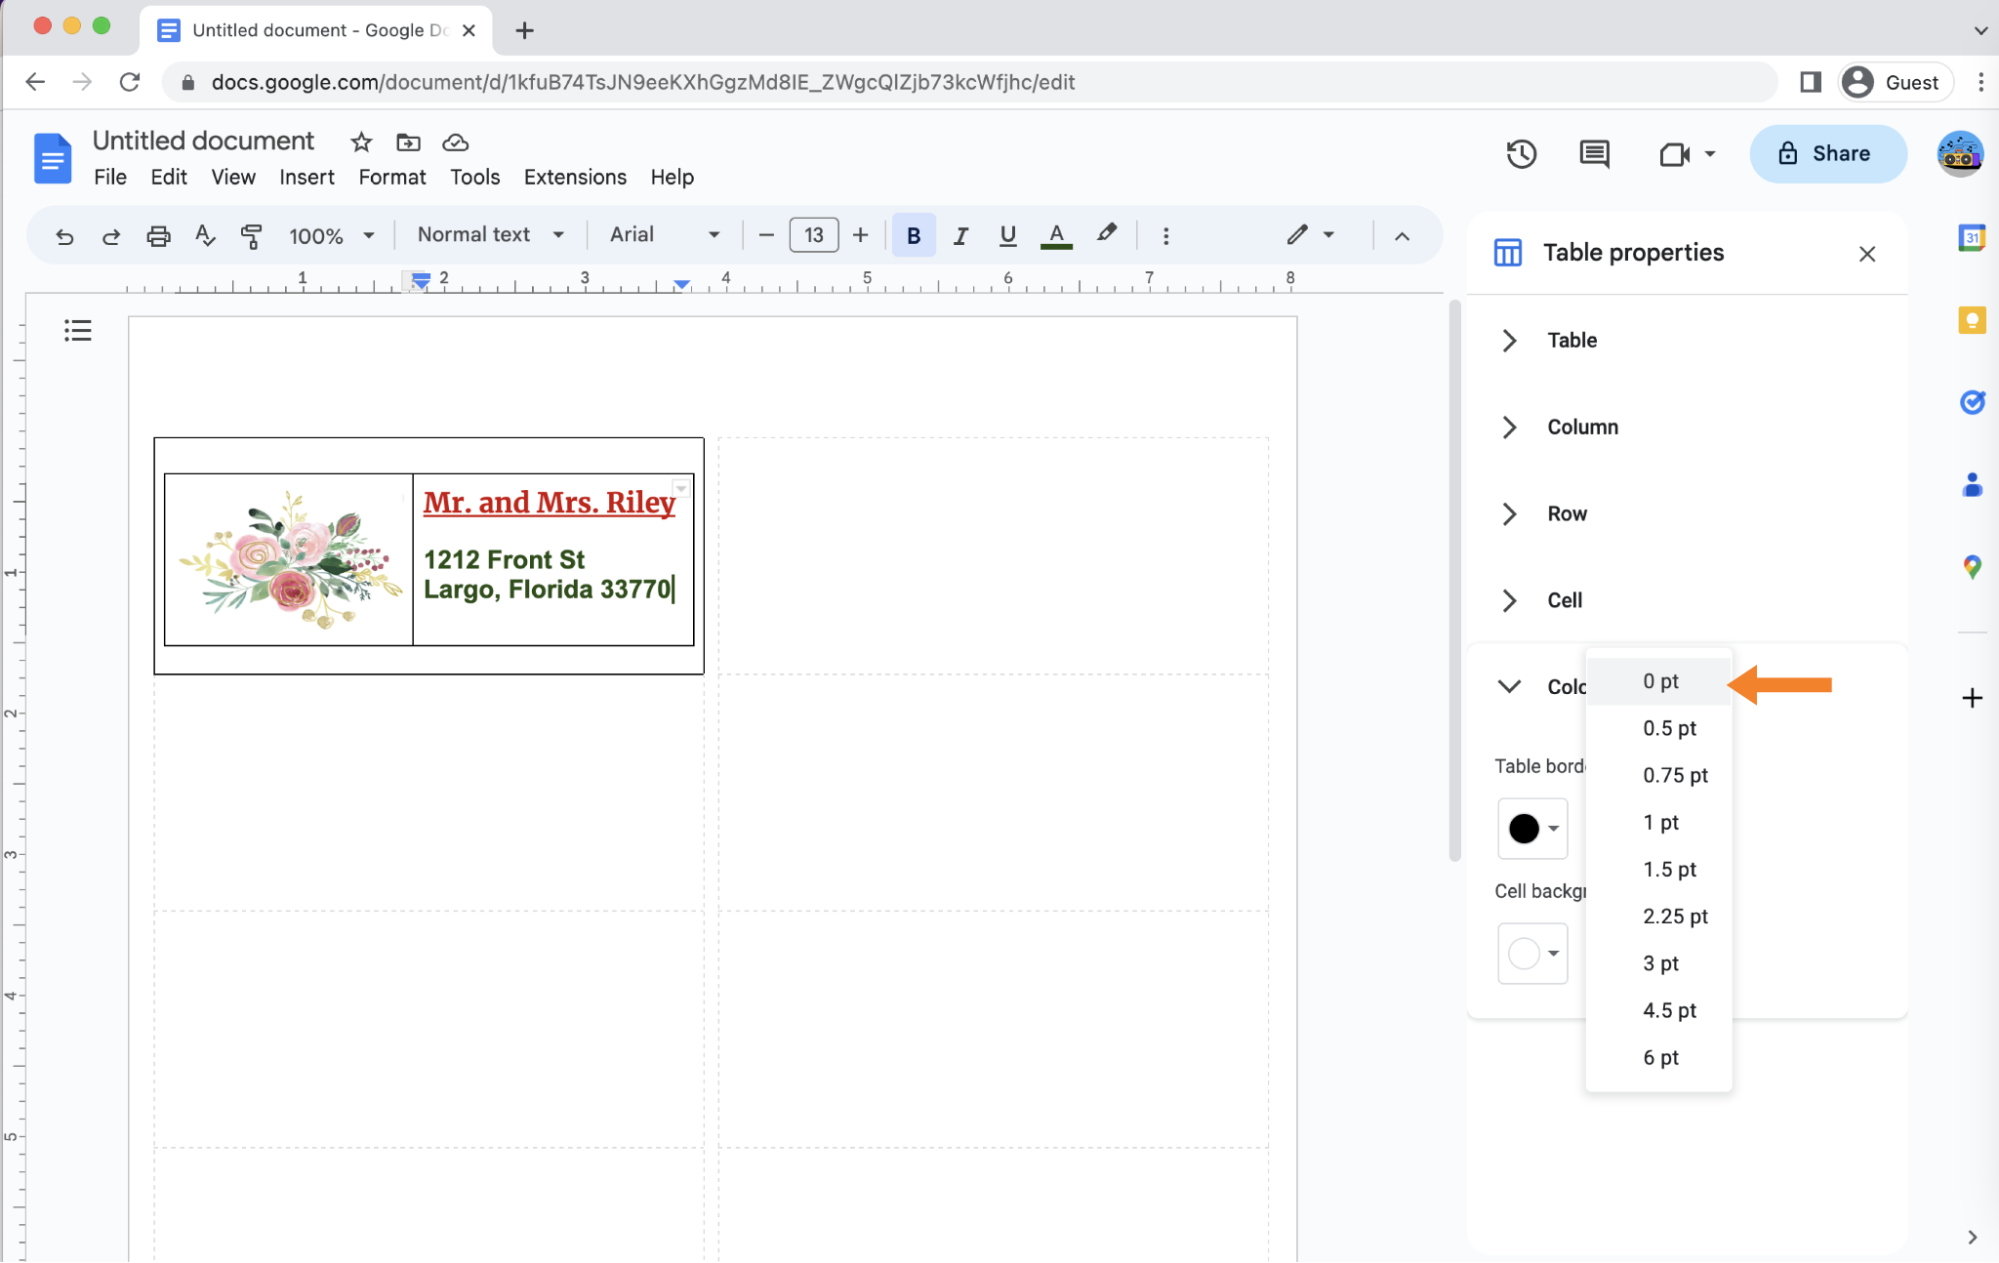
In the “Table border” section under the “Color” menu, change the value to “0 pt.”
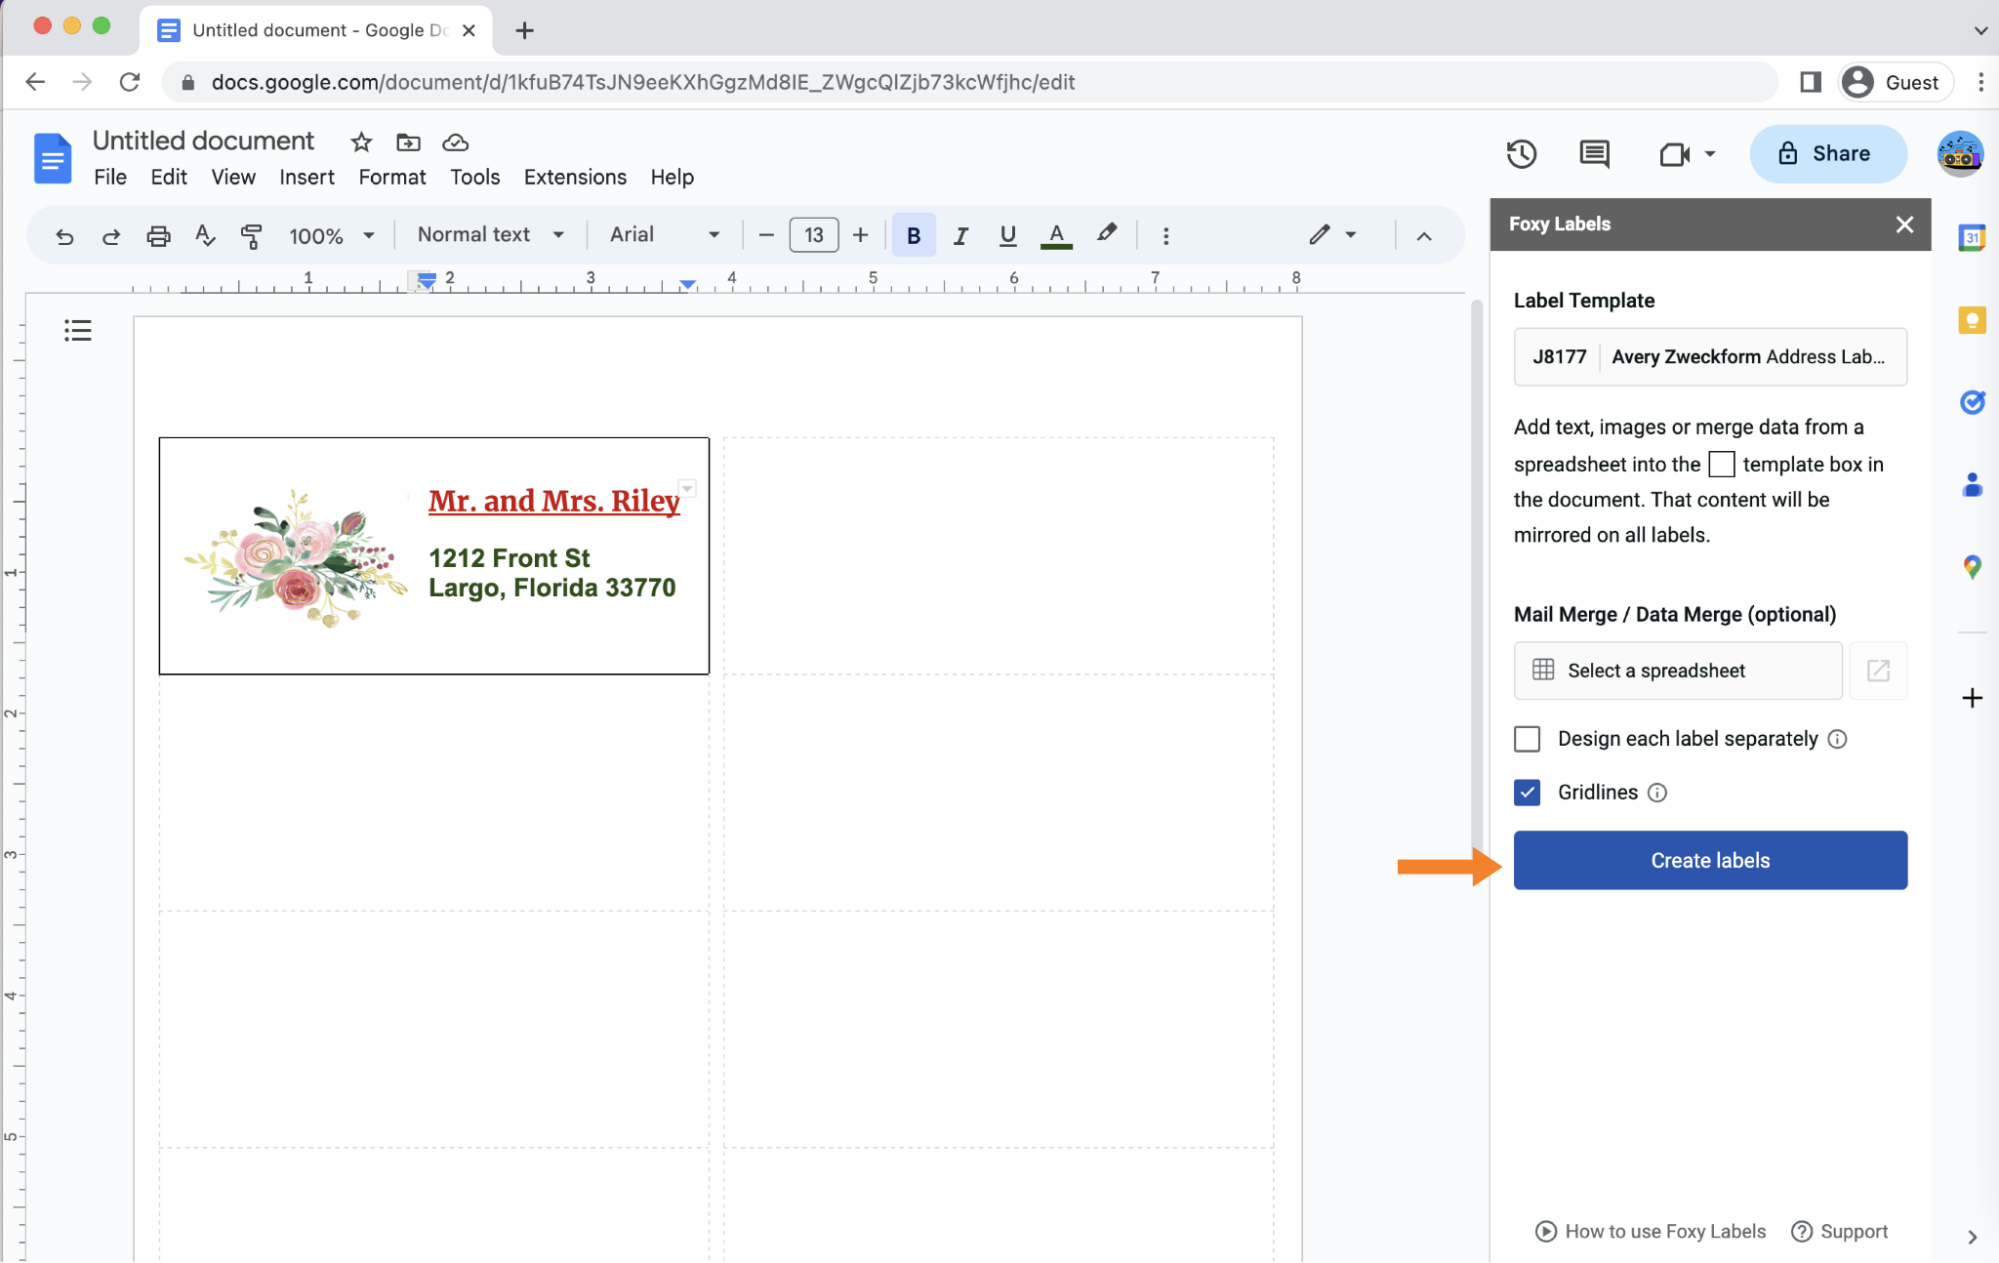
8. Create the labels
Everything looks fine! All you have to do now is click on "Create labels" and review your project.
9. Open and review the final document
Click "Open" at the bottom of the "Foxy Labels" sidebar. Your results will be available shortly.
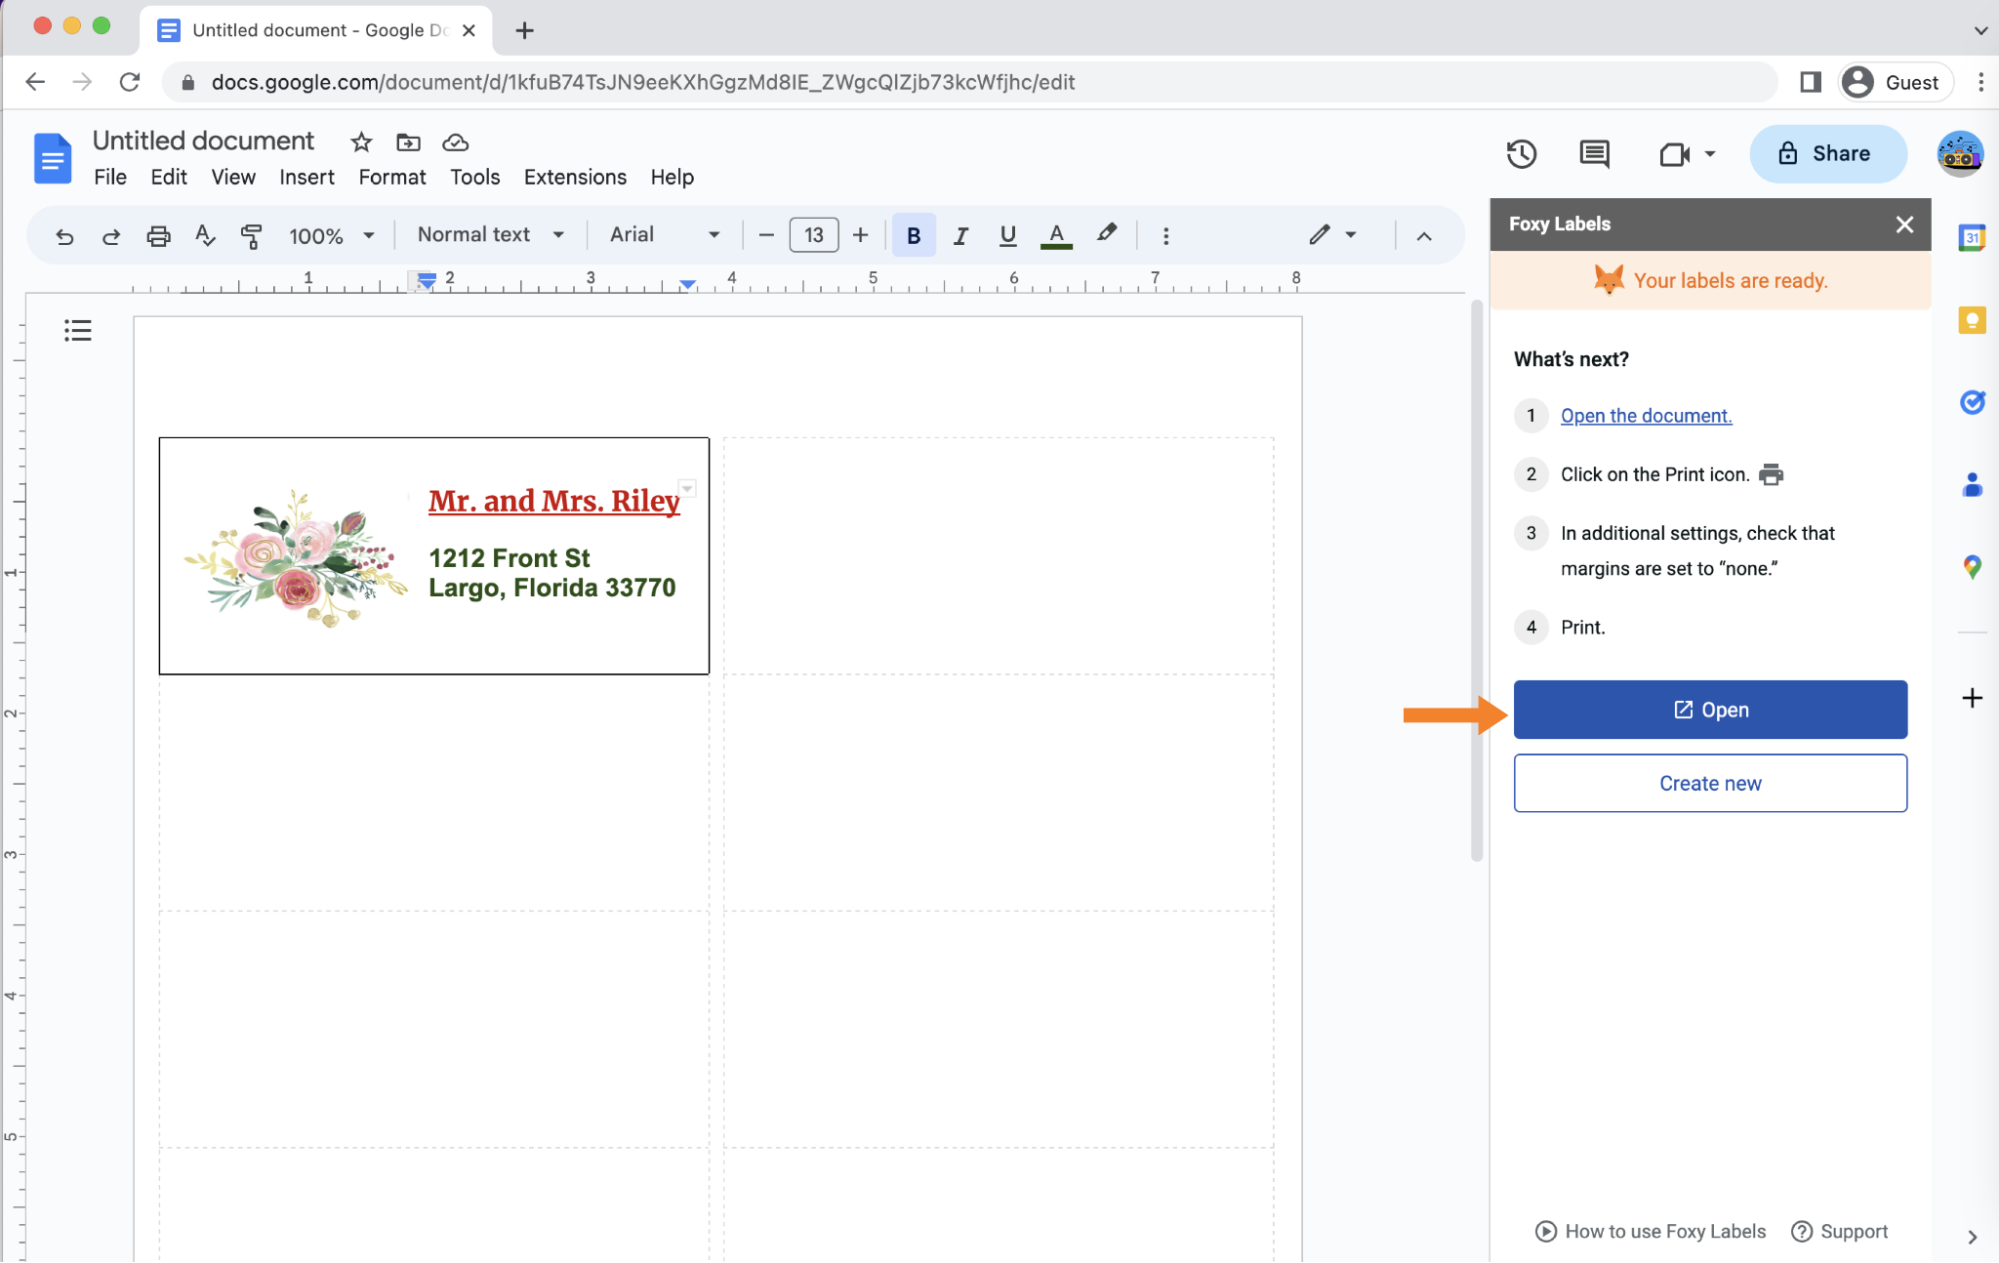
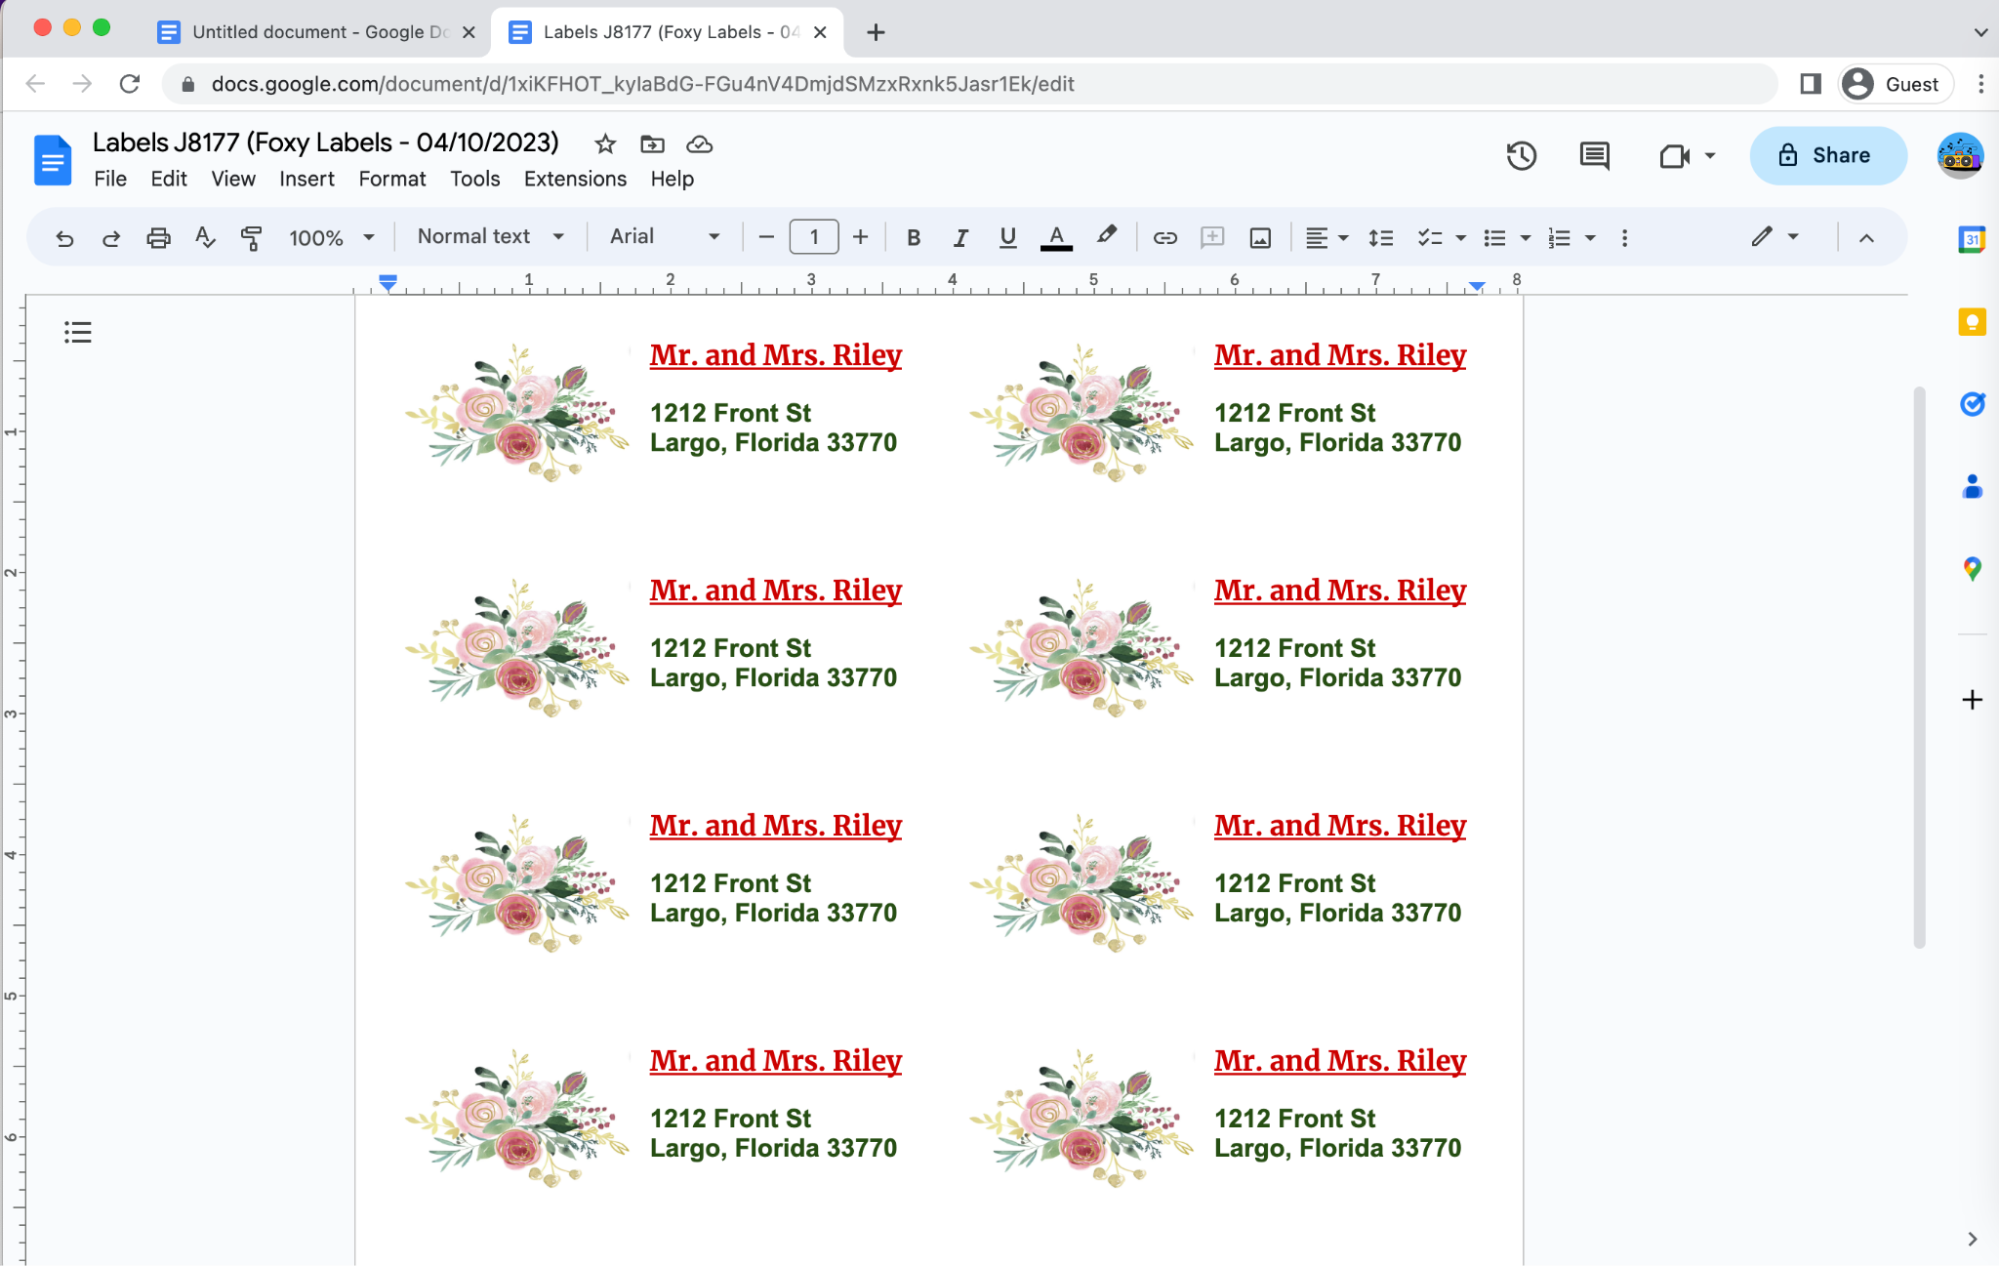
With Foxy Labels, you can create amazing personalized address labels with beautiful images in just a few minutes. From now on, a brief glance at the envelope or package will be enough to know that the mail has arrived from Mr. and Mrs. Riley.
10. Print your family-inspired address labels
Now it's time to put your custom labels to use! First, make sure your printer is loaded with the correct size label paper and has enough ink. Before printing:
- Double-check that everything is aligned correctly on your labels.
- If you need to make any changes, return to the original document and edit.
- Click "Create labels" again and open the updated copy.
To print your labels, go to "File" and select "Print." Ensure the margin is set to "none" in the print dialogue and the scale is 100%. You may need to adjust the page size depending on your label format.
So what are you waiting for? Give Foxy Labels a try and design your personalized address tags today! Creating family-style labels is a great way to simplify your mailing affairs, and with the help of Foxy Labels, it's an effortless task.