Picture a sunny day in Cleveland, Ohio, where Bettie and Jim Morgan are busy planning their annual 4th of July family gathering. They want this year's celebration to be extra special, with a touch of personalization that will leave a lasting impression on their loved ones. What better way to do that than creating unique, custom bottle labels for their Independence Day beverages?
Welcome to our step-by-step tutorial on how to use the versatile Google Docs extension, Foxy Labels, to design and print one-of-a-kind bottle labels for any special occasion. In this guide, we'll walk you through designing striking and memorable labels for your Independence Day celebration, just like Bettie and Jim. So gather your creative juices, and let's embark on a journey that will transform your ordinary bottles into incredible souvenirs that your guests will cherish long after the fireworks have faded!
1. Open a Blank Document
First, you need to open a new Google Document. The handiest method is navigating to the link https://docs.new, which generates and launches a blank document.
2. Launch Foxy Labels
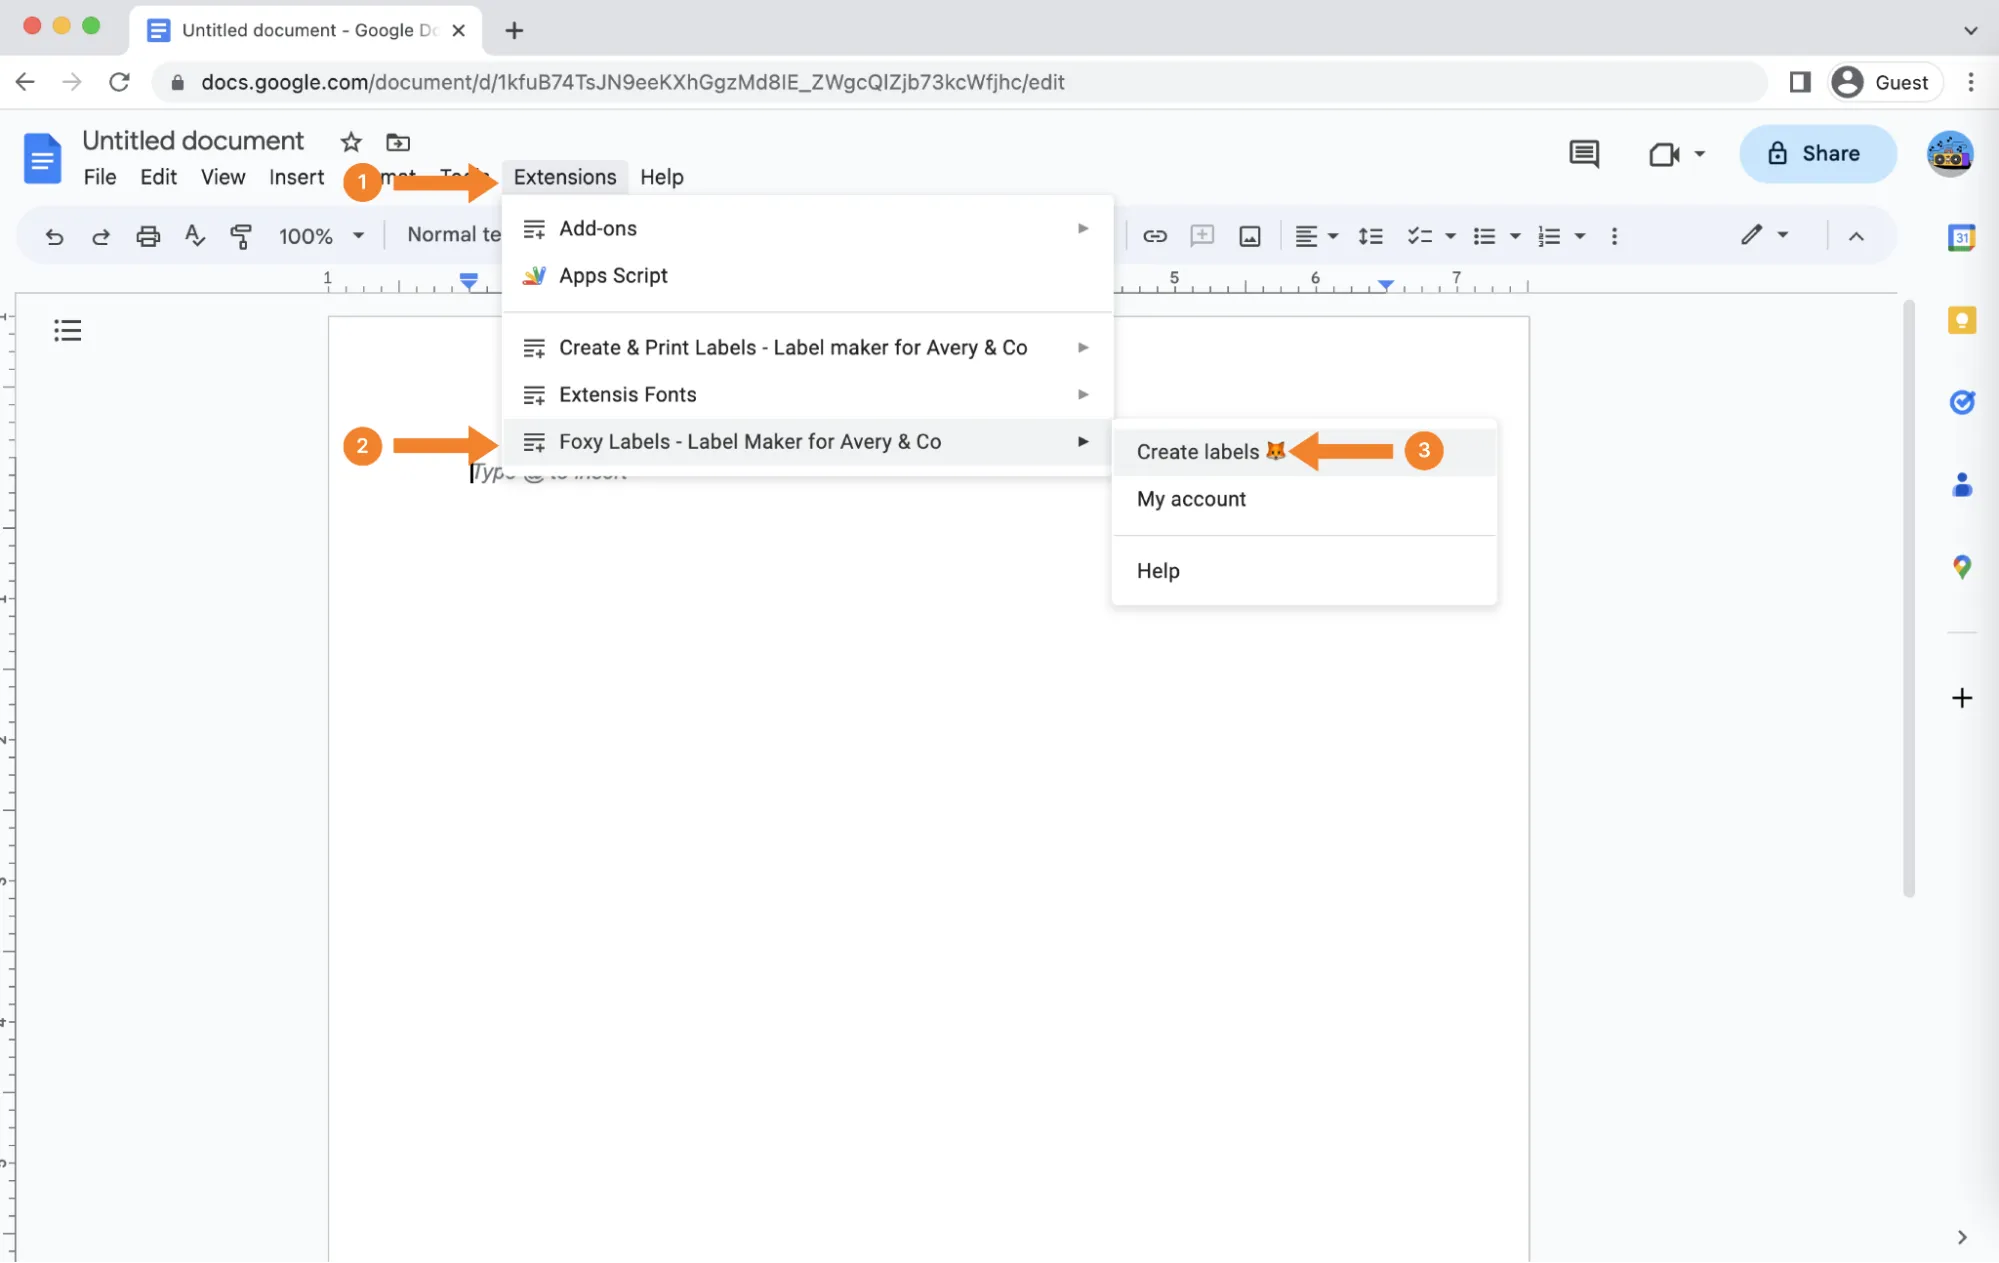
Make sure to install the extension if you don't have it yet. After the plugin is set up, click on "Extensions" (1), access the "Foxy Labels - Label Maker for Avery & Co" menu (2), and opt for "Create labels" (3).
3. Select a template
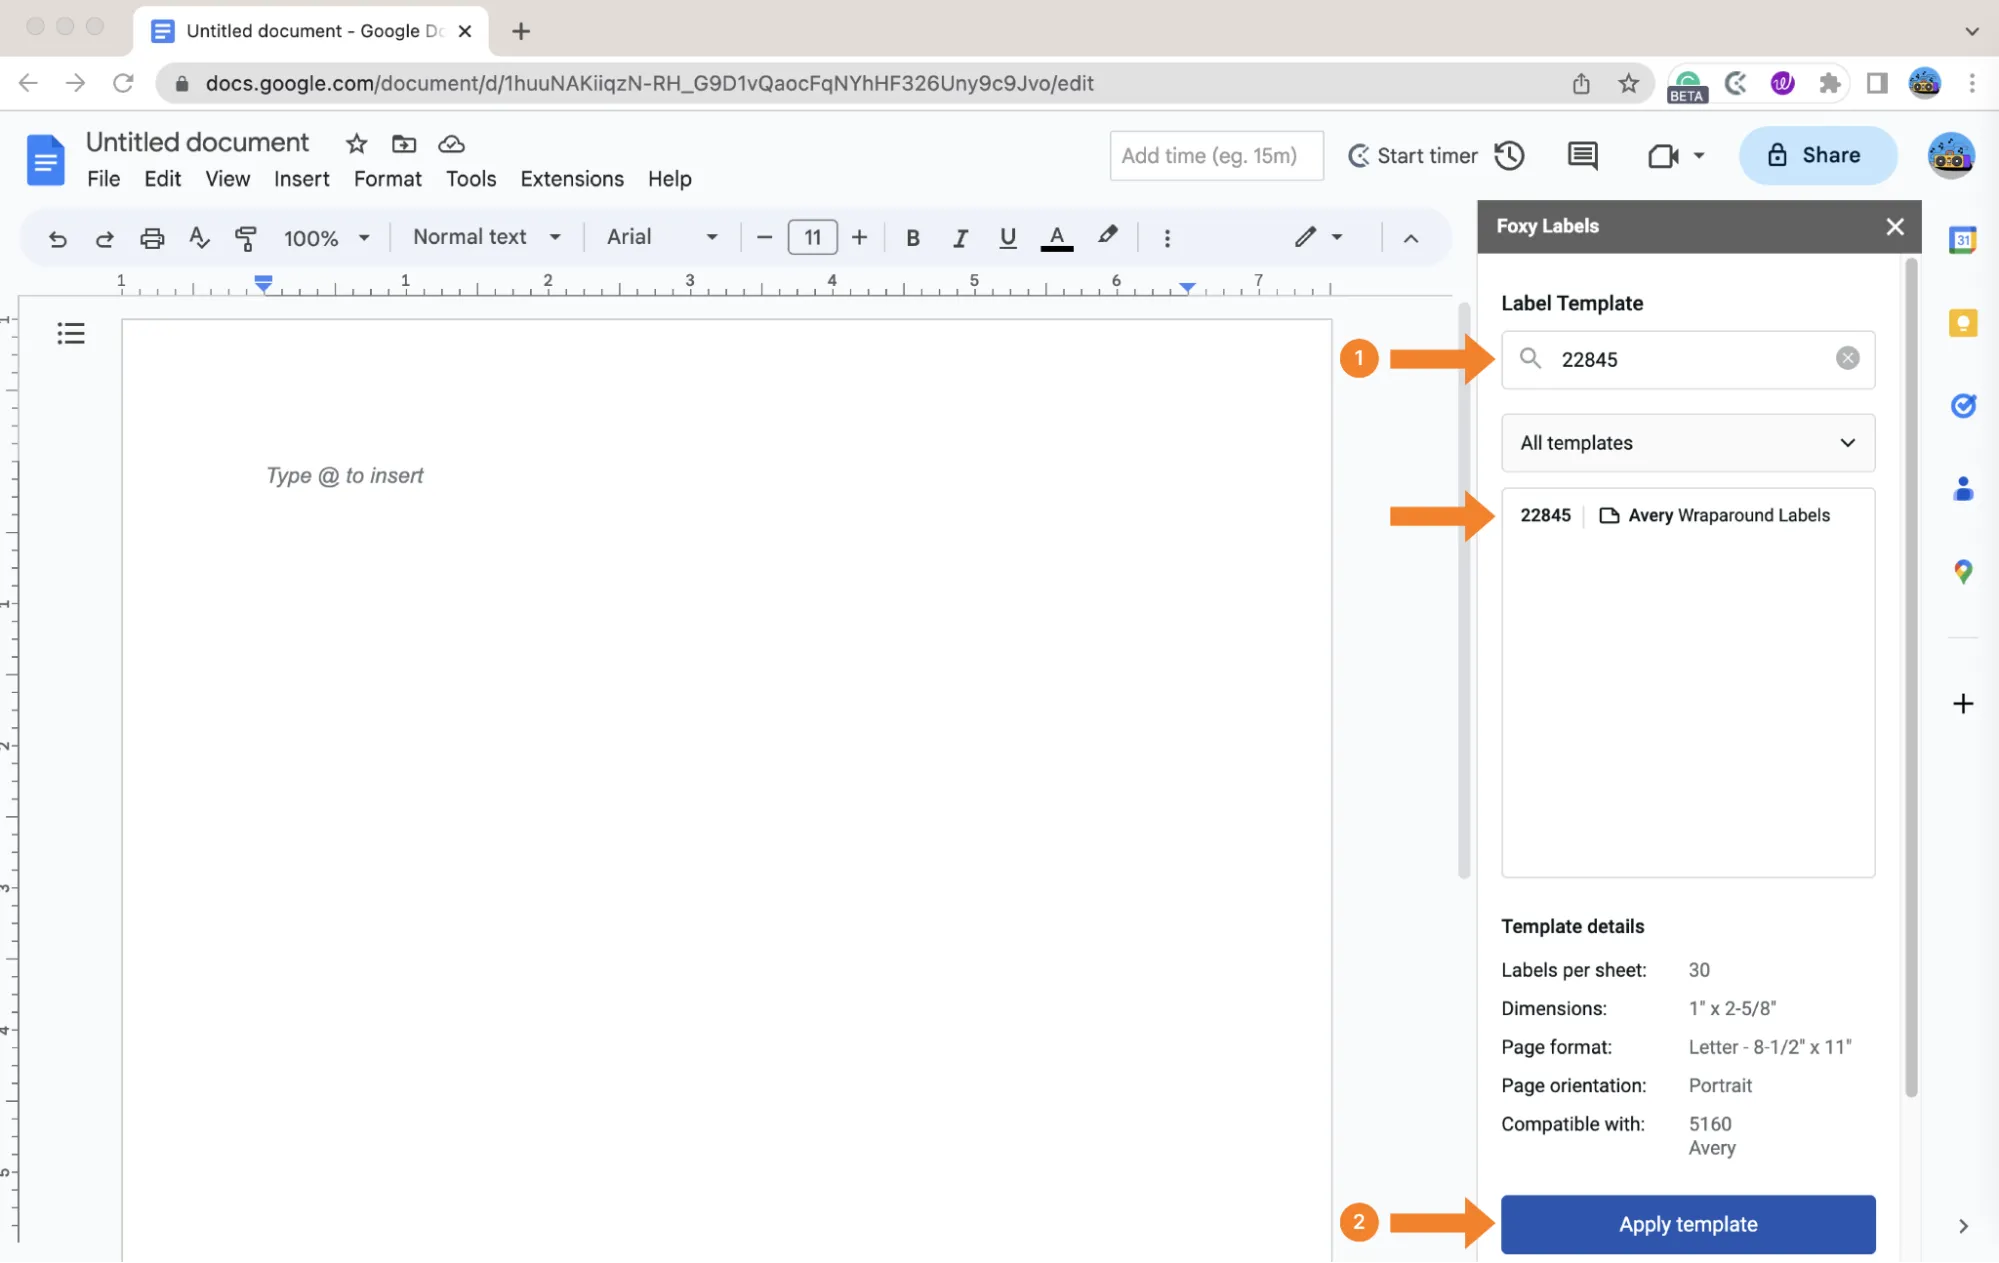
As you aim to create bottle labels, a specific template is required for this task. Fortunately, Foxy Labels provides a wide range of options to accommodate different customer requirements, making the search for an appropriate template a breeze. Input the template code 22845 into the search bar in the Foxy Labels sidebar (step 1), or locate it by exploring the All templates list. After identifying the desired template, click on it and press the "Apply template" button (step 2). The template will promptly be displayed on your screen.
4. Design your bottle labels
There are plenty of ways you can design your special bottle labels, and the only thing that limits your creativity is only the dimensions of the template. The following design may inspire you to adopt certain ideas or encourage you to explore Google Docs' editing features to develop your exceptional project.
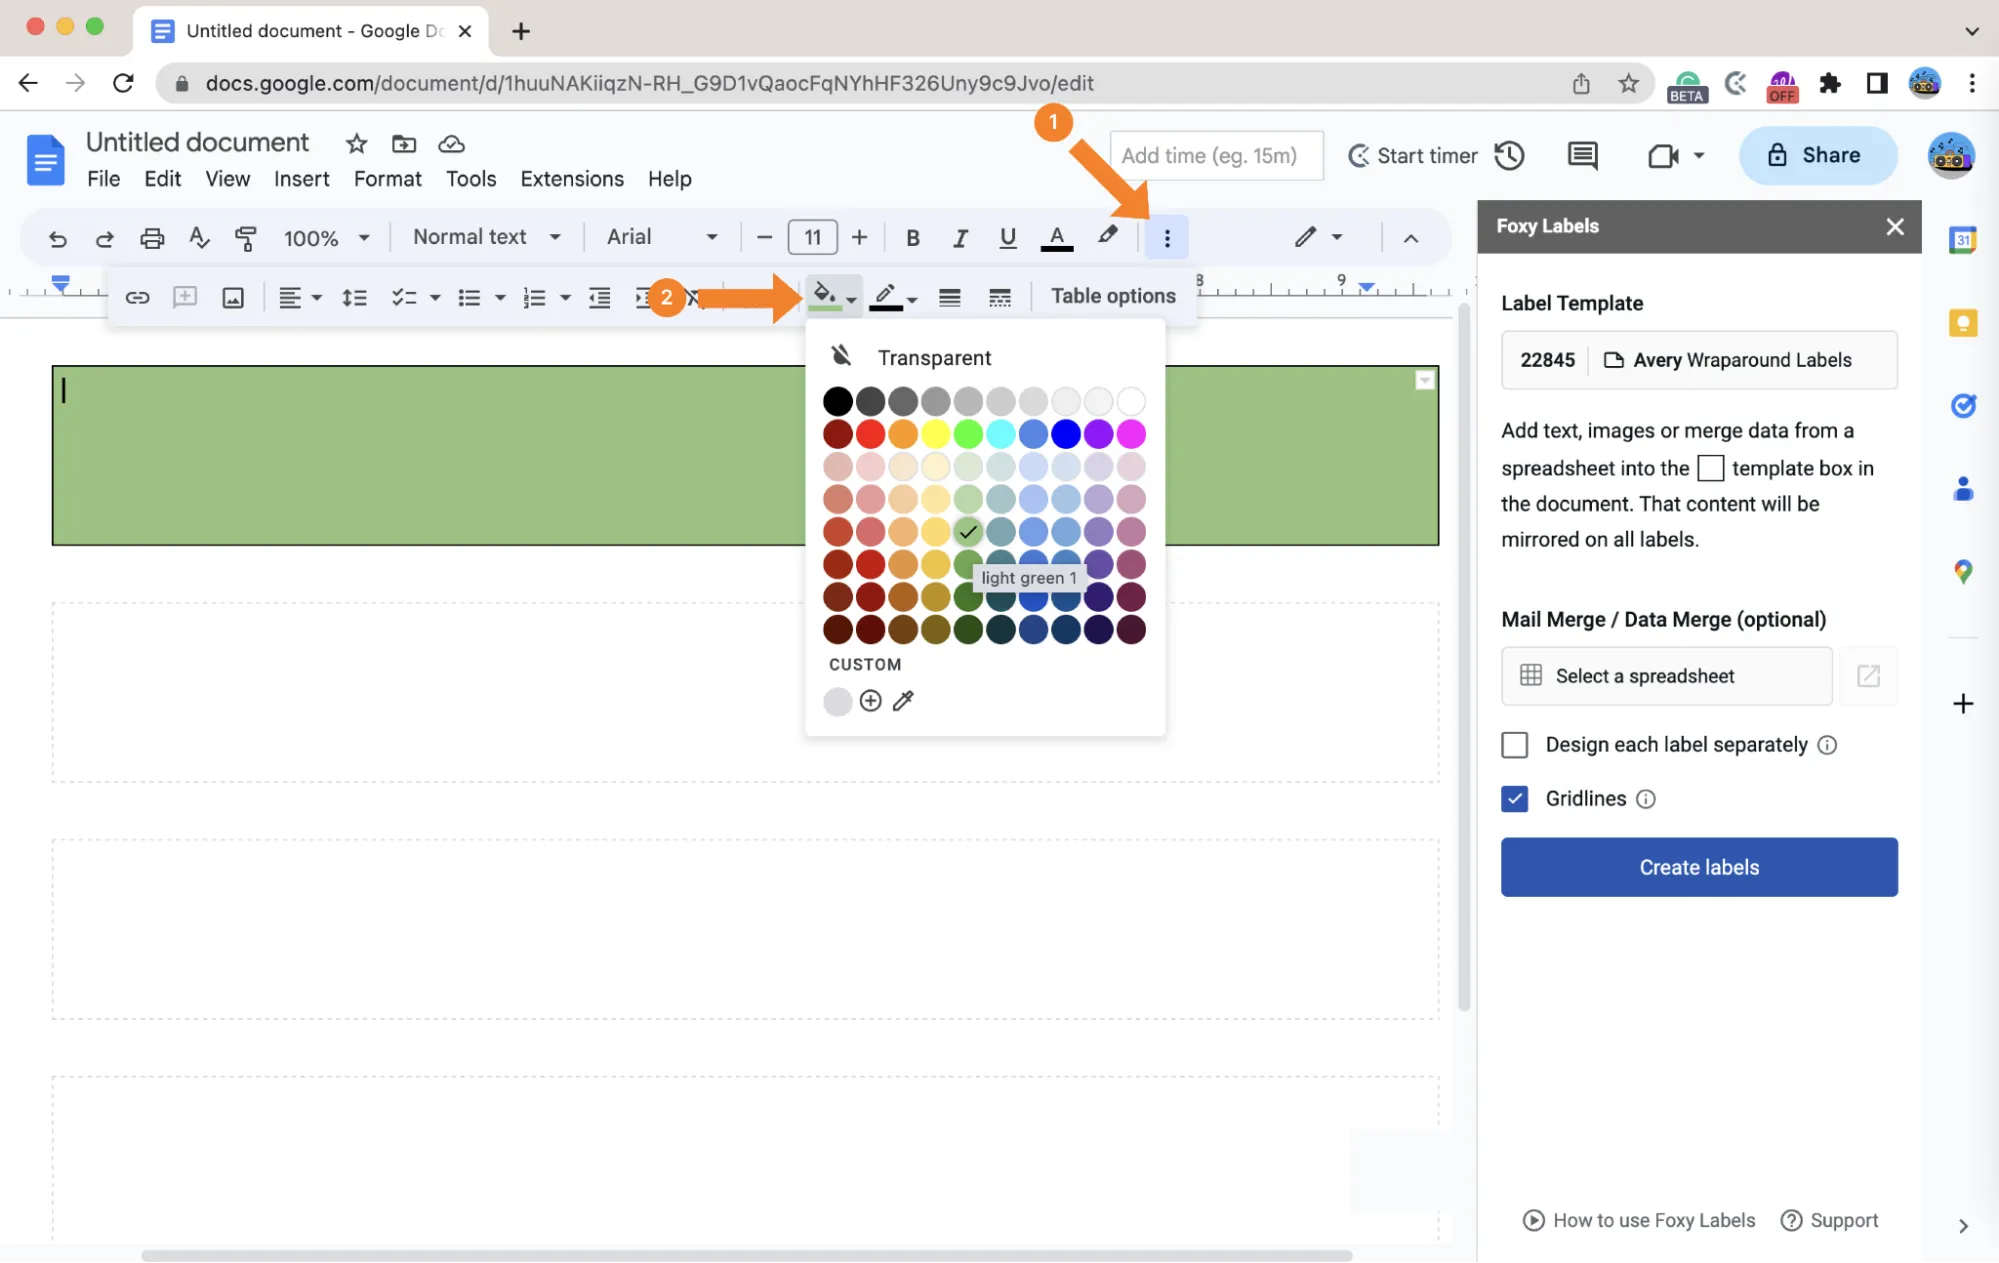
4.1 Fill the frame with a background colorClick on the menu icon "More" (step 1) to request additional editing options. The one we are looking for is called "Background color." Click on it (step 2), and select the color you like from the palette of available options.
 4.2 Add the text
What else can we write on our bottles on the 4th of July? Of course, it's "Happy Independence Day!"
Click on the inside of the template and write the greeting (step 1). Apply "Center" alignment. Otherwise, your labels will look awkward once on the bottles. In our case, the font is Trebuchet MS, and the font size is 25.
Now, let's make the words a little more patriotic by using our national colors: blue for the "Happy," white for the "Independence," and red for the "Day." It is just an example, and you don't have to follow the same pattern.
Double-click on the word "Happy" to select it (step 2). Then click on the icon "Text color" to view all of them and choose blue (step 3). Duplicate these steps for the remaining words, applying different colors.

Bettie and Jim are working to create memorable festive bottle labels, so they chose to immortalize the day by including their names and the location of the celebration.
Click within the template's frame once more and input any extra details you may want to add. In our example, we have "Bettie and Jim Morgan, Cleveland, 2023," written in Comfortaa font with a font size of 12 and centered alignment.
 4.3 Decorate the labels with emoji
The labels on the bottles already stand out, showcasing the festive event and the location of the celebration. However, with Foxy Labels and Google Docs, you can enhance the appeal of the bottles on your party table, further captivating your guests. Let's embellish these labels with fitting emojis.
Place your cursor in front of the word “Happy” and click on the “Insert” menu. Select “Emoji” from the dropdown menu.
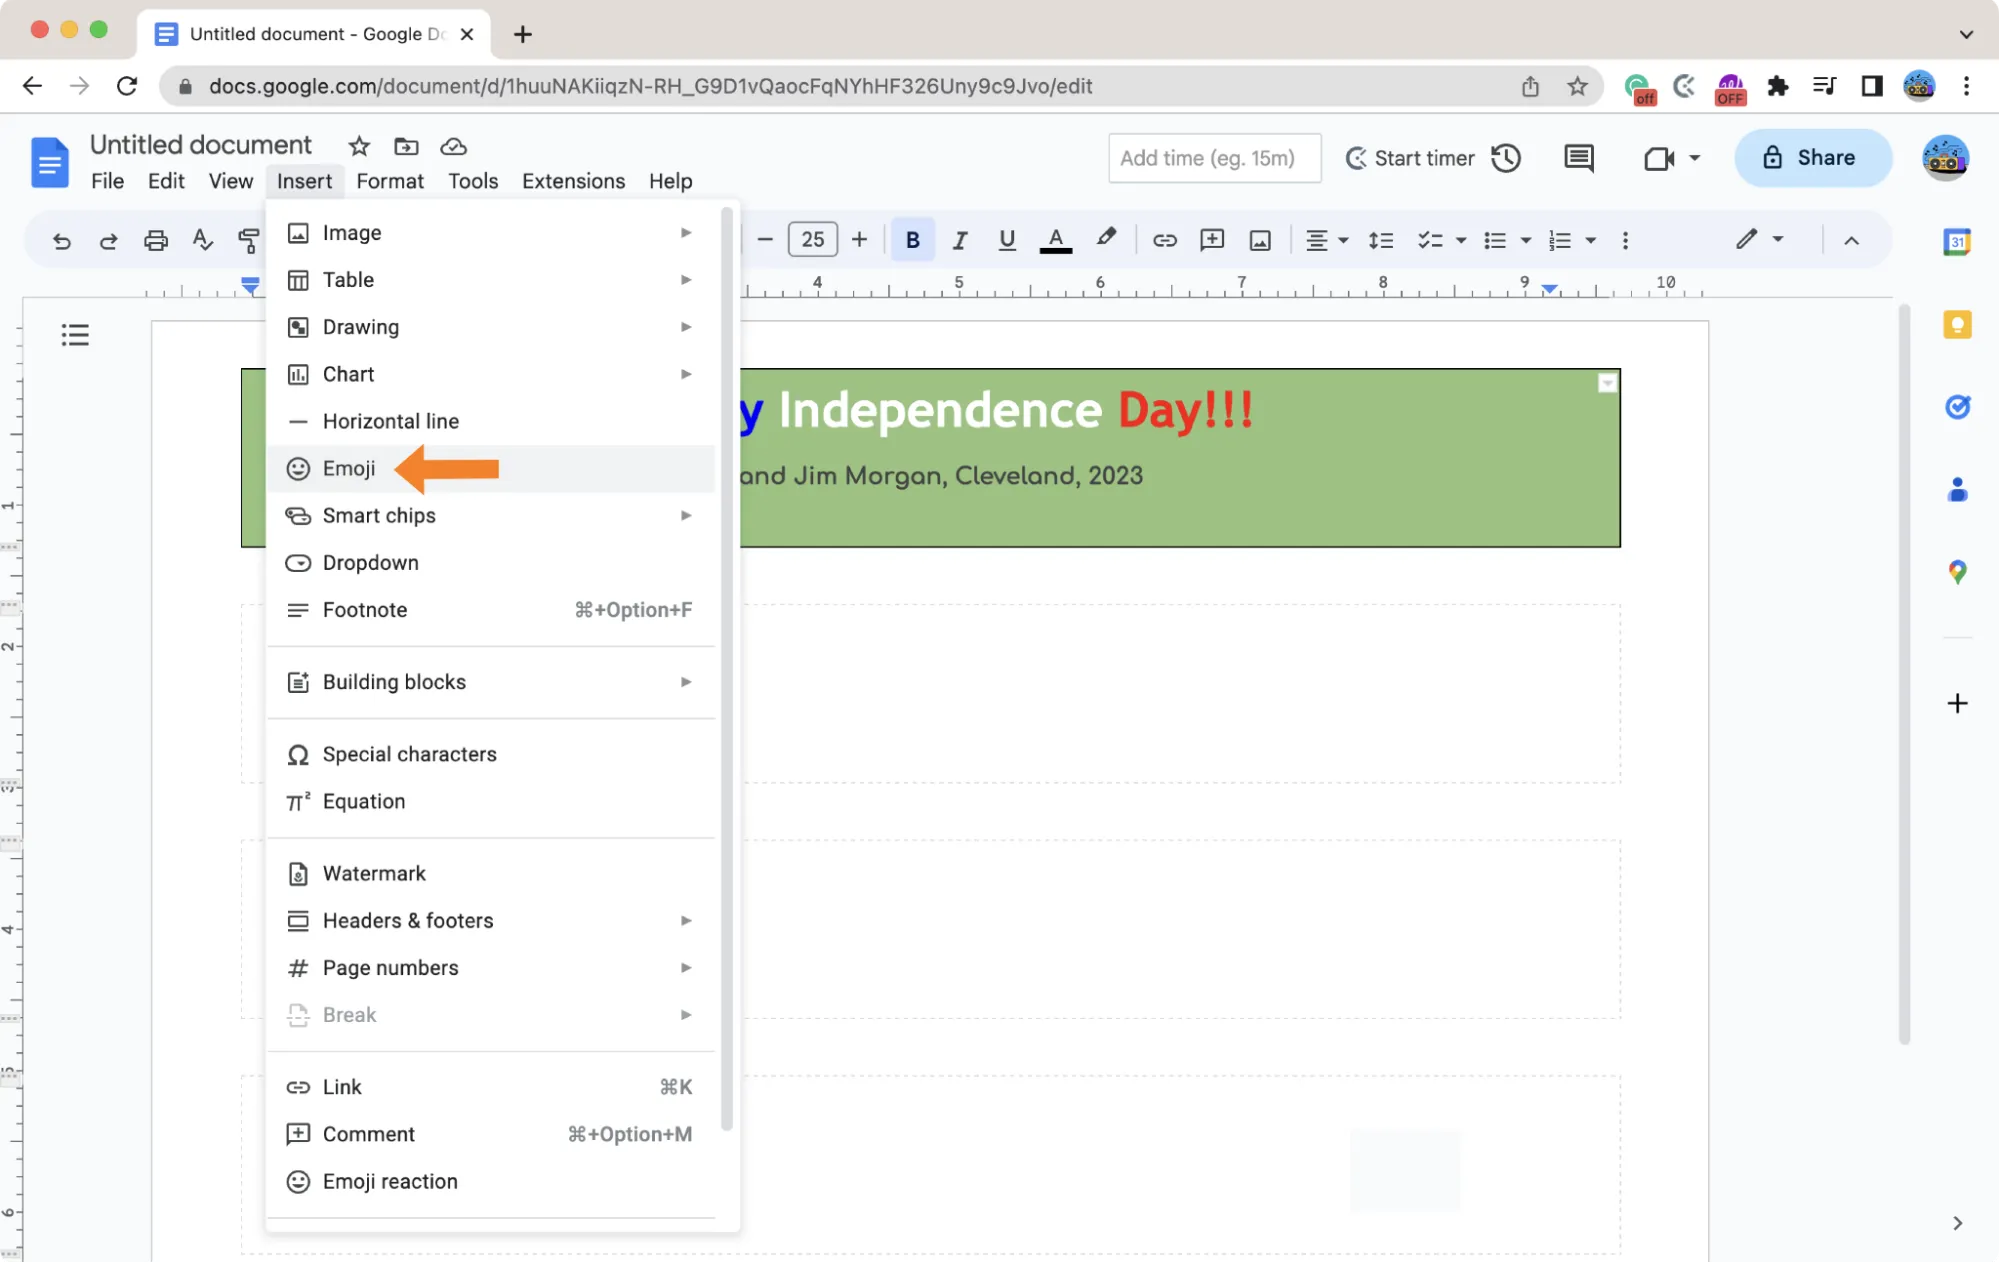
As we celebrate another year of American independence, opt for the Statue of Liberty, the star, and the US flag emojis. Browse through the available emojis to locate those appropriate for the holiday. You can search for specific emojis by typing their names in the search bar if you know what you want. Click on the desired emoji, and it will be added to the document.
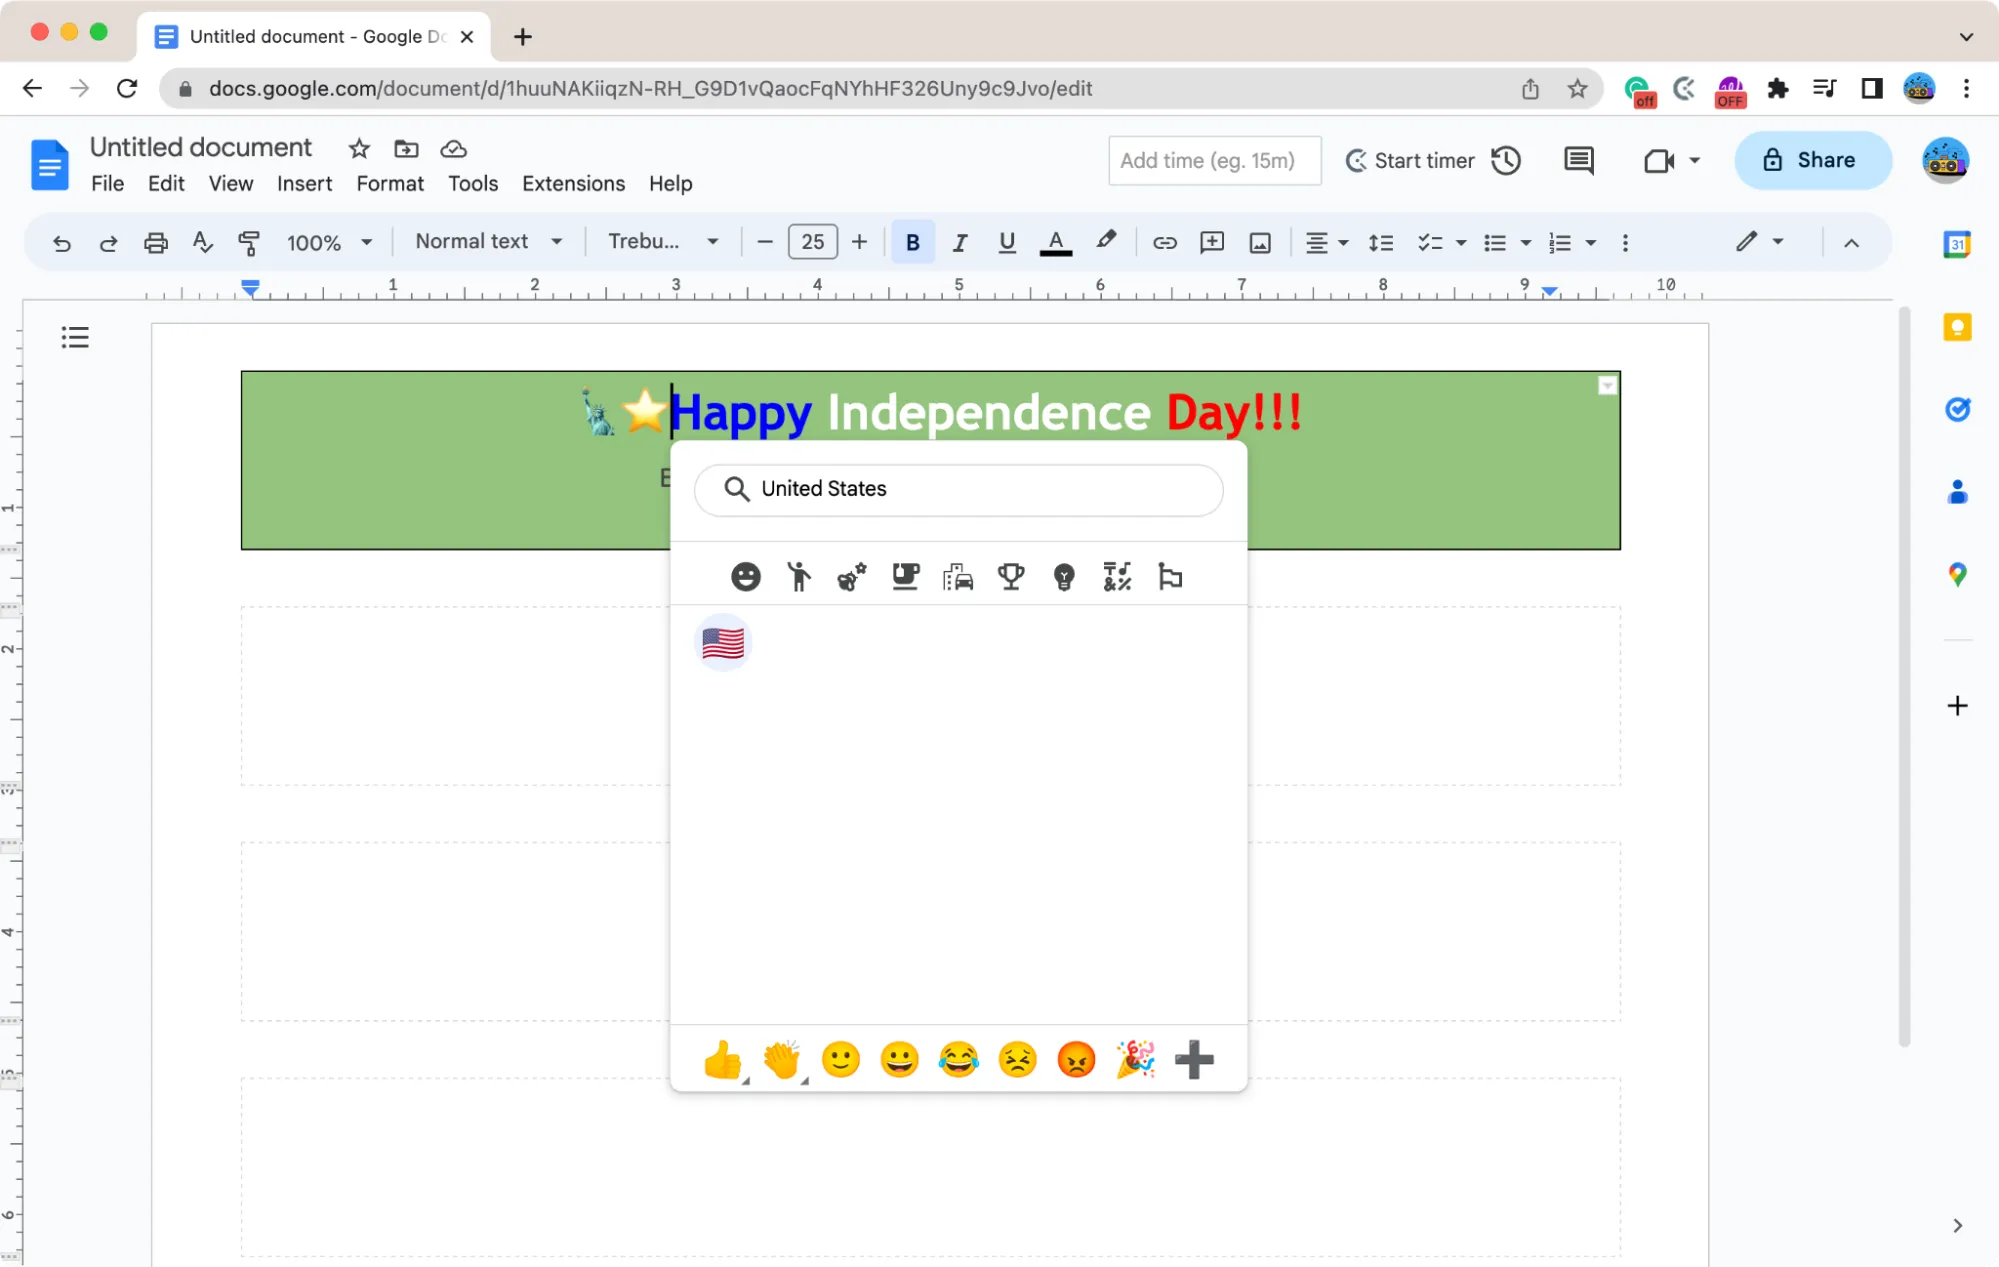
To create a balanced appearance for the labels on the bottles, we replicate the identical collection of emojis and add them to the conclusion of the sentence. Perform these steps again, positioning the cursor following the final icon. The result is as follows.

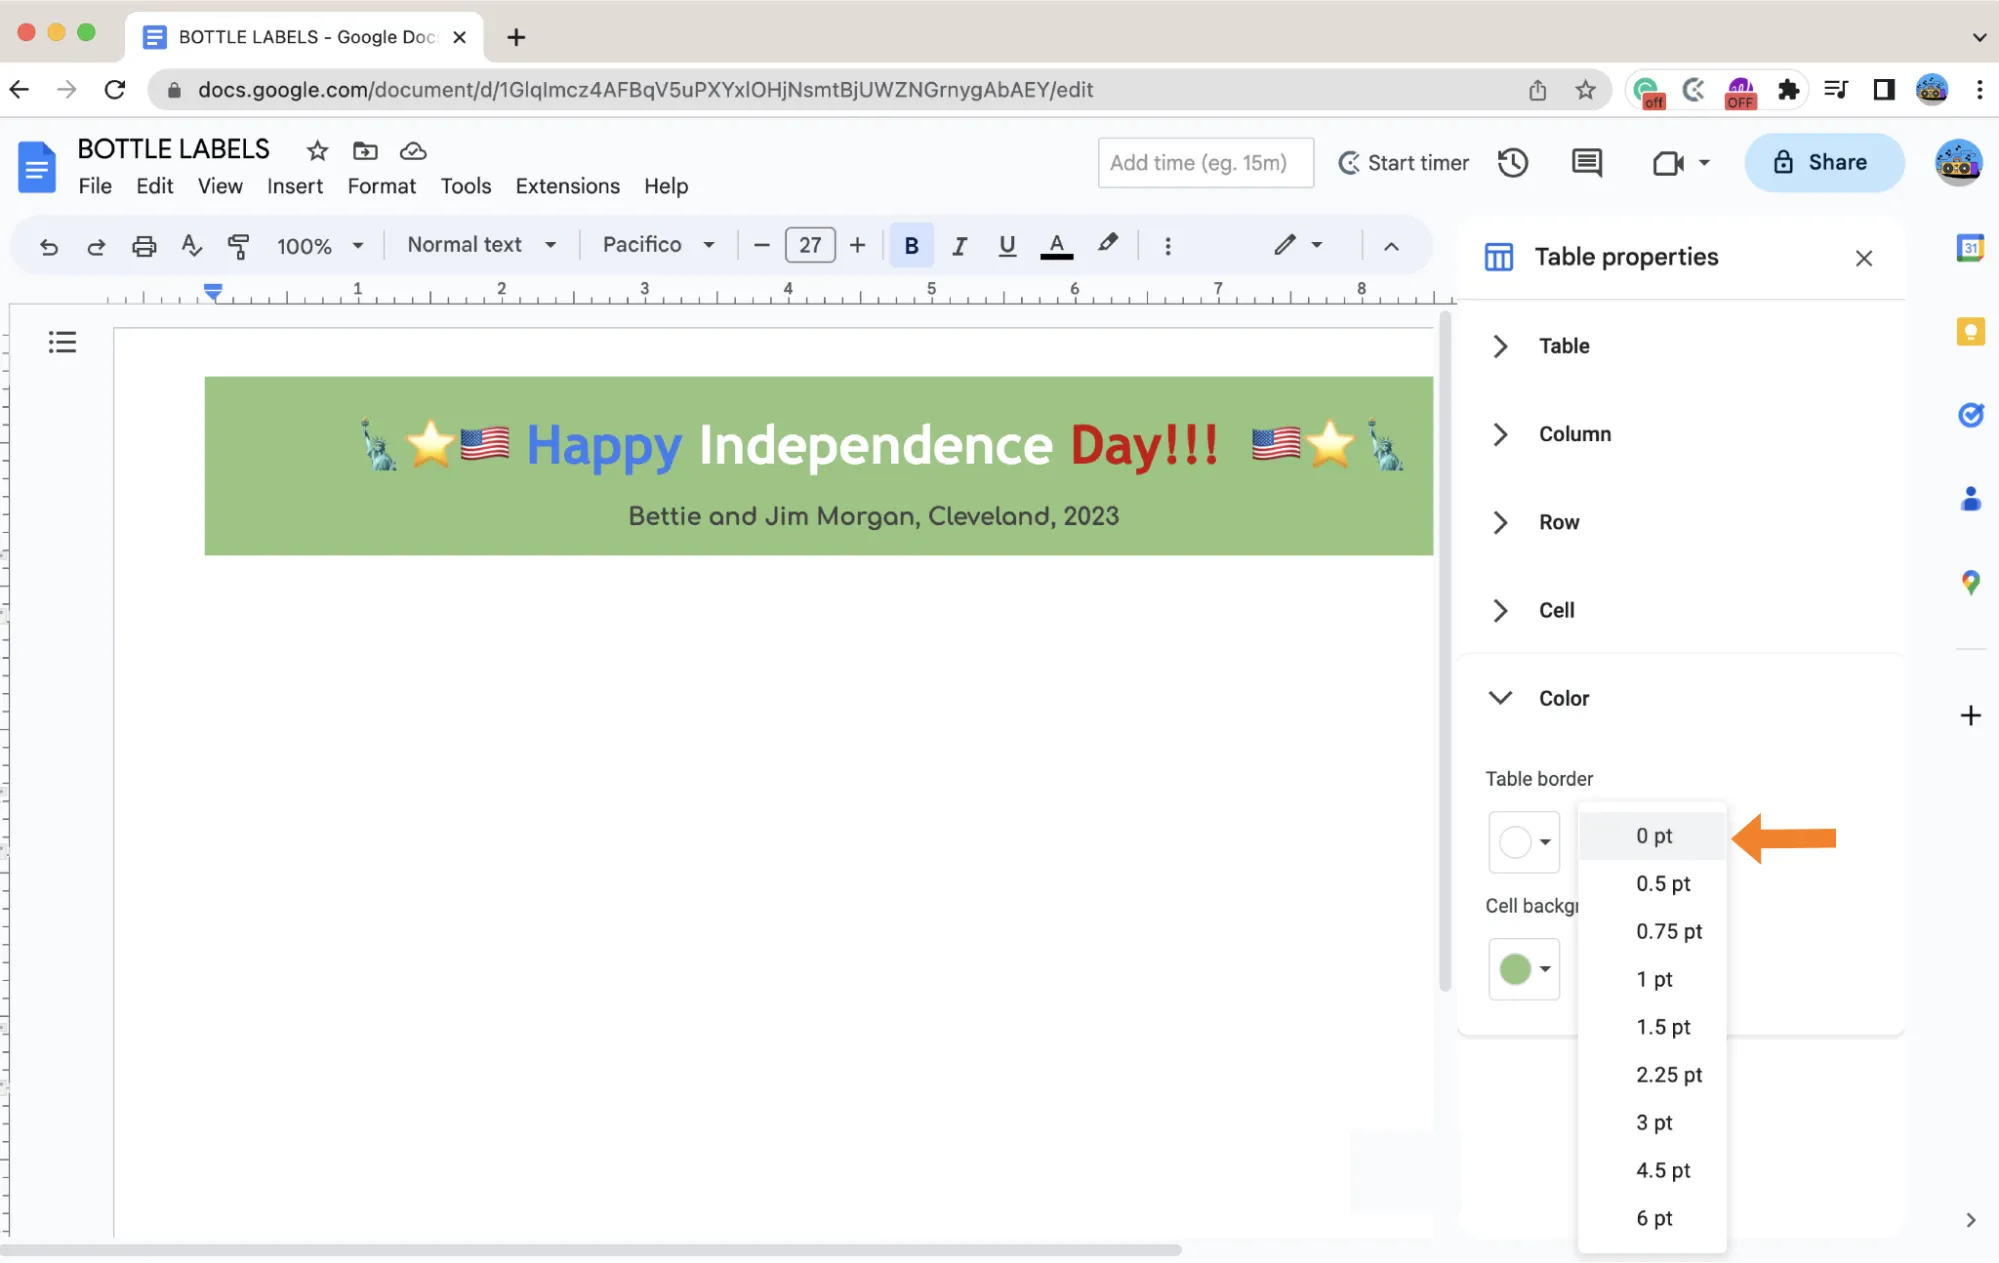
5. Remove the borders
Before printing, you need to remove the blank border wrapping up the labels right now. Otherwise, they will appear on your printed document.
To do that, right-click with your mouse inside the frame and select the menu "Table properties." In the context menu, find and click on “Color” and make “Table border” 0 pt.
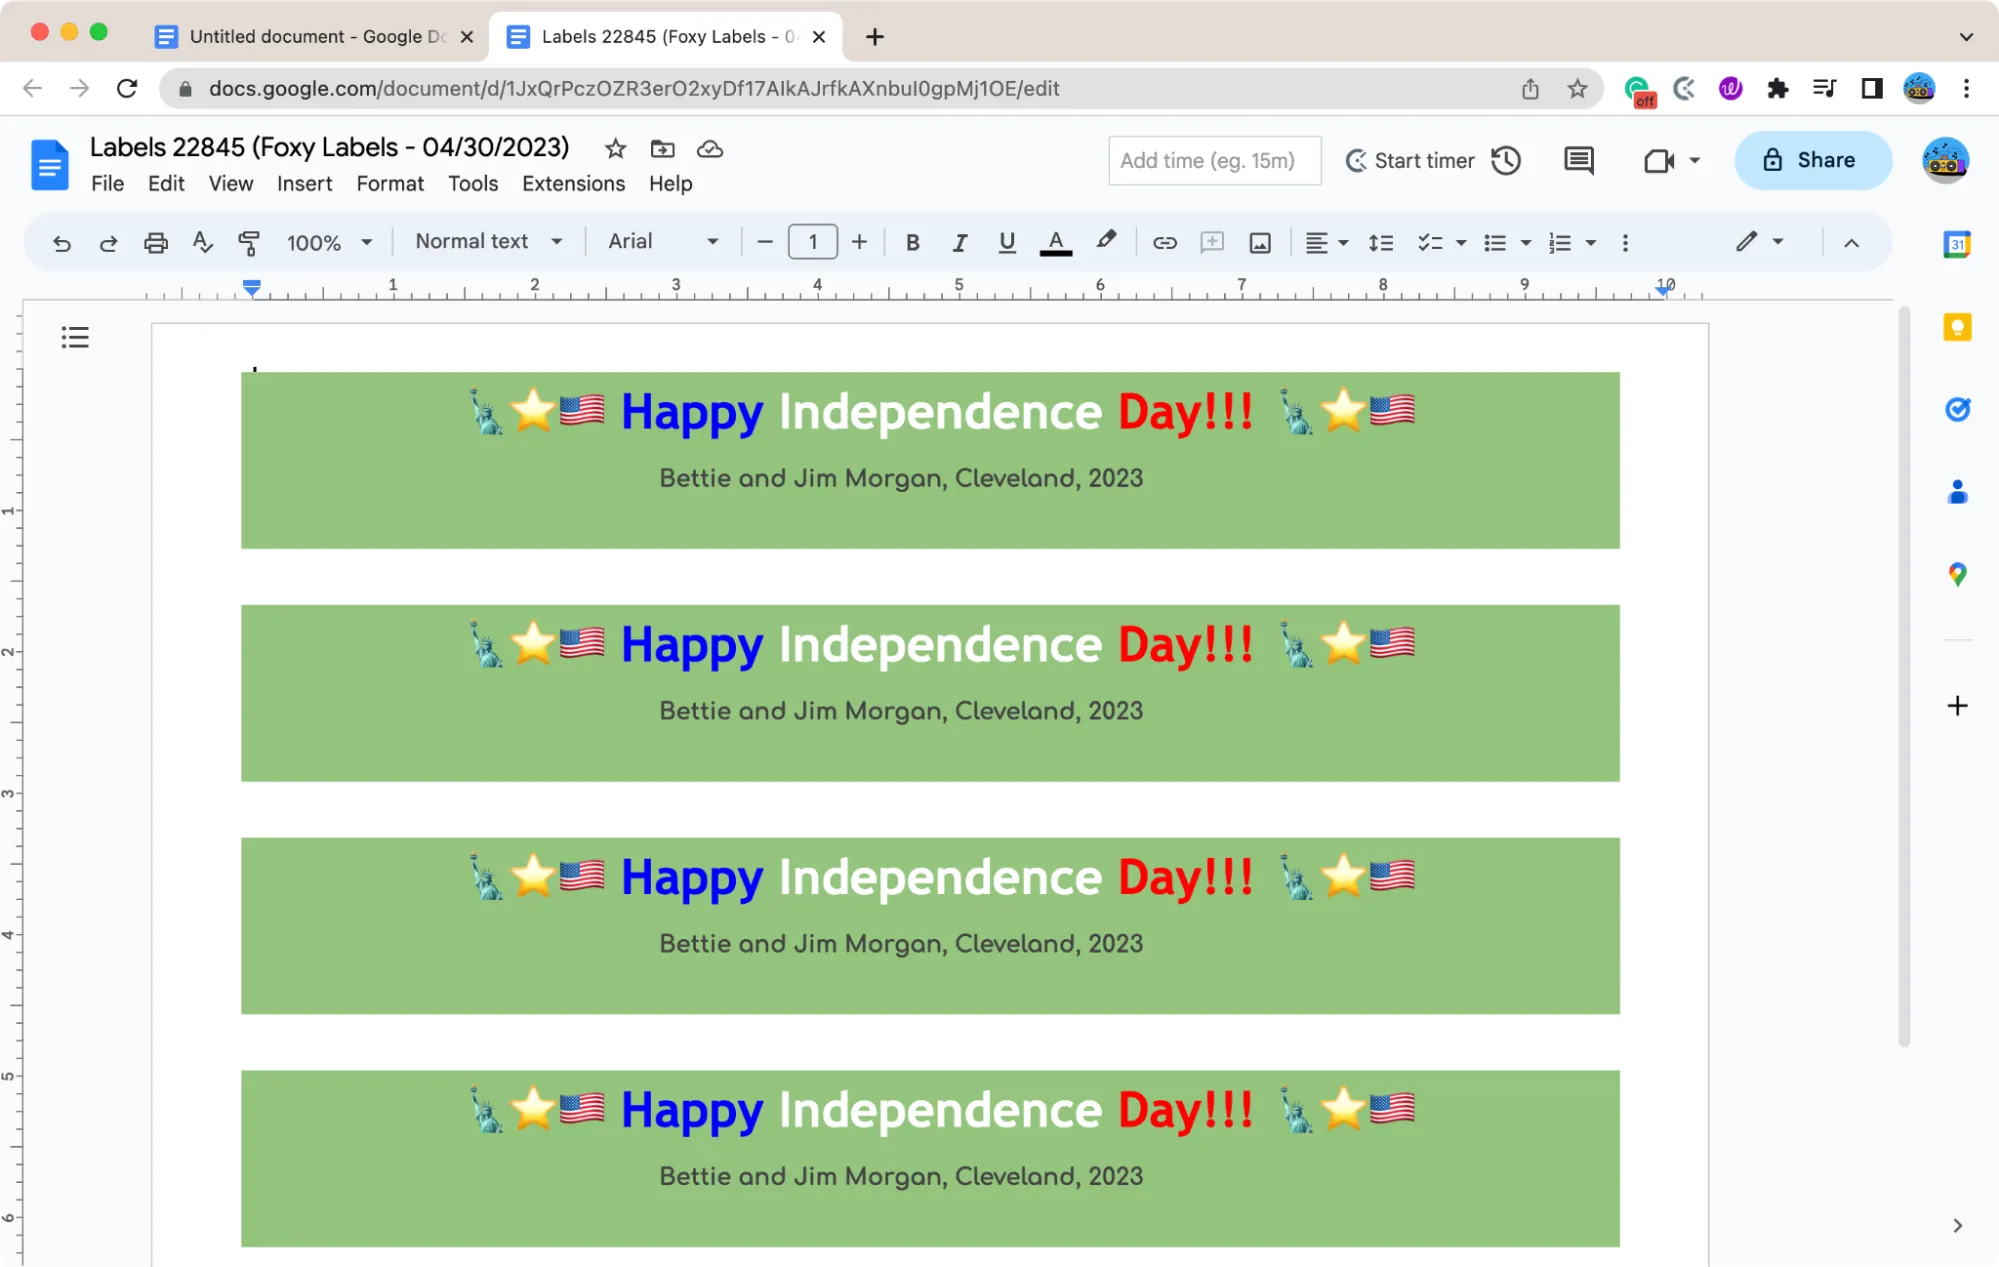
6. Create labels
Now everything looks fine, and we’re ready to create a document full of our unique customized bottle labels. Click on “Create labels” and review the project before printing.
NOTE: If the Foxy Labels sidebar disappears anytime during your work, there is no need to worry. You can request it back on the screen by repeating the actions from part 2 of this tutorial.

7. Open and review the document
Take a final look at the design, and if it looks just like you’ve imagined, click "Open" at the bottom of the "Foxy Labels" sidebar. Your generated document will be available in a second.

And there you have it! Your stunning Independence Day bottle labels are now ready to be displayed and enjoyed at your celebration. These eye-catching, personalized labels will surely be a hit with your guests, making your event even more memorable.
8. Print your bottle labels
It's time to print your personalized labels and finally put them on the bottles! Begin by ensuring your printer has sufficient ink and the appropriate label paper size.
Before printing, make sure to:
- Verify that all elements on your labels are properly aligned.
- If adjustments are needed, return to the initial document to make edits.
- Click "Create labels" once more and open the revised version.
- You might need to modify the page size depending on your label design. To print your labels, head to "File" and choose "Print." In the print dialogue, set the margin to "none" and the scale to 100%.
9. Apply the labels to the bottles
Once you have printed your customized Independence Day labels, carefully remove them from the label sheet. Make sure your bottles are clean and dry before applying the labels.
Here are some tips for applying your bottle labels:
- Align the label: Place the bottle on a flat surface and position the label on the bottle, straight and centered.
- Apply pressure: Gently press the label onto the bottle, starting from the center and working your way outward to the edges. This will help ensure a smooth and wrinkle-free application.
- Smooth out any bubbles: If you notice any air bubbles or wrinkles, gently smooth them out with your fingers or a soft cloth, being careful not to damage the label.
10. Final words
Remember, you can use Foxy Labels and this tutorial to create custom labels for any occasion. Just change the design elements, text, and colors to match the theme of your event. The possibilities are endless!
Now, sit back, relax, and enjoy your Independence Day celebration, knowing you've added a special touch that will leave a lasting impression on your loved ones. Happy crafting, and happy Independence Day!