Avery® Labels are known all over the world for their customization and ease of use. Avery® has loads of different products available on their website and on well known market places like Amazon where you can buy whichever product you desire. May it be a shipping address label sheet or business cards or whatever, there are almost all types of products you might have a need for. These can be used easily in your home printer and do not require a ton of guidance. Once you get a hang of it, you can use it to make any sort of labels required. All you need to do is learn how to set up Word for Avery® Labels.
How to Make Avery® Labels in Word
If I have bought an Avery® Product, it can be quite clearly seen that on that product’s packaging, a number for Avery Template is given. What is this number? Well, the thing is that Avery offers free templates, most of which are built right into Microsoft Word and if the template for your product is not there, you can download it for Word from Avery’s Website for free. Using these templates, one can efficiently create any form of labels, format it as we want and print them so that they can be used for the purposes intended.
How to Create Avery® Labels in Word
The benefit of using Avery® Labels products and their designated templates is that you do not have to adjust for margins or change the formatting at all. All you need to do is find the respected Avery® Template and use it to create Avery labels in word. Follow the directions given below in great detail with pictorial examples so you know how to do Avery labels in word.
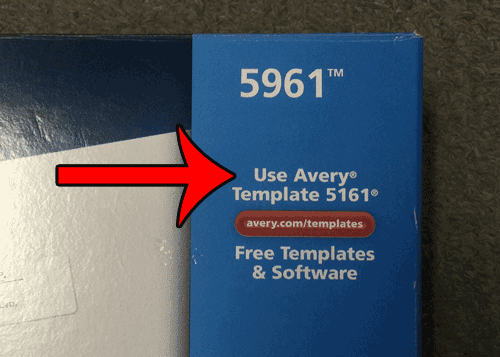
Pick up your Avery® product and look at the packaging. Most commonly, on the front side of the packaging, there will be written a direction to use a specific Avery Template alongside its code number.
Now the next step is locating the designated Avery® template in Microsoft word. If in any case you are not able to locate the respective template, then you need to download it from https://www.avery.com/templates.
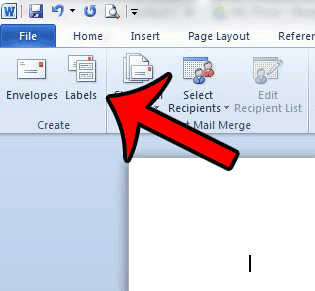
Ok so now open up your Microsoft Word. Open a blank document and in the horizontal bar menu located at the top, look for an option that says Mailings. Click on it.

Now the menu below this horizontal menu changes and you can now an option that goes by the name of Labels on the left. Click on it.
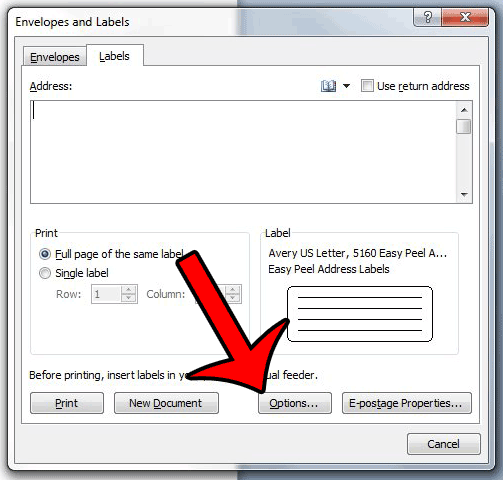
A pop up window appears before you. What you now need to do is look for the options button in this new window.
Another pop up box should appear now. Have a brief look at it and search for label information. Under that you can see Label Vendors. In that list, look for Avery US Letter.
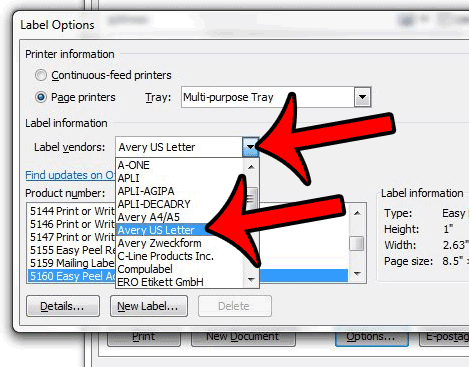
Below Label Vendors, you can see a section for product number. Under that search for your product according to its designated number. It will be easy to do so using the number.
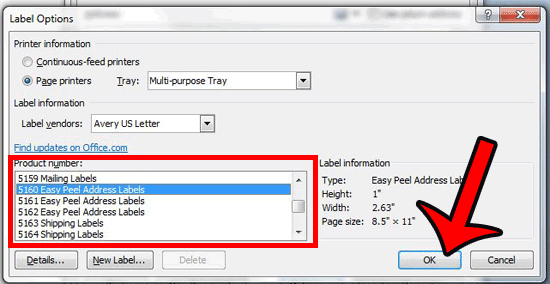
Once done click on ok.
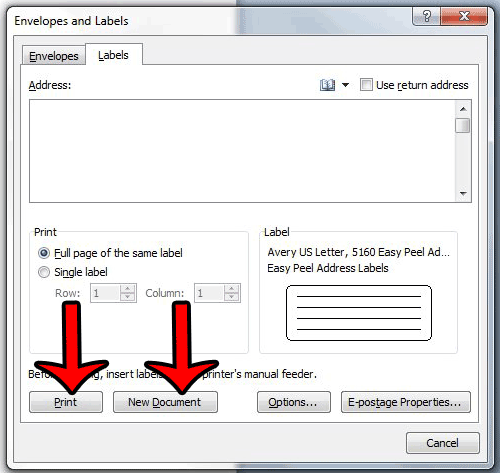
Now, if you want to create labels, all of which have the same information, as would be true if you were creating business cards or something similar, then click on the address box. Then type the information you want to appear on the labels. If you do not require any more customizations, you can just click on the print button here and be done.
How to create Avery labels in Word
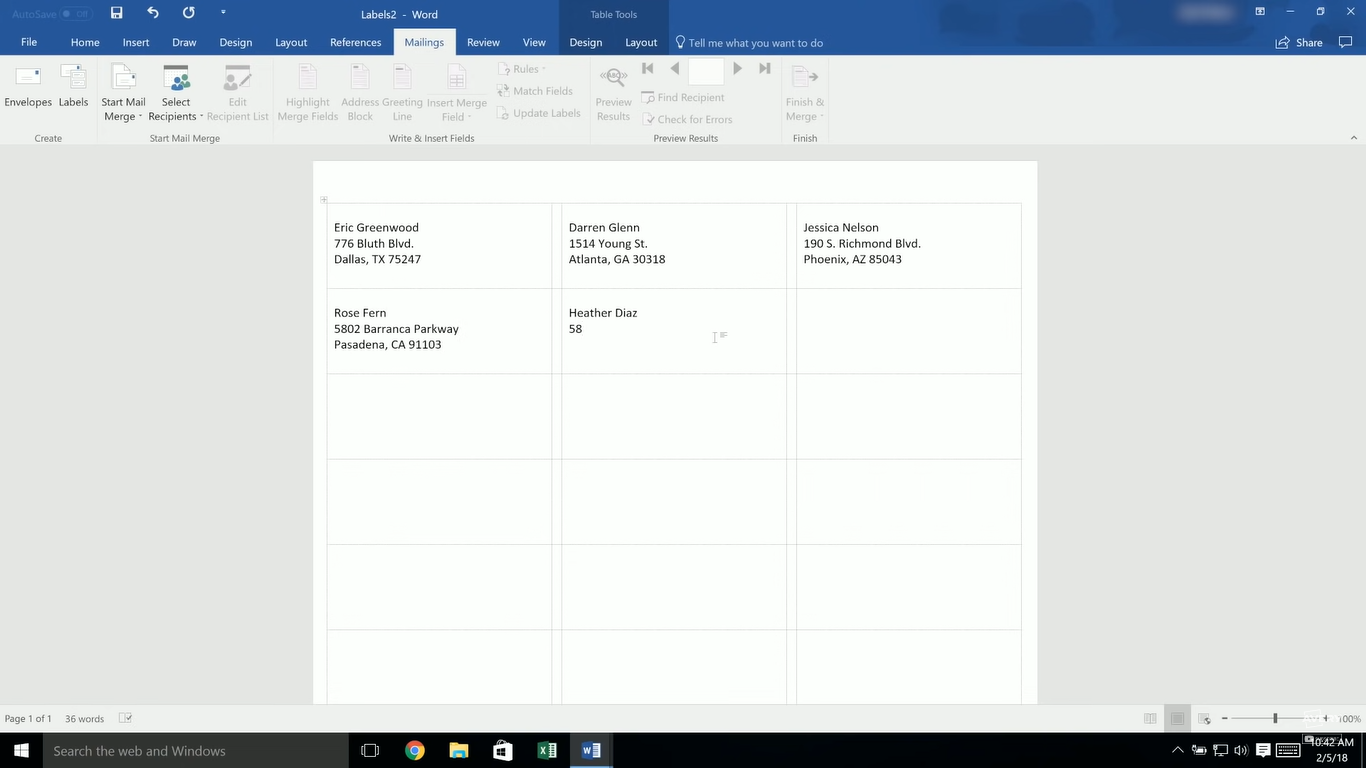
If you want to create labels which are different from each other then leave the address box empty and click on new document. This will take you to a new document whose format has been specifically created for labels. Most probably gridlines will appear showing where one label starts and ends.
Now you may customize each label the way you desire. Once you are done, just Hit the ‘Ctrl + P’ button and print your labels.
How to print Avery® labels in Word
If you are unable to find your product’s template, then as mentioned before, you have to go to Avery’s website and search for it. In order to do, enter the product number from your packaging into the search bar.
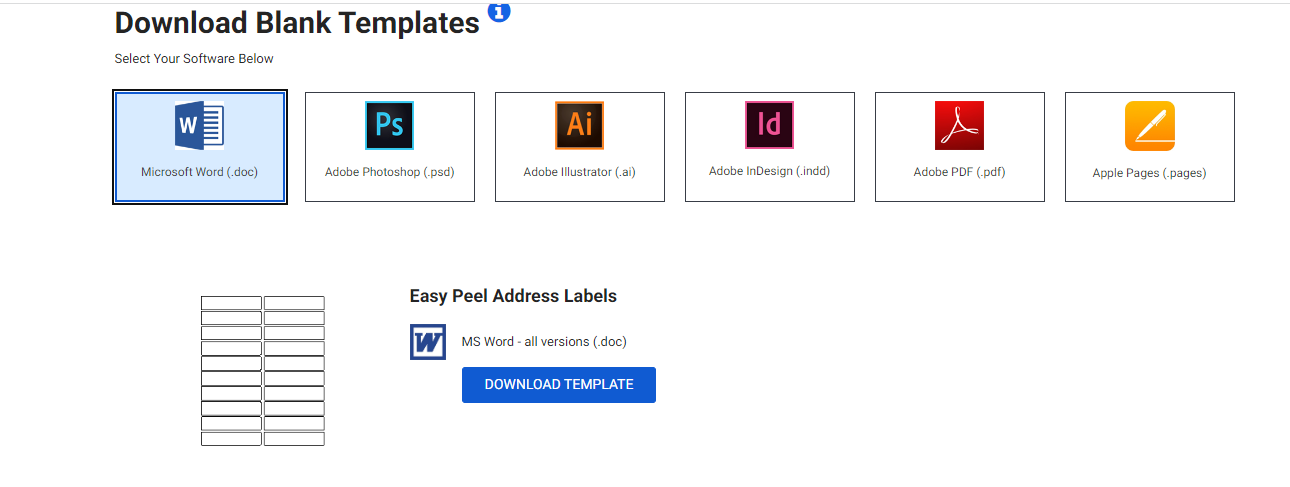
Click on the product number in the search results and it will show your product and some option too. You can decide which software you are using and choose the template for that software. In our case we are using Microsoft word, thus click on this icon.
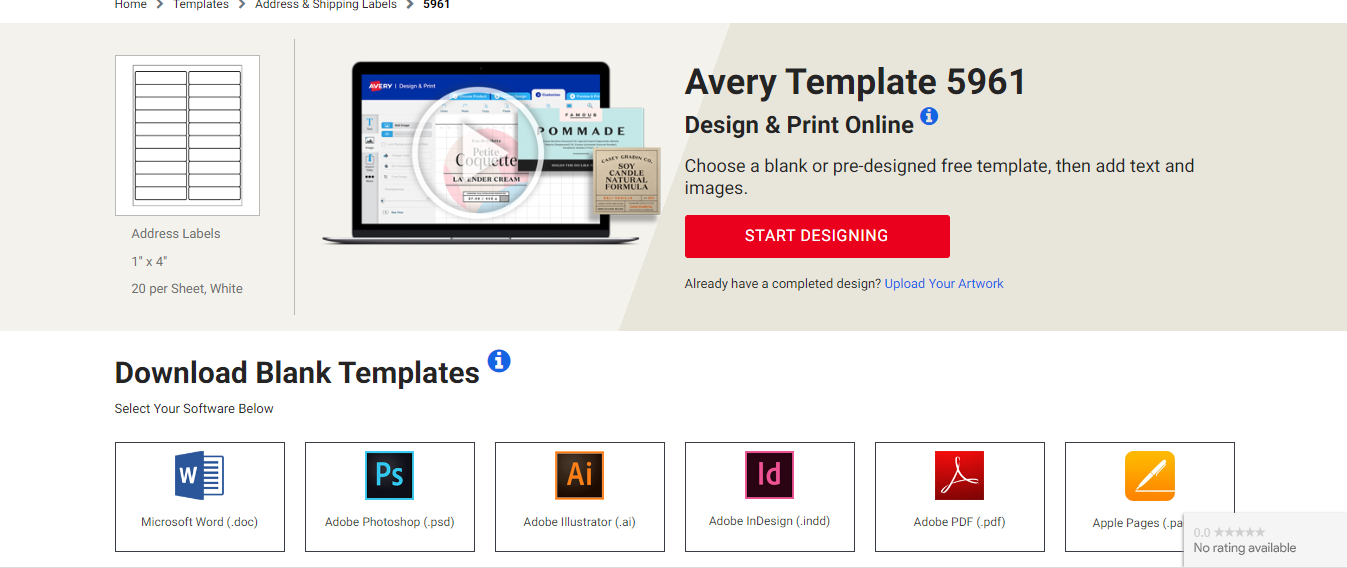
Click on download template for all versions.
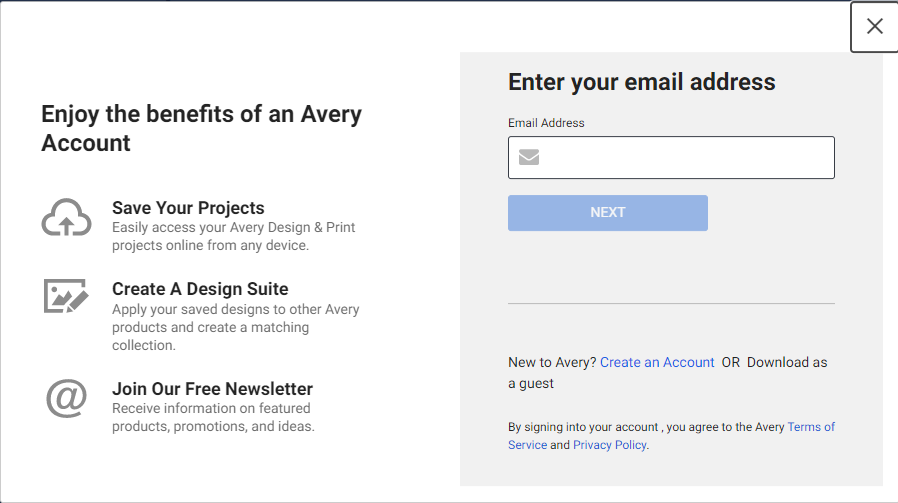
Before being able to download, Avery® will ask you for your contact information. Thus, add in your email. If you do not want promotions and news letters, make sure to untick the option in the end.
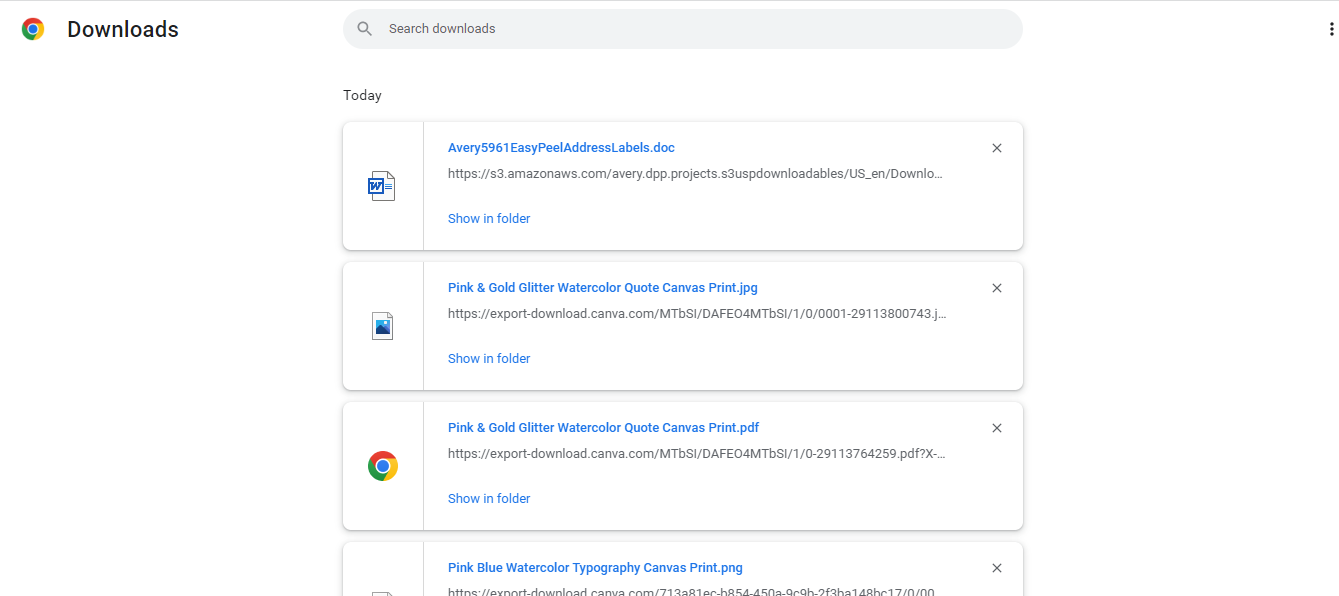
Once downloaded, open the document and it will automatically open with the designated template deployed. All you have to do now is add in the information and print your labels.
How to create Avery® labels in Word
You can also add images or customize the labels any way you want. Keep messing around with the tools and create magic. Thus, you have successfully setup Avery® labels in your MS word. This is how to print Avery® Labels in word.
Before printing, make sure that you select the correct printer with your Avery® product perfectly set in for printing, otherwise you are going to encounter errors.
How to do Avery® labels in Word: Final thoughts
Avery® products are of really good quality and the price they come with is almost justified. Free templates for specific products help in creating accurate labels the way one wants it. How to make Avery® labels in word has been greatly simplified because of these templates. Deploy the template, select each label and edit it the way you want and print it with the help of the detailed guide given above. There might be some cheaper products available on the market which can use similar templates, thus be sure to give them a look too.